
In this blog, I am going to show you how to build a nice and simple UI with data coming from invoking REST APIs. All without code, but in just a few clicks.
I consider myself a good backend developer, good at making things functional, but I really struggle every time I need to produce nice UIs. However, using Oracle Visual Builder, I feel like I don’t have to be a UI developer or designer, I can very easily produce nice and friendly mobile UIs that consume my backend REST APIs. If you are like me, a backend programmer who loves API-first design approach, I’m sure that you will find this blog not only informative, but also refreshing.
This is a quick view of what we are going to achieve in this article:

- First, we are going to auto-create Service controls in Oracle Visual Builder by pointing to existing REST APIs.
- Then, we are going to use the out-of-the box widgets and components to build a simple, yet powerful UI that consumes such APIs.
- Finally, we are going to publish the UI and test it across different media, e.g. Web on a laptop, mobile, tablets, etc.
Ok, let’s get started.
Before we start
In this blog I assume the following:
- You have an Oracle Cloud account, if not request a free trial. Here: https://cloud.oracle.com/tryit
- I also assume that you have an Oracle Visual Builder environment ready to use – If not, talk to your sysops admin, you might have to to provision one, it takes just a few minutes: See here for more information.
-
Also, I assume that you have some REST APIs that you want to call. For the purpose of this blog, I am going to consume APIs that I produced earlier in a previous blog. It is a containerised NodeJS application called apis4harness that allows to interact with OCI API resources. In particular, it allows to: list, start and stop Oracle Autonomous Data Warehouse (ADW) instances.
The API endpoints look like this:
-
Get all existing ADW instances:
- GET: /services/adw
- GET: /services/adw
-
Get an existing ADW instance by ID:
- GET: /services/adw/{ocid}
- GET: /services/adw/{ocid}
-
Start an ADW instance by ID:
- POST: /services/adw/{ocid}?action=start
- POST: /services/adw/{ocid}?action=start
-
Stop and ADW instance by ID:
- POST: /services/adw/{ocid}?action=stop
- POST: /services/adw/{ocid}?action=stop
-
Ok then, let’s have fun!
Creating a Visual Builder Application and REST Service Endpoints
The first step is to create a new Application in Oracle Visual Builder, then we are going to point to our Swagger definition and let Oracle Visual Builder auto-create Service Control APIs for us.
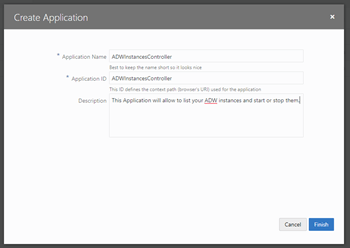
- At the root level of Visual Builder, click on the top right button to create a new Application.

- Give it a good name and description. In this case, I am going to call some APIs I produced to list and start/stop Oracle Autonomous DB (ADW) instances. When done, click Finish.
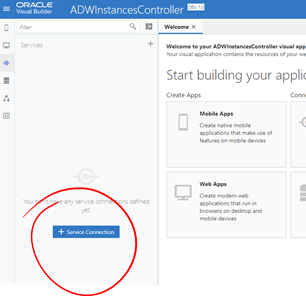
- Your New Application will open.
- On the left menu, locate the “Service Connection” icon and click on it.

- Click on “+ Service Connection” button to create a new one.
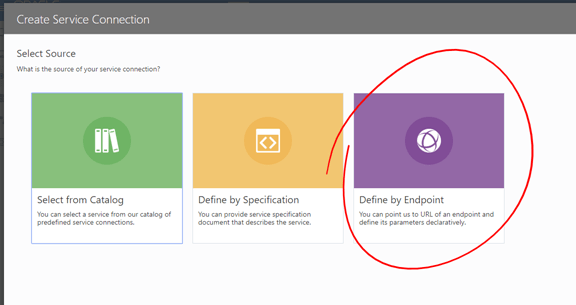
- We can create new Service Connections, based on existing ones, based on a Swagger definition or manually based on an API endpoint.
- For the purpose of this demonstration, I am going to show you how to build service endpoints manually by pointing to existing REST APIs.
- Select “Define by Endpoint”.
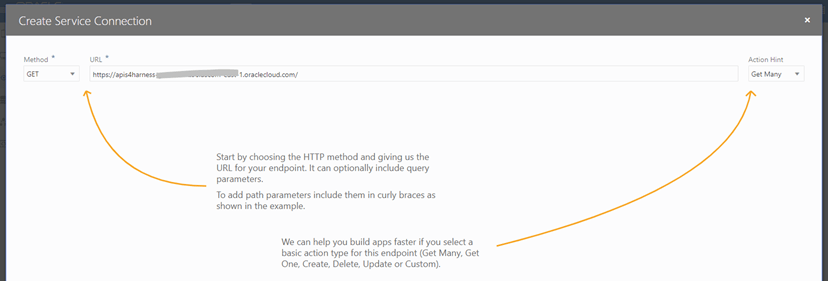
- Paste into URL, the base URL from where you are running your APIs. Click Next, when done.
-
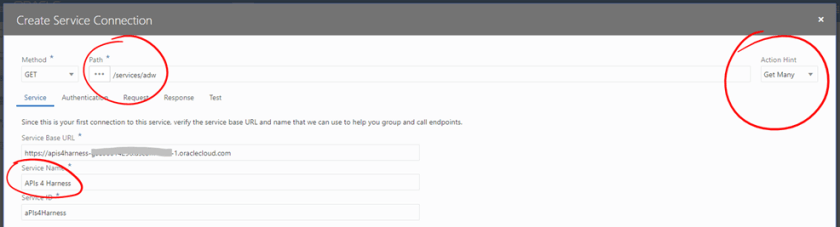
Set the first endpoint:
- Path: /services/adw
- Service Name: Enter a sensible name. For example: APIs 4 Harness
- Action Hint: Get Many
- Click on Test tab. Then click on Send.

- Make sure you get a correct response back. Then, click “Copy to Response Body”.
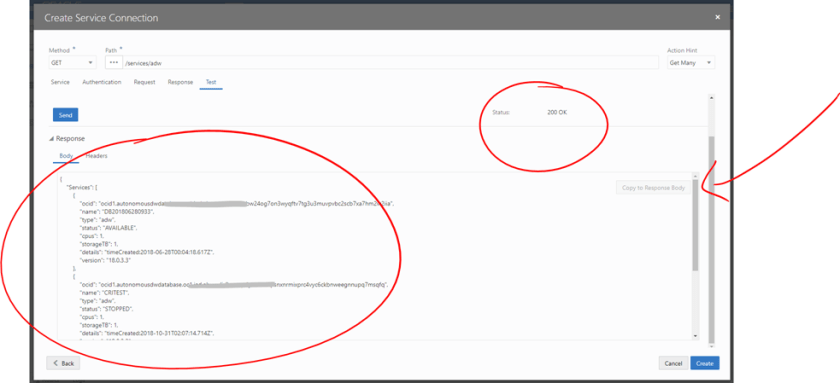
Note: Your response might vary depending on the ADW instances that you have running in your target environment.
- Click on Create.
- Now, let’s add other 2 endpoints that are required to build our UI. Click on your new Service Connection (e.g. APIs 4 Harness) and then on the Endpoints tab
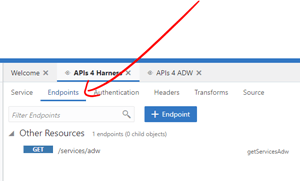
- Click on the + Endpoint button to add a new endpoint.
-
Let’s enter the following configuration:
- Path: /services/adw/{ocid}
- Action Hint: Get One
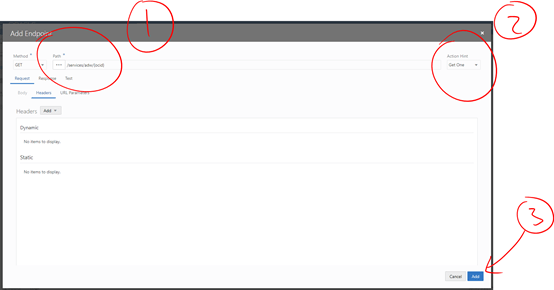
- Click on Test sub tab.
- Enter a valid ADW OCID as the value of the parameter. Then, click Send.
- Make sure you get a successful response. Then, click on “Copy to Response Body” button.
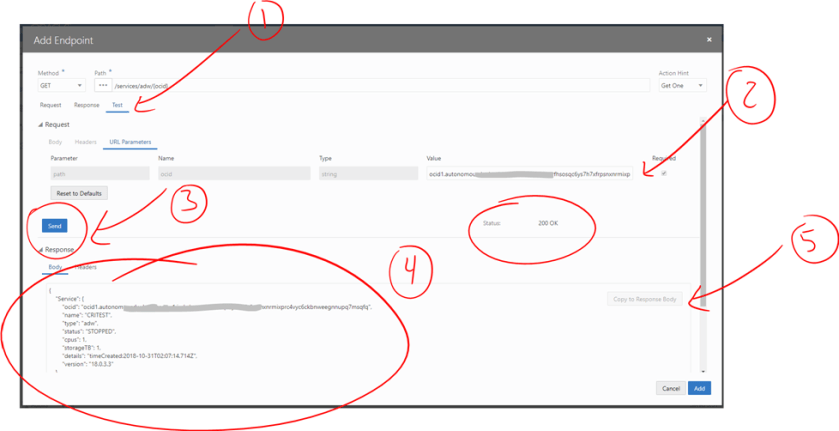
- When done, click on Add.
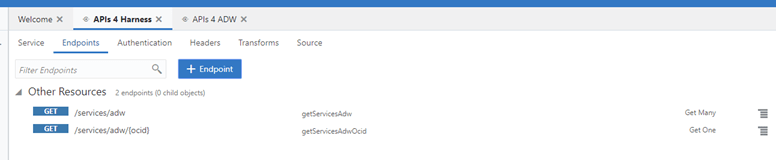
- You should have 2 endpoints at this point.
- Let’s add another endpoint. This time, in order to start and stop our ADW instances. Click on + Endpoint button.
-
Set this configuration:
- Method: POST
- Path: /services/adw/{ocid}
- Action Hint: Get One
- Add a Static Headers: Content-type : application/json
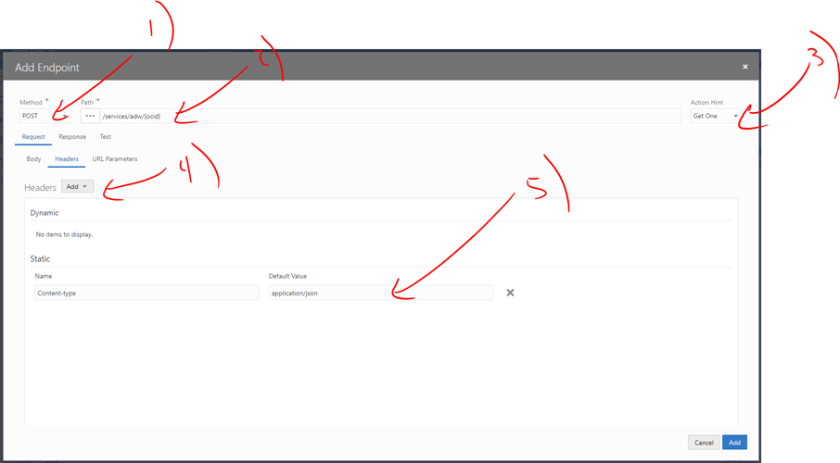
- Click on Request > URL Parameters sub-tab.
- Add a Dynamic Parameter. Call it action and set it to Required.

- Click on Request > Body sub tab.
- I am not expecting any body to start/stop ADW instances, so simply set an empty JSON payload, i.e. {}

- Click on Test and then URL Parameters sub-tab.
- Enter a valid ADW instance OCID and set stop as your action parameter value.

- You will response like this one:
{
“id”: “202”,
“status”: “accepted”,
“message”: “Request accepted… Work in progress.”
}
- Click Copy to Response Body. Finally, click on Add.
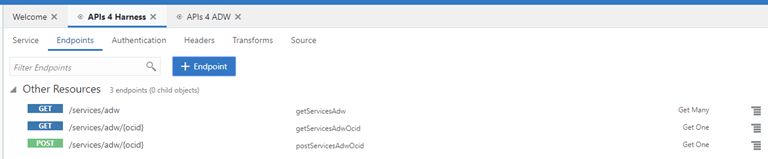
- You should have 3 REST API endpoints.
- Congratulations. You Service Connection and Endpoints are ready. Move to the next section to build a very simple UI that consumes these REST API endpoints.
Creating a Web UI that consumes your REST API Endpoints
Now that we have created the Service Connections and endpoints, crafting a web UI that consumes such endpoints is easy.
- Locate the Web Applications icon on the left menu and create a new Web Application.
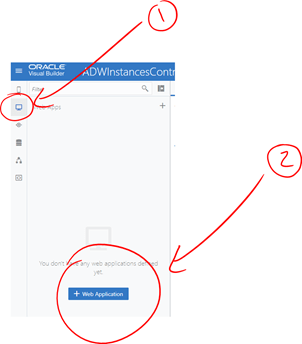
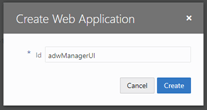
- Give it a good Identifier name. Then, click Create.
- The new Web App main page will open.

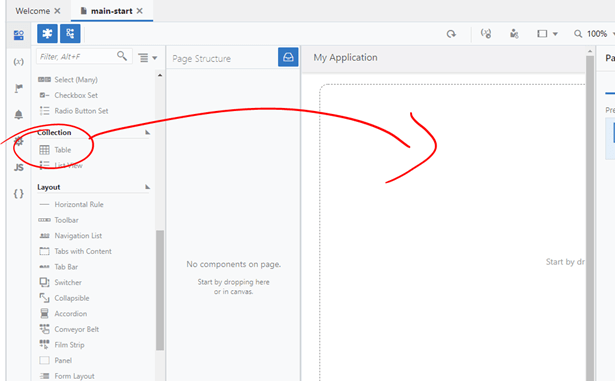
- Let’s build a simple UI. Drag and drop a table into the main canvas
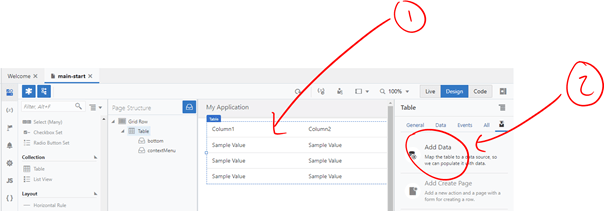
- While still having the table selected, click Add Data on the right menu.
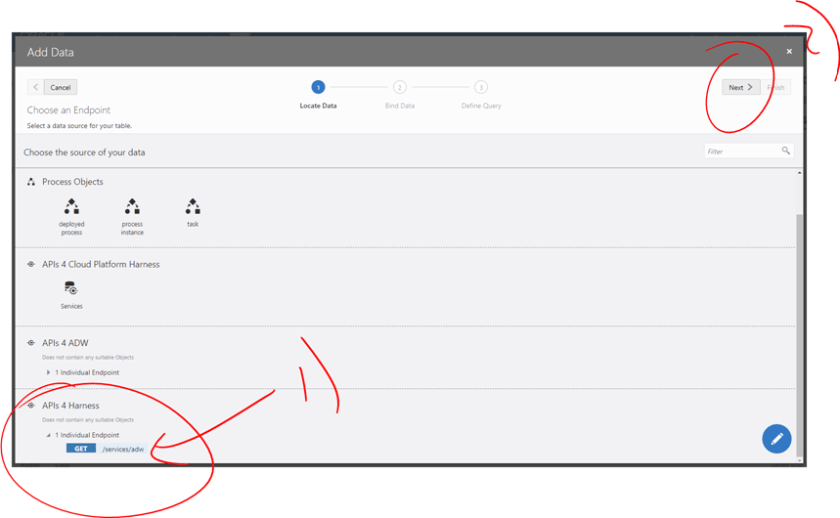
- Locate your previously created Service Connection. In my case, it is called “APIs 4 Harness”.
- Notice that there is 1 endpoint that return multiple records (i.e. /services/adw), select it and then click Next.
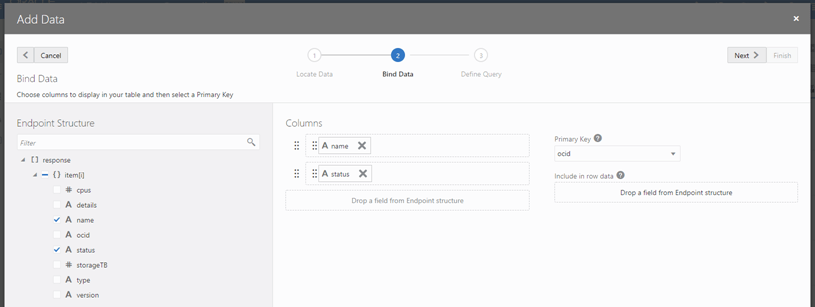
- In step 2 (Bind Data), select the fields that you want to present in the table. Let’s keep it simple and only select: Name and Status.
- Also make sure to select as Primary Key the field that would represent the unique identifier of your item. In my case it is the OCID of the ADW instance. (note: It doesn’t have to be shown in the table if you don’t want to).
- When done, click Next.
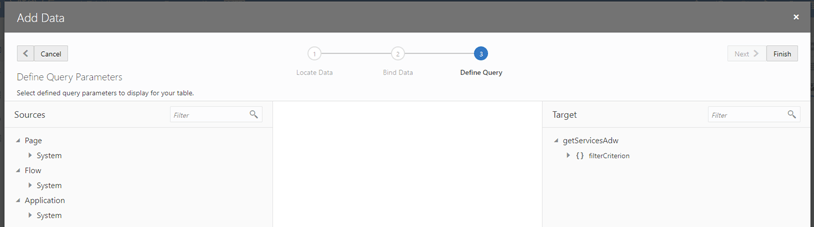
- In Step 3, simply click Finish.
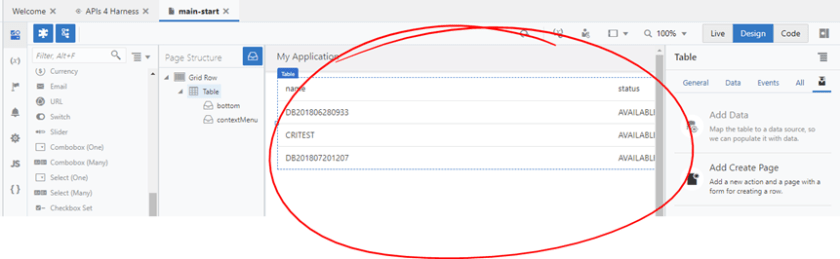
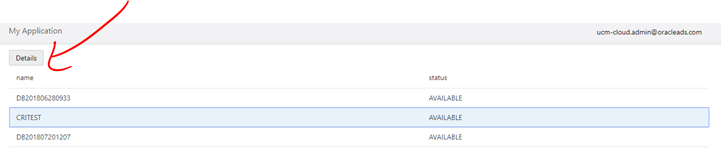
- Notice that your ADW instances should appear already in the table. Nice huh?
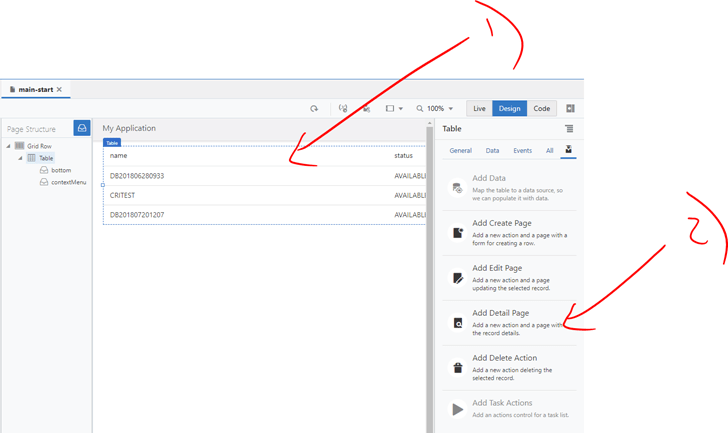
- Now, let’s add an event on the table, so that one selecting a particular row, we can ask for more details.
- While still having the table selected, click on the right menu “Add Detail Page” .
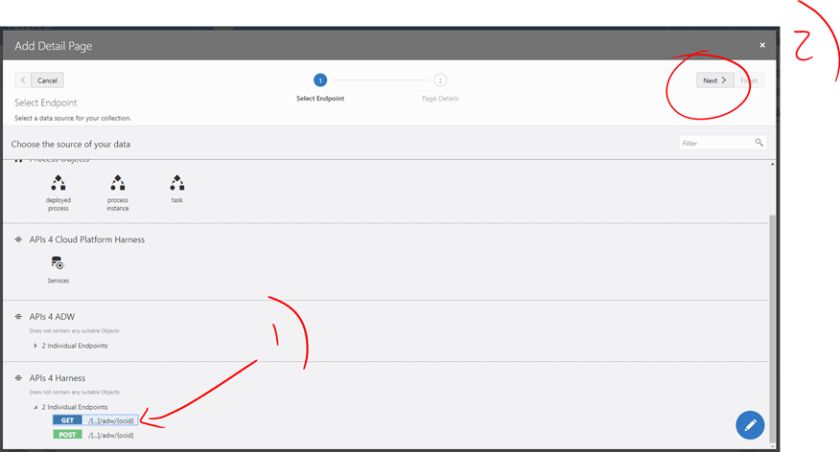
- Expand your “APIs 4 Harness” Connection and select the GET: /services/adw/{ocid} endpoint. Click Next when done.
- Select as many fields as you want from the left structure. Then enter a good name for the Button label and Page Title, for example: Details
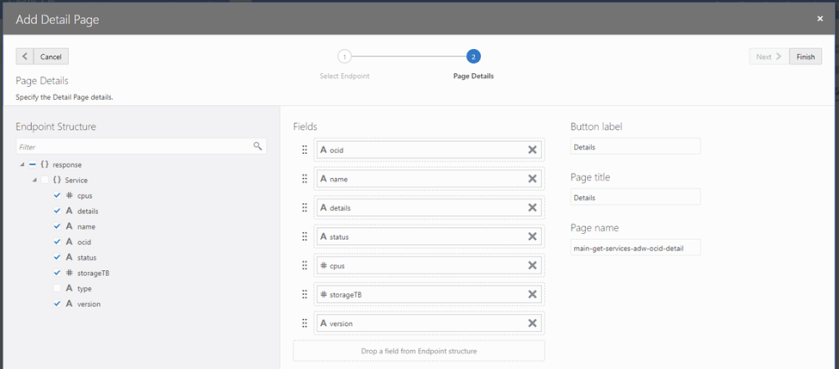
- Also, feel free to re-order your field as you prefer them to appear on the page. When done, click Finish.
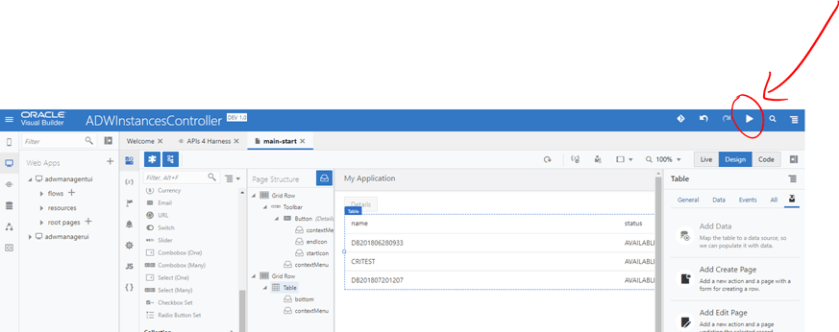
- We are ready to test our Web UI. Click on the top right Play icon.
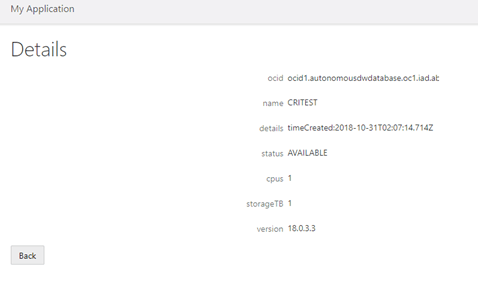
- A new browser page will open. Notice that as you select a row, the “Details” button becomes active.
- Then, click on it and noticed how the rest of the details on that particular ADW instance come in a second page.
- Nice huh? Let’s finish by adding 2 new buttons on top to Stop or Start instances.
- Close the test page and go back to VBCS designer.
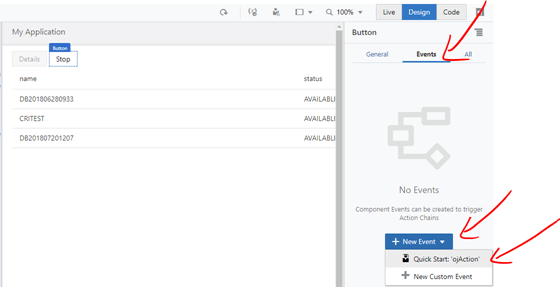
- Drag and drop a button next to the Details button.
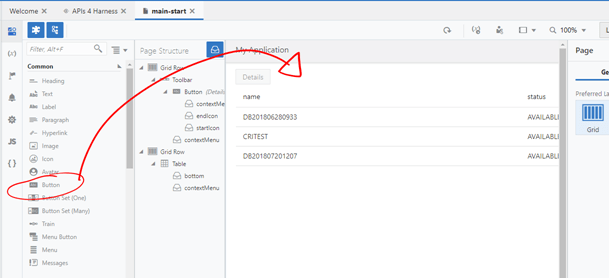
- Set its text label to Stop.
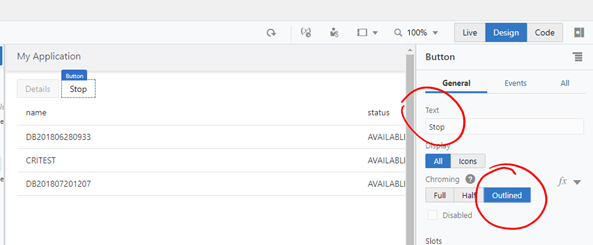
- Click on Events and then + New Event > Quick Start: ojAction
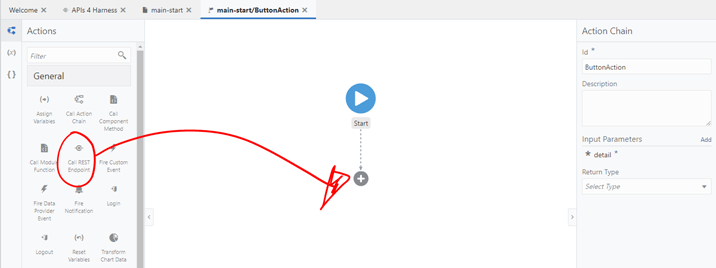
- From the left menu, drag and drop “Call REST endpoint” to under the Start icon on the main flow.
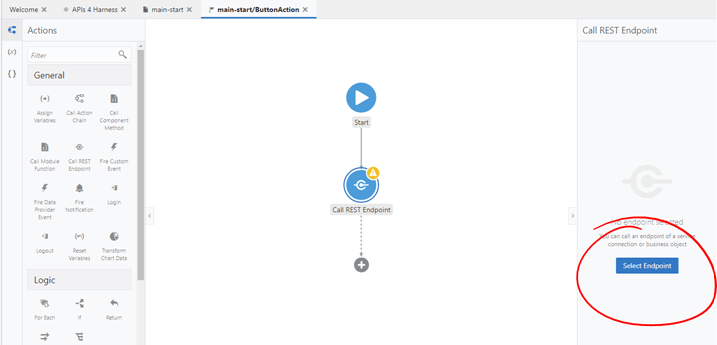
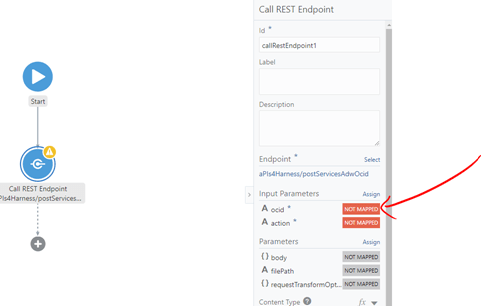
- Click on Select Endpoint.
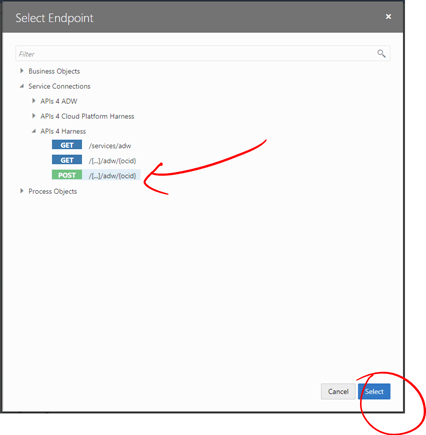
- Expand Service Connections > APIs 4 Harness > POST: /services/adw/{ocid} – Then, click Select.
- On the right menu, click on ocid
NOT MAPPED to map it first.
- Let’s piggyback from the first Event that we auto-generated with Details, which already copied the value of the OCID of the ADW instance currently being selected into variable: “oj_table_32xxxxx_SelectedId”.
- Simply connect this variable from the left into ocid on the right.
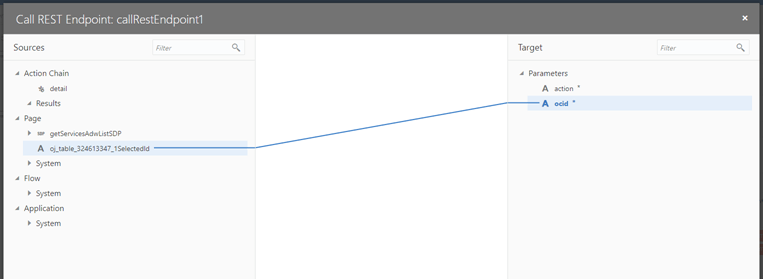
- Now, select action and simply enter stop at the bottom text area. When done, click Save.

- Go back to the main-start page and add another button next to Stop. Repeat the same steps we did for the previous button, but this time, simply modify the button text and action text to: start
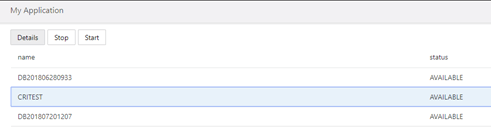
- Your main page, should look like this at the end:

- Once again, test it and make sure that you can now stop and start your instances by clicking on the top buttons.
Congratulations, the UI is fully functional. Hopefully with this quick article you learnt how to build simple UIs in VBCS that call REST APIs.
A couple of suggested enhancements to consider in the current UI:
- Try to add a bit of smartness on the Stop/Start buttons to only get active when a row is being selected and the current status of the ADW instance applies. That is, if the selected ADW instance is already running, don’t allow to call Start and vie-versa.
- Try to return a quick acknowledgement that the start/stop REST endpoint was called successfully.
- Finally, try to provide a way to auto-refresh the page to see the change of status on the ADW instances.
I will keep publishing more advanced topics as I keep playing with consuming REST APIs from within Oracle Visual Builder. So, you better stay tuned!
I hope you found this blog useful. If you have any question or comment, feel free to contact me directly at https://www.linkedin.com/in/citurria/
Thanks for your time.
