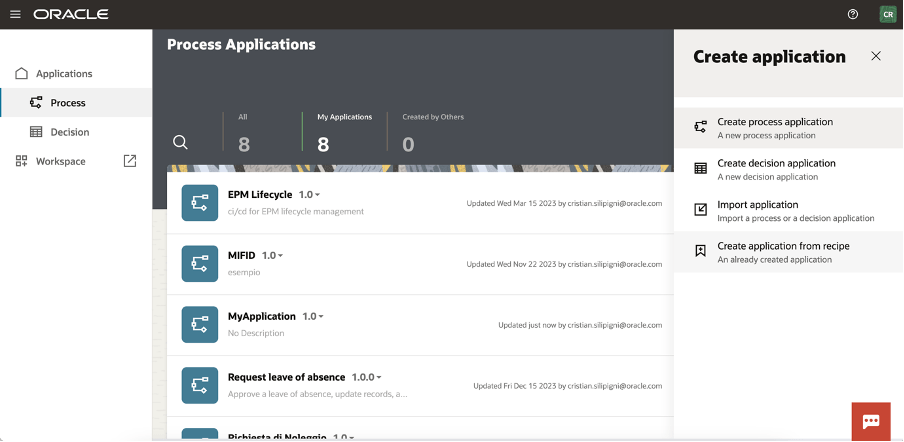
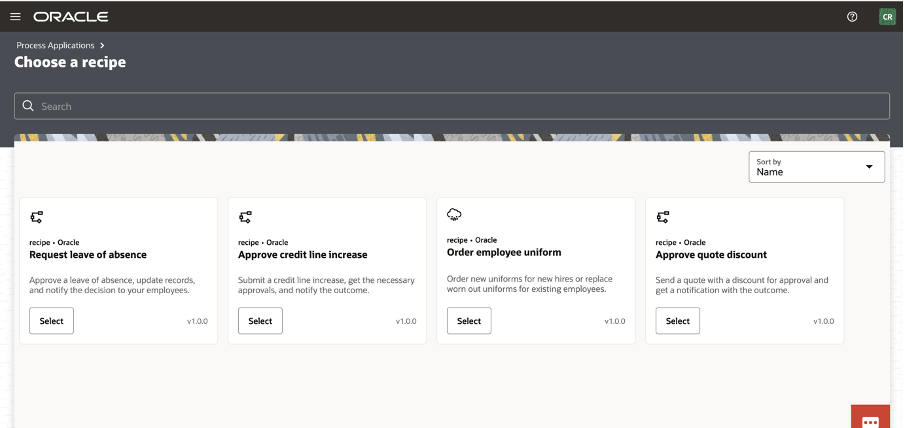
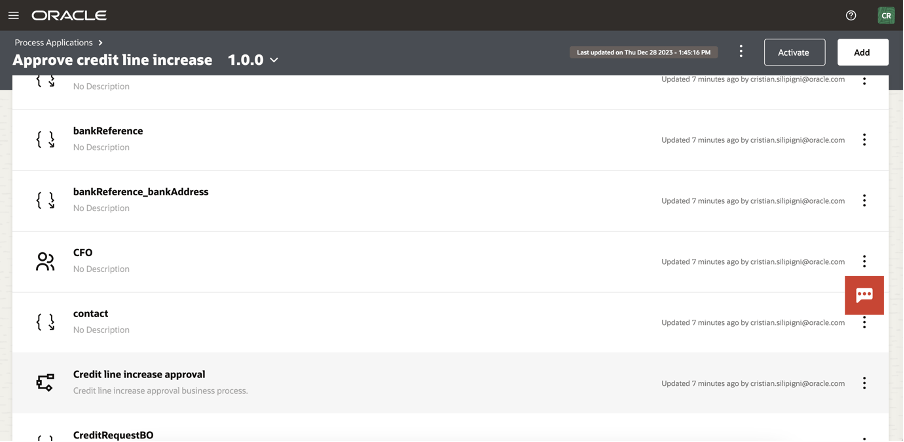
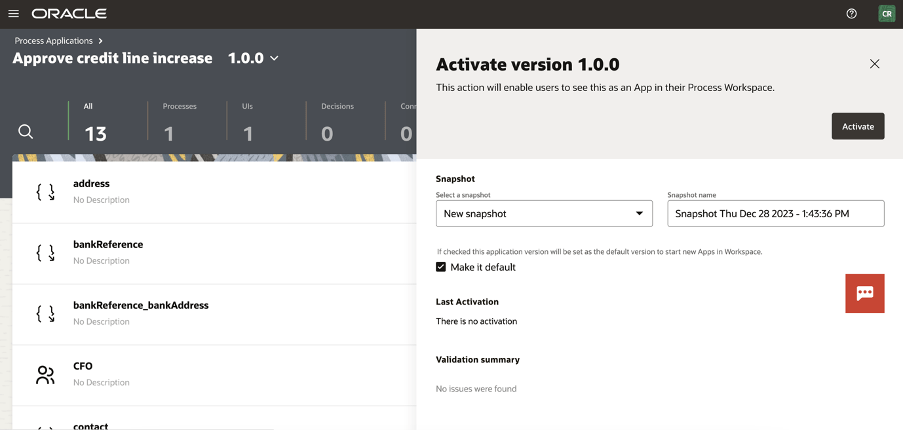
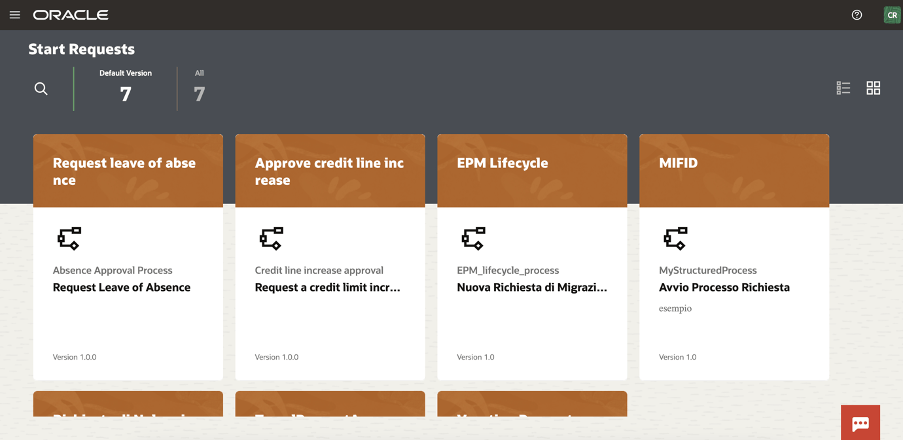
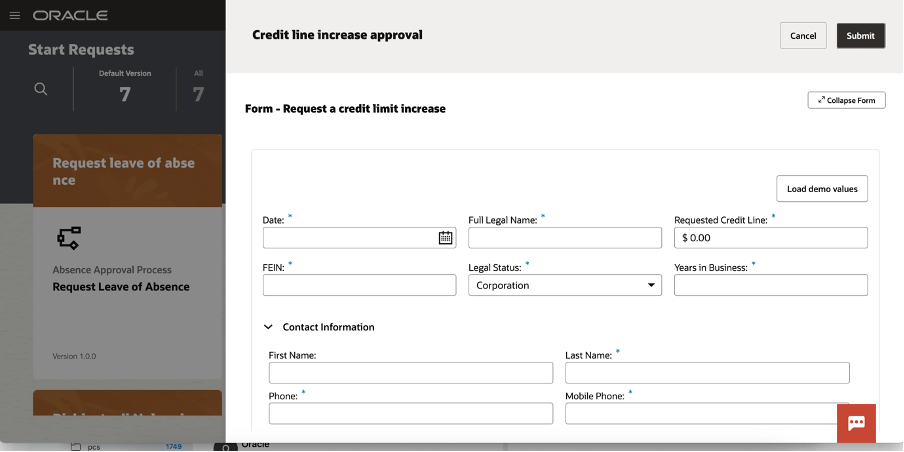
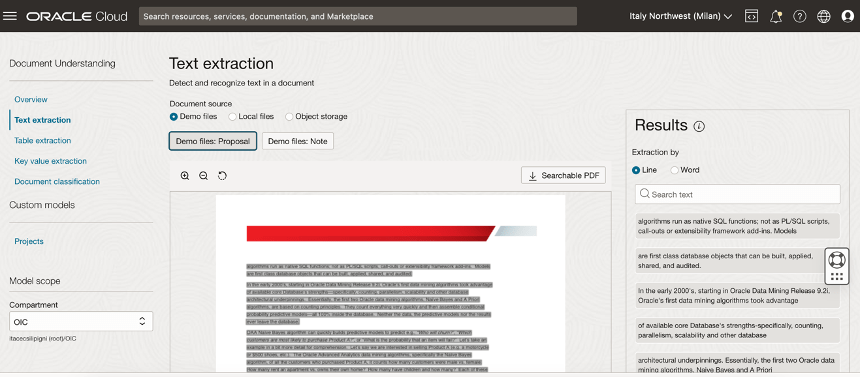
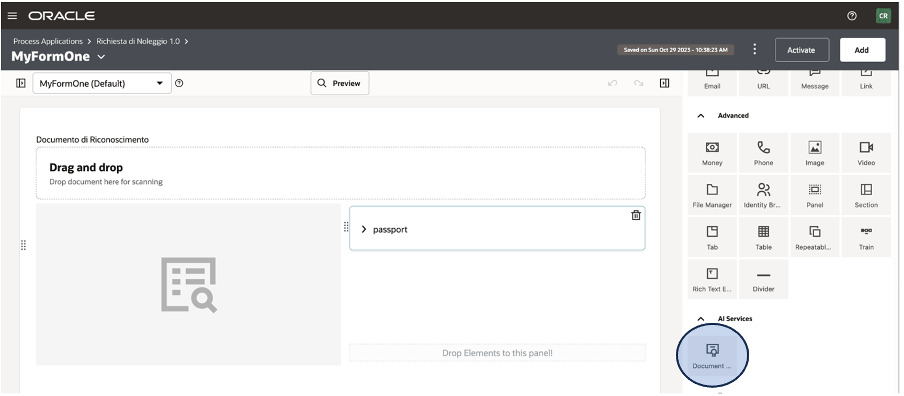
Process Automation helps you to rapidly design, automate, and manage business processes in the Cloud

Step-by-step guide discovering how to provision and build a business process with OCI Process Automation

OCI Process Automation (shortly OPA) is an OCI PaaS Oracle Managed cloud service which helps customers to build their business processes based on Structured or Unstructured models. This is the best solution to easily manage business processes granting to business users to build their own implementations without coding but just using a web browser and drag&drop capabilities… what we usually call a “no code” environment

The article has the goal to explain how, step by step, we can quickly test the features included in OPA… starting from my experience with the tool.

Just to simplify the explanation, I will describe a “happy path” process … in my example building one business process which usually is quite loved by everyone…. mainly when talking about the Vacation Request Approvals 🙂

Continue reading “Process Automation helps you to rapidly design, automate, and manage business processes in the Cloud”
Advertisement

Oracle Integration, OCI API Gateway and OCI Logging & Analytics

Integration, Control, Security and Monitoring

A real implementation often has different aspects which need to be addressed. Some of them are:

  • A tool to be used for building the integration among applications and technologies, possibly leveraging a low code environment
  • A tool to expose the APIs enabling the integration with third party applications applying in addition security policies, caching capabilities, routing, etc
  • A tool to monitor from IT Operation perspective the entire solution as just one application skipping the need to manage several silos or frameworks

Oracle Cloud can provide the right answer to your developer needs using the best Cloud native services and here identified by OCI API Gateway (API GTW), Oracle Integration (OIC) and OCI Logging and Analytics (LA)

If you are already using Oracle Integration for your development purposes probably you have already noticed the chance you have to configure the API Management solution that you prefer, exposing what you have already built.

From OIC console, you can access the “Setting” section and configure properly what you need

Clicking on the “API Management” link you can configure the connection to your OCI API Gateway instance

How and where can you find the required information?

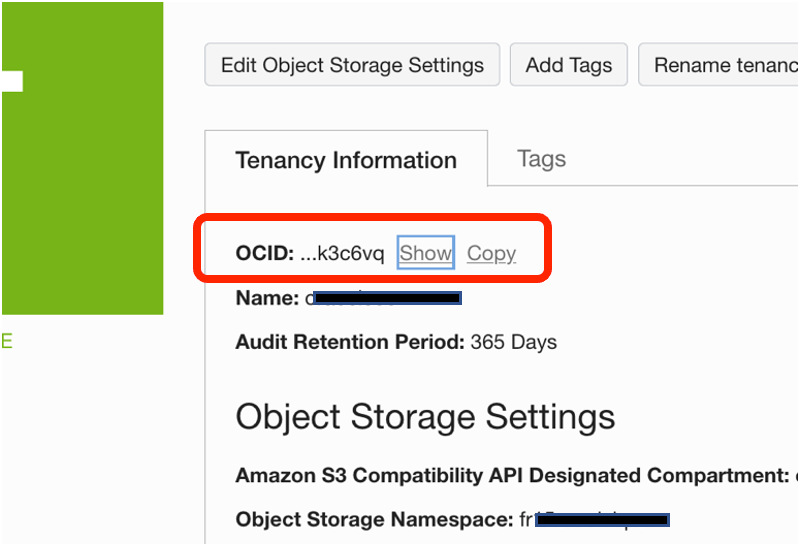
Tenancy OCID can be found navigating the OCI Console and clicking on “Tenancy” details

Copy and paste this value on the previous screen into the Oracle Integration console

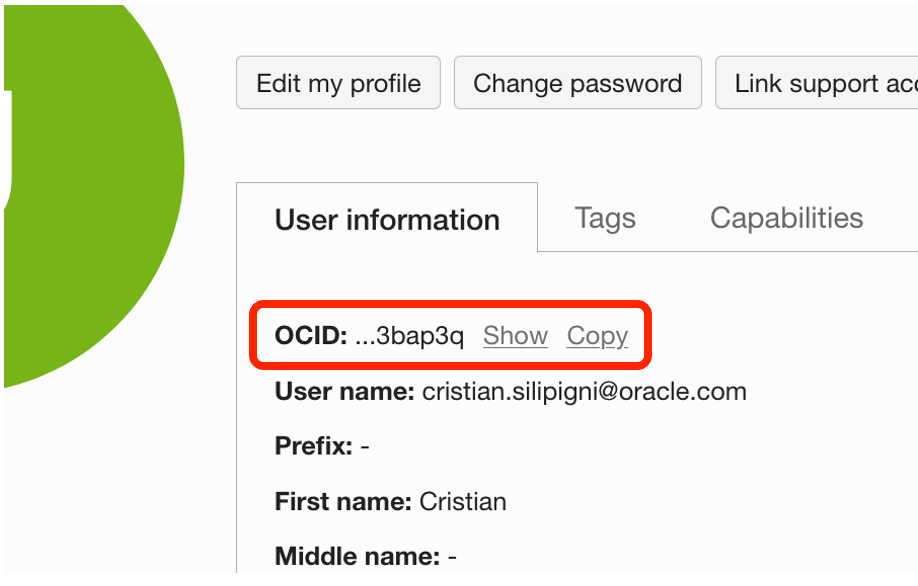
User OCID can be found from OCI Console under the link “My Profile”.

Also in this case, copy and paste the “OCID Id” into the Oracle Integration console

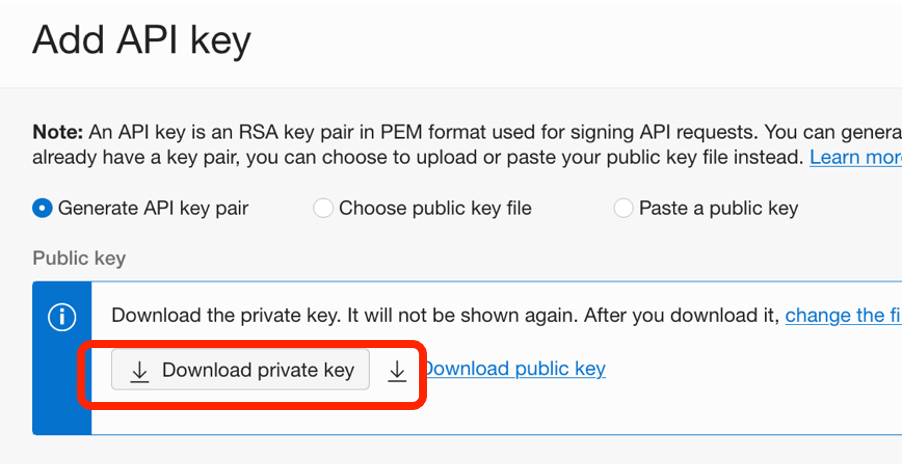
Finger Print: from OCI Console, after having selected “User Profile”, click on “API Keys” and from here you can add a new API Key

Download the “private key” than click “add”

A new key will appear among those eventually already generated previously

Private Key: this one, in pem format, comes from the activities previously done during the API Key creation. Before uploading the key in the API Management setting, you need to convert this one. The key that you have downloaded is in PKCS8 format and this one must be converted to RSA (PKCS1) before using it for the API Management connection, using the following command from your shell

openssl rsa -in private_key_in_pkcs8_format.pem -out new_converted_file.pem

Once converted the file, you can upload your new key to complete the configuration with your API Management connection.

Click “Save” and that’s all

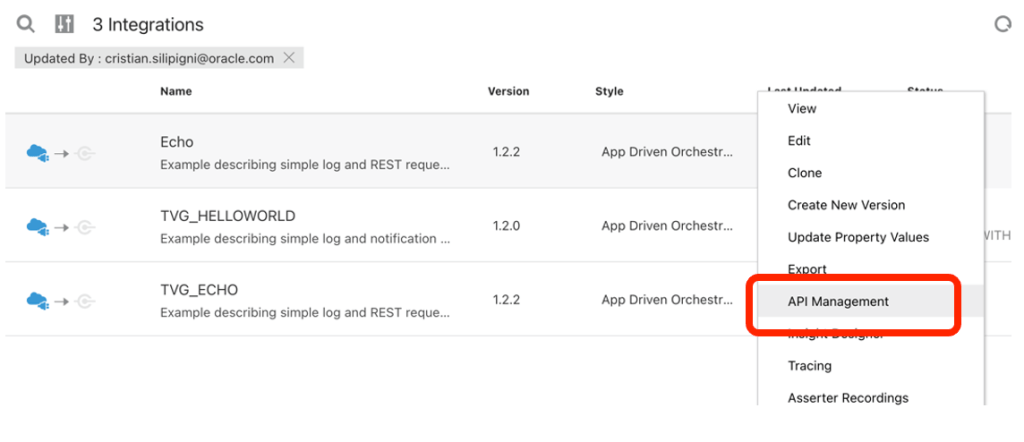
Now from your Oracle Integration console, you can work with your integration flows and after having completed your implementation you are now ready to publish your asset to you OCI API Gateway instance. I’m using the “ECHO” integration flow as an example

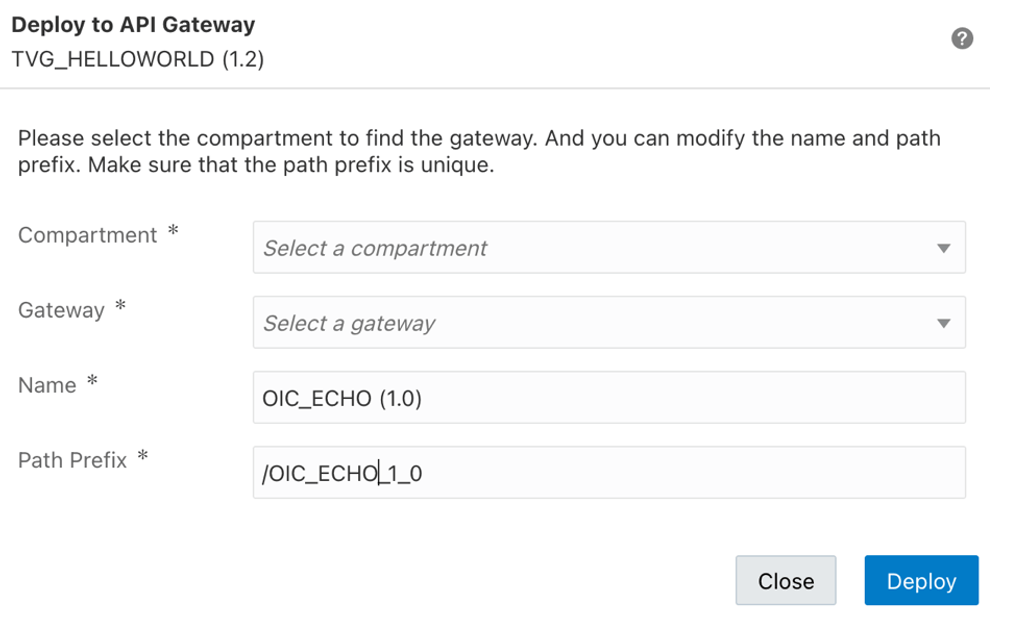
Clicking on API Management you can publish the integration flow providing all the required information and details as below presented

selecting the Compartment where your OCI API Gateway is running and the right API GTW instance (for example that one for the TEST environment)

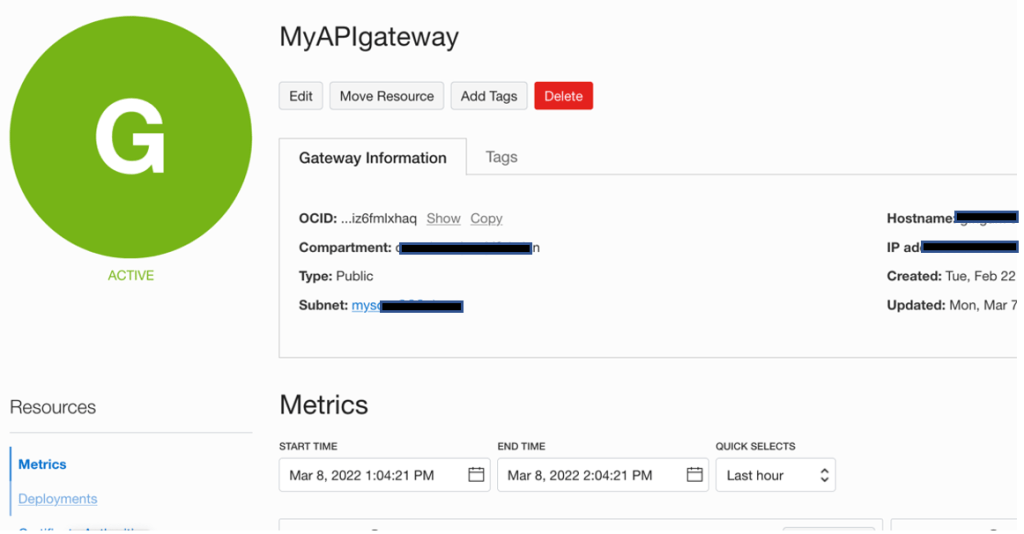
Clicking on the “Deploy” button and wait for few seconds before seeing your service exposed into you OCI API Gateway instance (in my case “MyAPIGateway”)

Clicking on the active gateway instance, you can access to the deployed APIs

as below shown

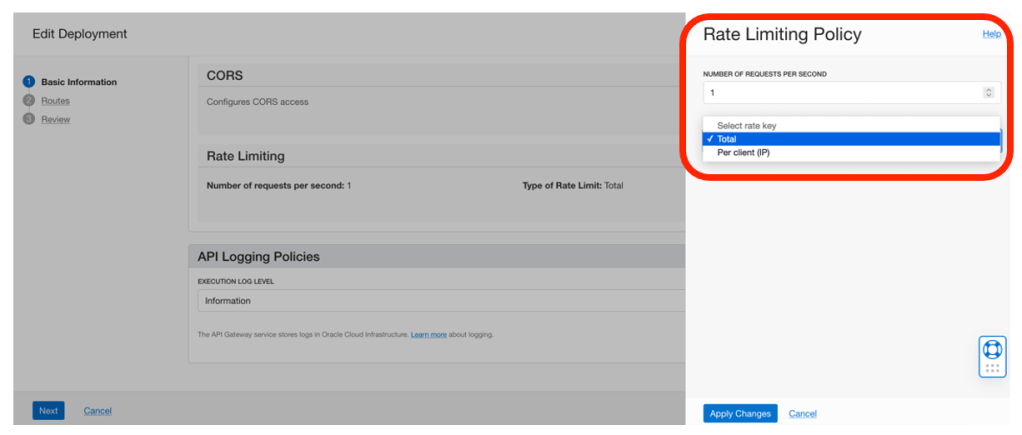
Clicking on your service, it’s possible to configure the policy you want to apply. In the case below shown, a “Rate Limiting” policy has been applied to control and filter the use of this service

So, jumping again into the previous webpage, where your REST service is detailed, you can copy the URL of the API endpoint to use it for invocation

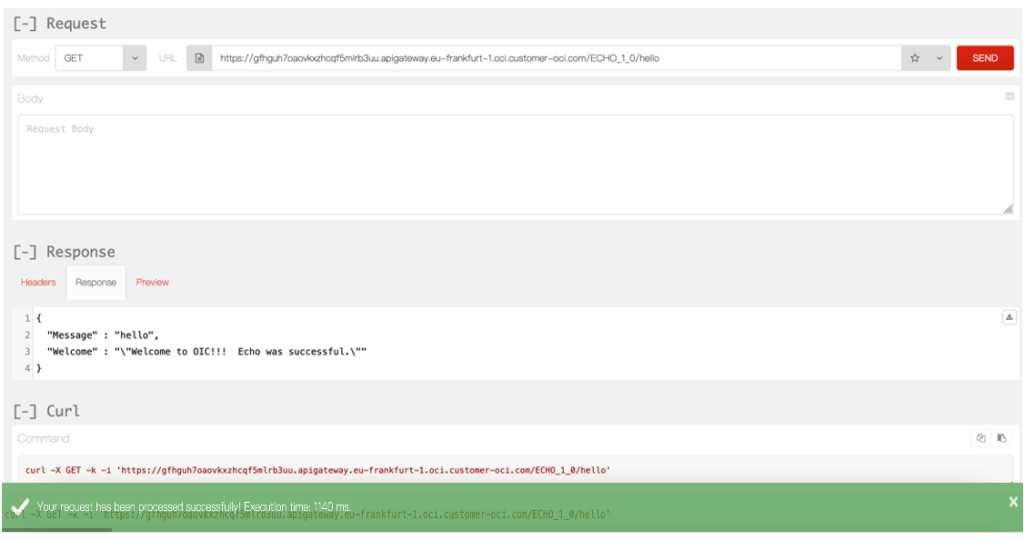
Open your REST client (or simply a browser) to test your service

The invocation has been successfully tested.

Now, you can monitor the metrics from the OCI API Gateway console in the “Metrics” section to get more details about the behavior; you can select the right time interval to check and get visibility of the API execution

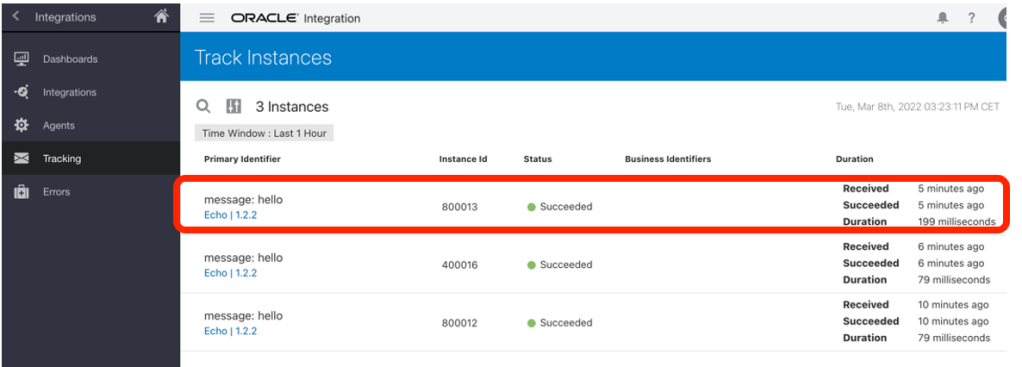
At the same time, you can also have a look at your Oracle Integration console to see how the calls have been managed by the integration platform and if needed you can submit again manually the requests in case of error if, of course, they are involving back-end systems which ahd some problems (networking issues, maintenance, …).

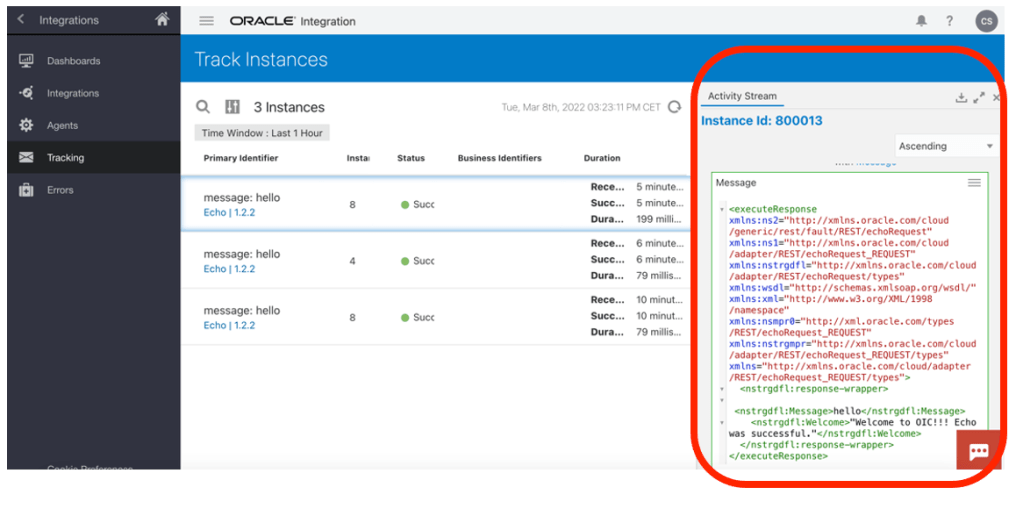
and getting further info about the execution and all details about the business message

In this case, I have used 2 different consoles to monitor OCI API Gateway and Oracle Integration respectevely.

Keep in mind that Oracle Cloud Infrastructure can help you in case you want to consolidate in just one console several information coming from different and disparate OCI Services.

This is the right case for using OCI Logging & Analytics; it allows you to build your own dashboard collecting all info you need from IT Operations perspective and just if needed you can use the dedicated console of each service to leverage deeper and specific management capabilities (errors management, resubmitting faulted instances, changing scheduling parameters, modifying security policies, tuning caching options, etc).

How to use OCI Logging & Analytics?

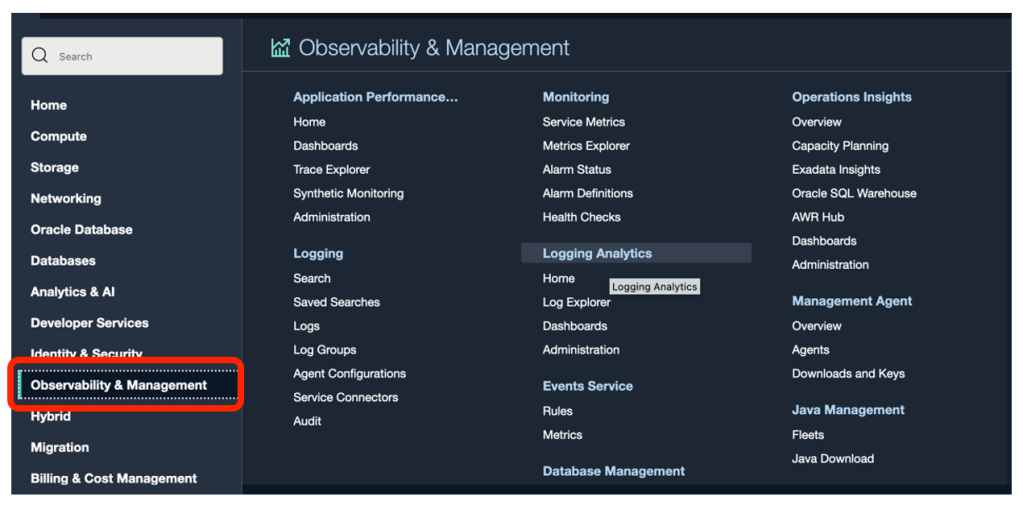
Using OCI Console and clicking on “Observability and Management” as below described

and select “Logging Analytics” link

From here you can create your own dashboard to include all information you need. In my case I have built a dashboard (“My OCI Dashboard”) collecting info from OCI API Gateway, Oracle Integration and Logging & Analytics itself, as below described:

The screenshot upper represented, includes 6 different widgets which are collecting metrics from different sources so including in just one console all information you want about latency, inbound requests, bytes ingested, bytes sent, etc

How to create a Logging & Analytics dashboard?

Not really hard… on the contrary very straightforward procedure and you can get more details looking at the following blog post:

https://blogs.oracle.com/observability/post/monitor-and-optimize-performance-of-integrated-applications

This is a very simple implementation to show capabilities and synergies of the Oracle Cloud Infrastructure services and resources

Documentation:

OCI API Gateway

https://docs.oracle.com/en-us/iaas/Content/APIGateway/Concepts/apigatewayoverview.htm

https://www.oracle.com/webfolder/technetwork/tutorials/infographics/oci_apigw_gs_quickview/apigw_quickview_top/apigw_quickview/index.html

Oracle Integration

https://docs.oracle.com/en/cloud/paas/integration-cloud/integrations-user/managing-integration-api-oracle-api-gateway.html#GUID-7F82A91E-CA79-4053-94D8-7DF0BEB0438A

https://docs.oracle.com/en/cloud/paas/integration-cloud/rest-adapter/troubleshoot-rest-adapter.html#GUID-F6137806-4051-484A-810B-DA366B96D7C1

https://docs.oracle.com/en/cloud/paas/integration-cloud/index.html

OCI Logging & Analytics

https://docs.oracle.com/en/cloud/paas/logging-analytics/logqs/#before_you_begin

CI/CD working with EiPaaS Oracle Integration (OIC)

Everyone is aware of the continuous integration and continuous development relevance which is nowadays the mantra of DevOps practices.

Oracle Integration is obviously part of the end2end lifecycle development being involved for connecting legacy applications usually deployed on-premise and SaaS applications often provided by Oracle Cloud or hosted on other Cloud providers.

It doesn’t matter where the applications are, where the integration is; the continuous delivery of new integration processes and versions need to be included in a smart and automated tool able to reduce the gap between the different developer teams.

Developers, who have the ownership to build new services and IT Operators, who have the task of deploying new code versions to the different environments, need to converge on one single tool to simplify complex procedures that can be simply considered as two sides of the same coin.

The common need is to keep all environments aligned with the latest implementations, possibly having everything monitored and tracked to grant audit activities in terms of compliance; this is a must when the project is starting to become critical and relevant at the enterprise level.

Oracle Integration (OIC), as you know, includes Visual Builder Cloud Service which allows open-source standards-based integration to develop, collaborate on, and deploy applications within Oracle Cloud.

Just for this, it’s easy to use Visual Builder Studio, the built-in tool, that allows developers to manage the software life cycle automating the development.

Oracle VB Studio natively supports Oracle Integration artifacts, so we can leverage this one to easily promote our integration flows from an environment to another one moving for example our integration projects from development to test environment once you we completed the new implementation and of course ready to test it.

That’s the right path to be used for promoting projects from Test to Production or from Production to a DR environment, this one probably running on a different OCI Region.

Working with the current implementation you can:

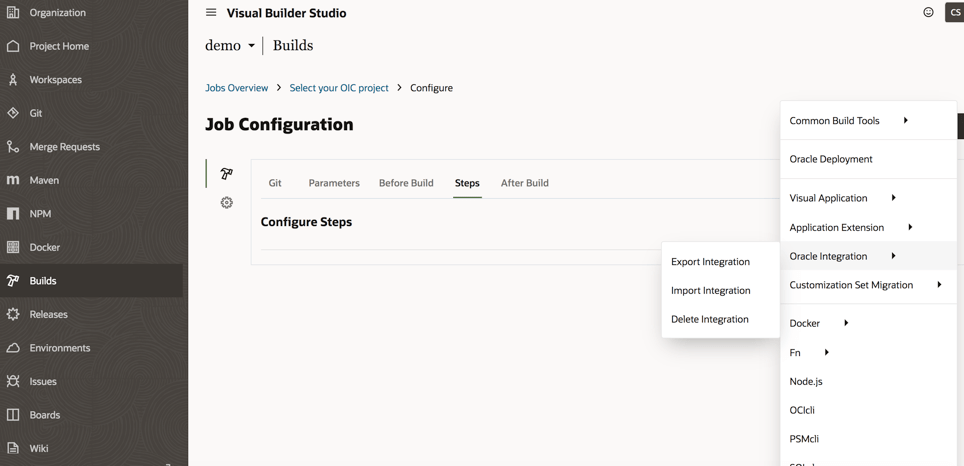
  • Export integration flows
  • Import integration flows
  • Delete integration flows

As shown below in the picture, the options we have working with Oracle Visual Builder Studio and OIC

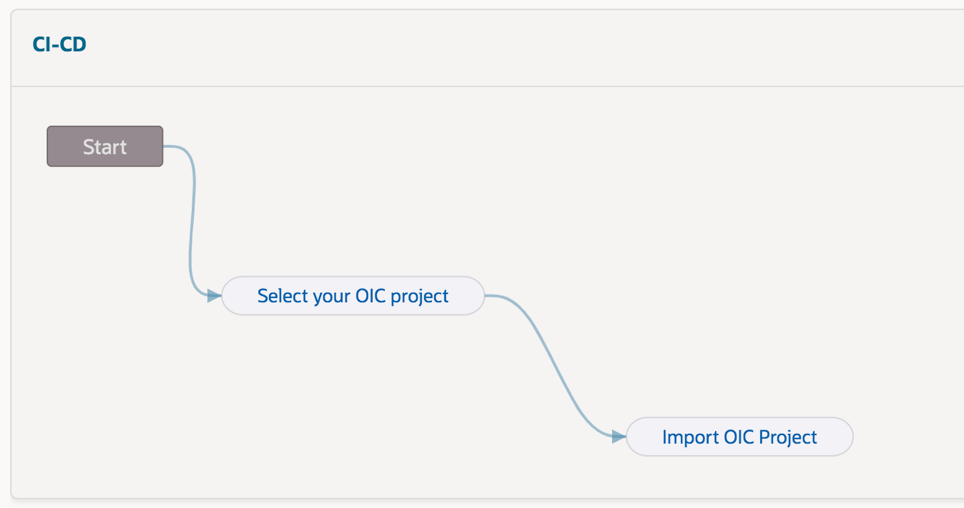
Herewith an example of pipeline that you can easily configure to automate the Export / Import procedure and defining in cascade all steps (“jobs”) to define the required actions, of course this one below just for demo purposes. This procedure will be later explained step-by-step just in case you want to reproduce this one for your own purposes
In order to export our assets from the development environment, for example, it’s enough to configure our source and target environments about the OIC instances

How to configure our OIC environments?

This is a straightforward operation working with VB Studio, as shown below:

We can create all connections we need to configure properly the tool

Once we have configured our instances, we need to build our “pipeline” so to automate the procedure when needed

Each pipeline can include all “jobs” we need (in the previous screenshot we have used two different jobs “select your OIC project” and “import OIC project”) so to build the right chain among the different available “jobs”

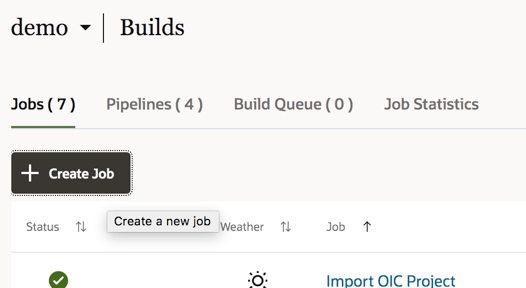
To create a job, select the Build link from the left panel of the Visual Builder studio and then we can create a new job

Each job has some options and parameters to be configured as below the screenshot shows:

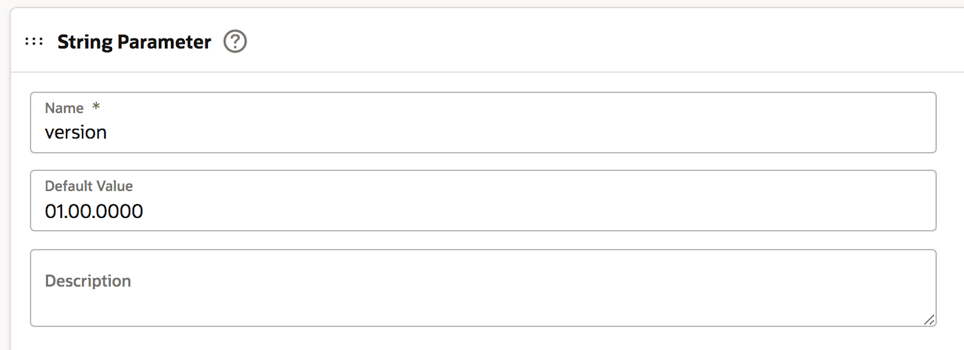
Select the “Parameters” tab to configure the string parameter:

The “Default Value” is the value of the integration flow version on our OIC instance to be selected and moved to the new instance. Of course, this value can be changed when we run the build so to properly set the right integration flow version

Now it’s time to select the “Steps” tab to identify the OIC instance from where we want to export our integration flow

If needed, we can also include the asserter recording just flagging the box. In this case we are moving (exporting / importing) the integration flow named “ECHO” and working with its *.iar file once we have exported this one.

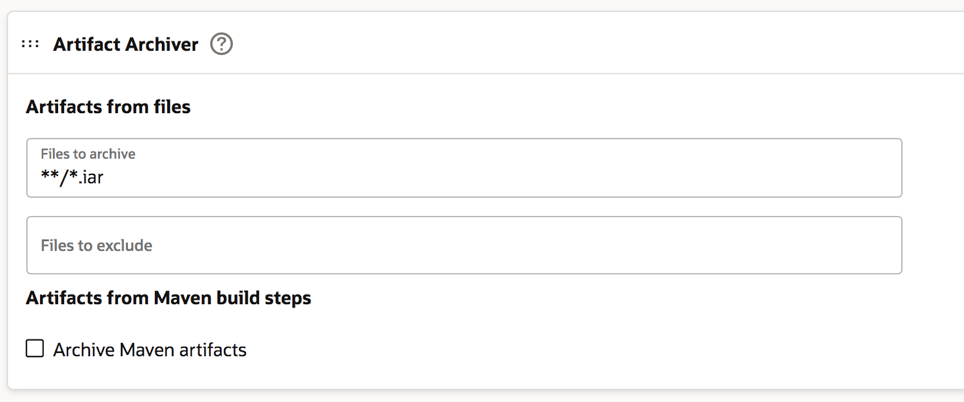
Now you can click the “After Build” tab to configure it as below described. The *.iar extension is the default extension of the integration flow when you decide to download it.

Click save and that’s all. Our first job is properly configured now.

To proceed we are now ready to configure the second job (“import OIC project”).

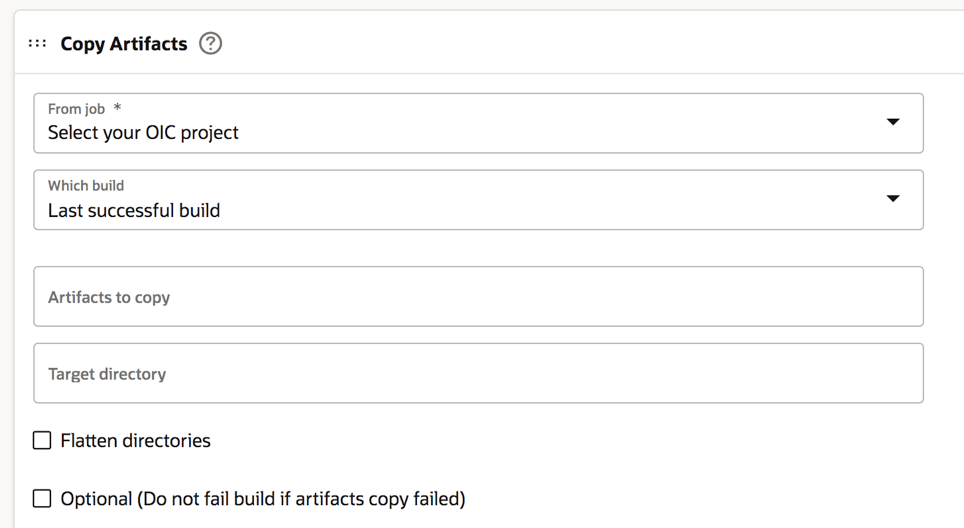
In this case, the first step to be accomplished is the configuration of the “Before Build” tab as below shown and adding a “Copy Artifacts” option

And now, as we did with the first job, we can properly configure the OIC instance target, in our sample, but in this case for the import action.

We can also check the box about the “activate integration” option so that our integration flow will be imported and started just to have this one ready to be invoked by applications

Also, in this case, we can now save our configuration.

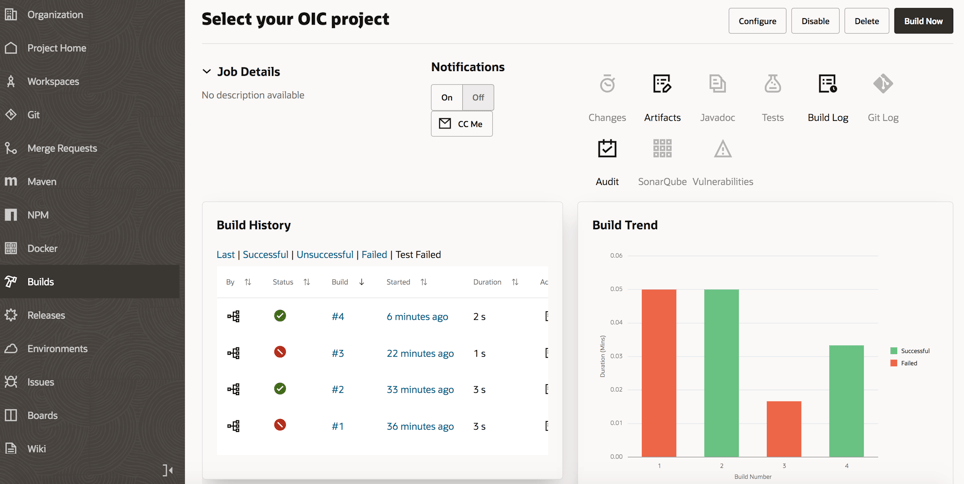
Once these operations have been completed, we are ready to test our pipeline selecting the start button on the right side of the web page and below shown

If the execution of our “build” is properly configured, we can see the “green flag” of our jobs once we run it

Furthermore, we can drill down the execution to look at the log information just in case something wrong having also the chance to download the file including the log for further analysis or if we need to share this one with other people or applications.

From the Visual Builder Studio “Home page” we can also get information about statistics and previous executions so to track the activities managed on the different resources we have

This is for sure the best way to properly manage our environments and the best approach to have under control the lifecycle of our projects and their deployment.

For further information, look at the really interesting content already published here:

Oracle Blog

https://blogs.oracle.com/vbcs/post/cicd-for-oracle-integrations-with-visual-builder-studio

https://blogs.oracle.com/integration/post/cicd-implementation-for-oic

Oracle Documentation:

https://docs.oracle.com/en/cloud/paas/visual-builder/visualbuilder-manage-development-process/build-your-applications.html

%d bloggers like this: