
Step-by-step guide discovering how to provision and build a business process with OCI Process Automation
OCI Process Automation (shortly OPA) is an OCI PaaS Oracle Managed cloud service which helps customers to build their business processes based on Structured or Unstructured models. This is the best solution to easily manage business processes granting to business users to build their own implementations without coding but just using a web browser and drag&drop capabilities… what we usually call a “no code” environment
The article has the goal to explain how, step by step, we can quickly test the features included in OPA… starting from my experience with the tool.
Just to simplify the explanation, I will describe a “happy path” process … in my example building one business process which usually is quite loved by everyone…. mainly when talking about the Vacation Request Approvals 🙂
For example, an employee will submit a vacation request; his team leader will be informed of that and if that’s ok the approval will be managed by his manager to complete the request

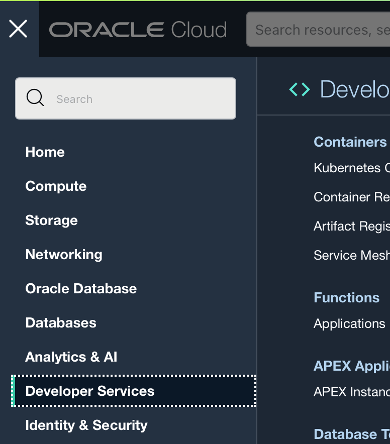
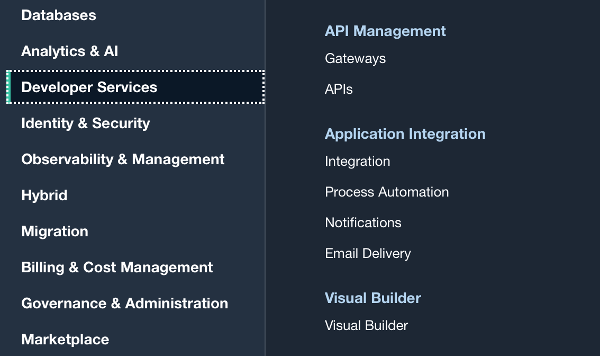
We can start from the provisioning. If you go to the OCI Console we can easily find the Oracle Process Automation link in the Developer Services section how below include in the picture
Selecting the Process Automation link, we can provision our OPA instance

We can provide our information and identify the right shape for our goal and of course including the available metering options
Here we can find more details about those details to be provided:
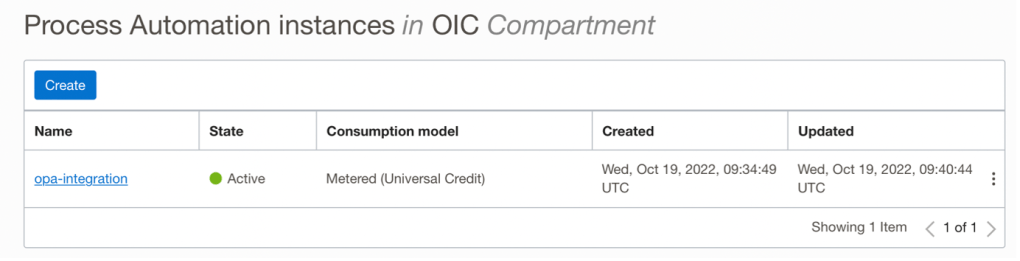
Once the service provisioning is completed we can see something like this one below
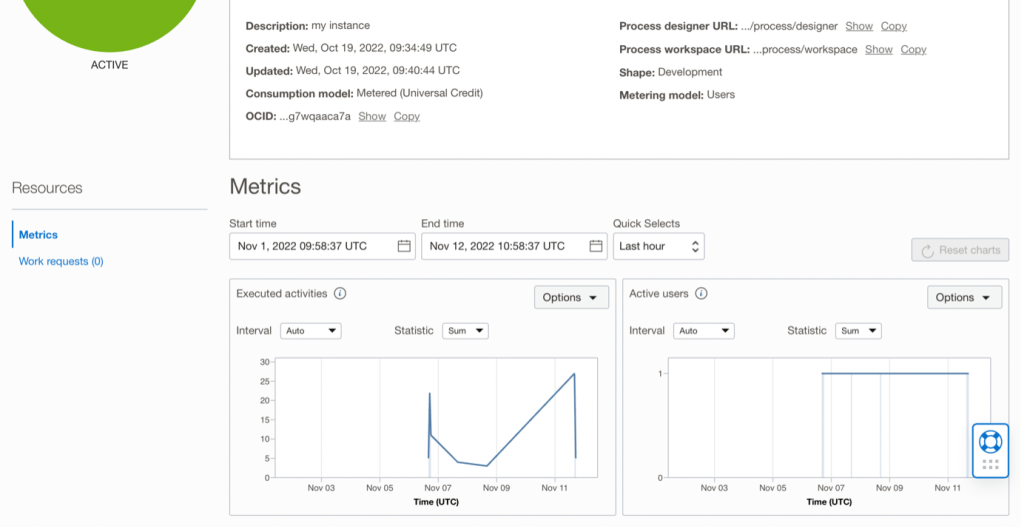
Selecting the instance name link we can access the OCI web console with further info about the provisioning
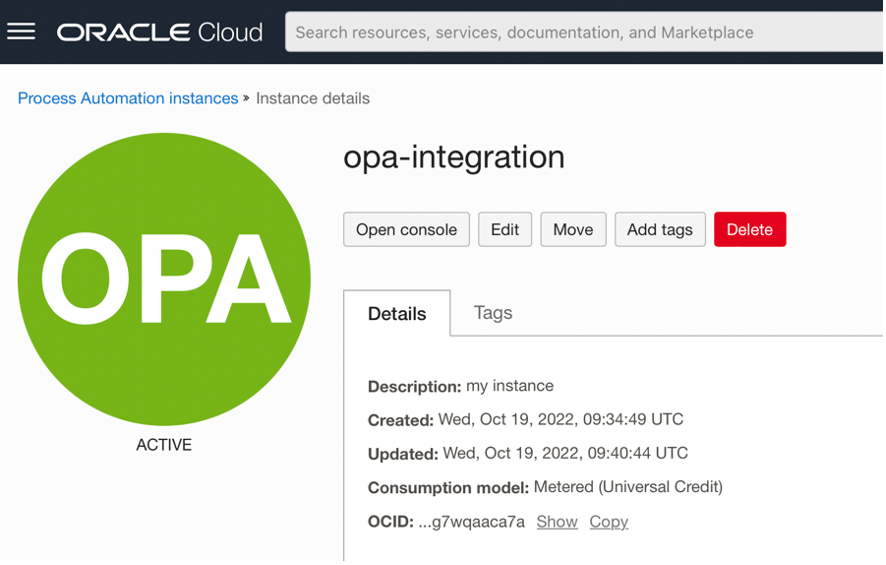
From here we can get also interesting and helpful info about the metrics of our service and other details about billing model, shape and URLS of the web applications used to design and run our implementations
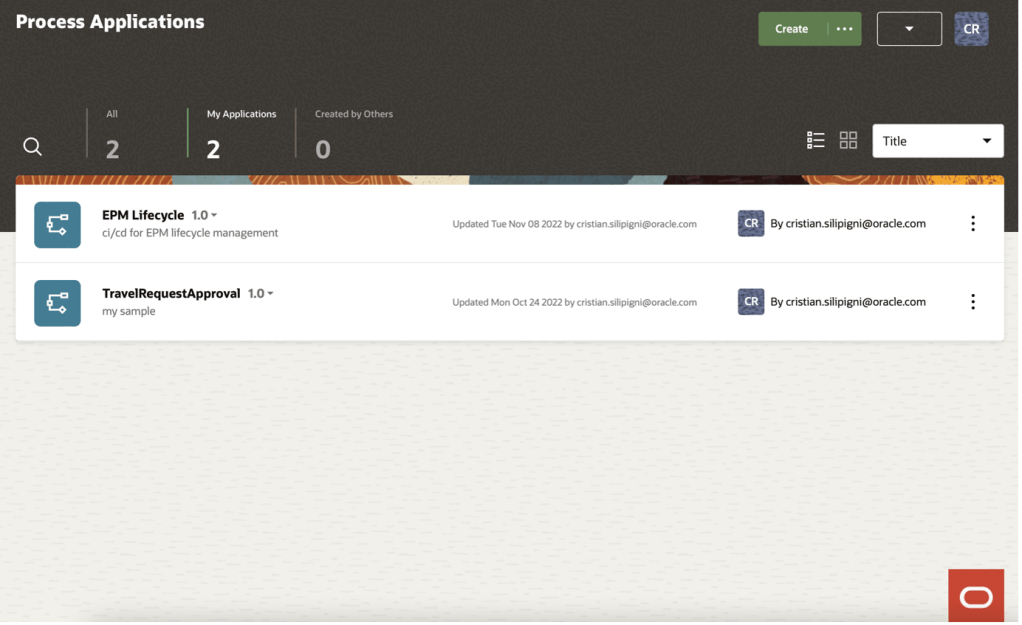
Now we are ready to start with our job… click on “open console” tab to quickly start!
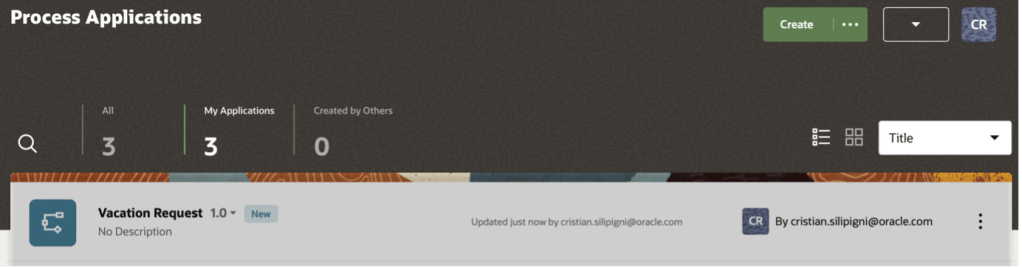
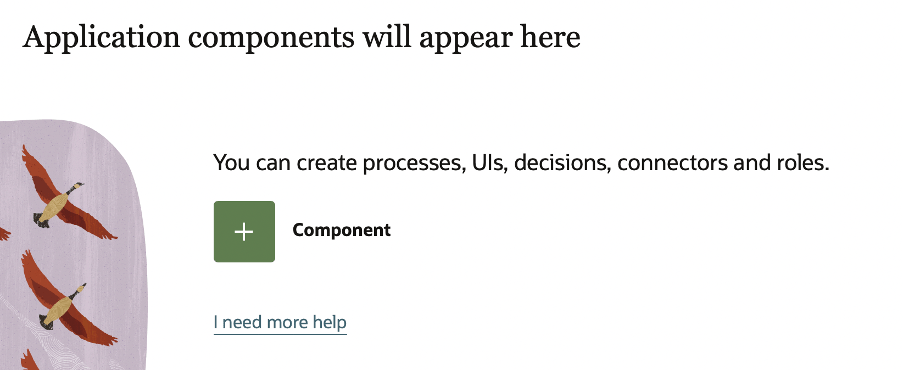
Now if we need to build the “Vacation Request” business process we need to create new resources as below explained after having created the new application. In our case “Vacation Request”
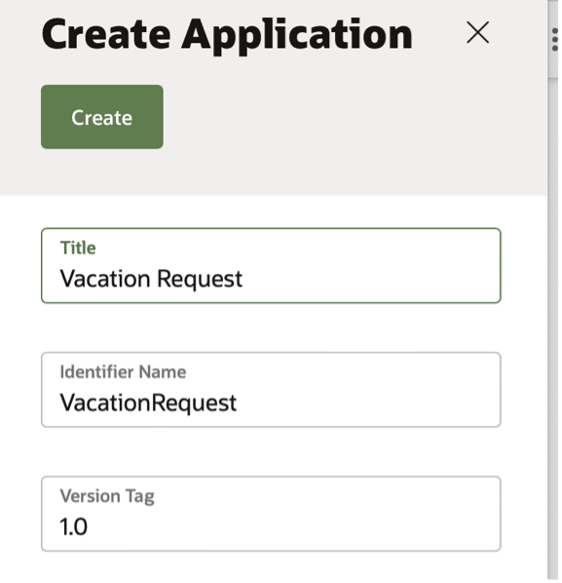
Something like this should appear in our web page
After having provided few details, we can start with the design of our process
Everything starts from designing the workflow… how it should be built satisfying the business requirements
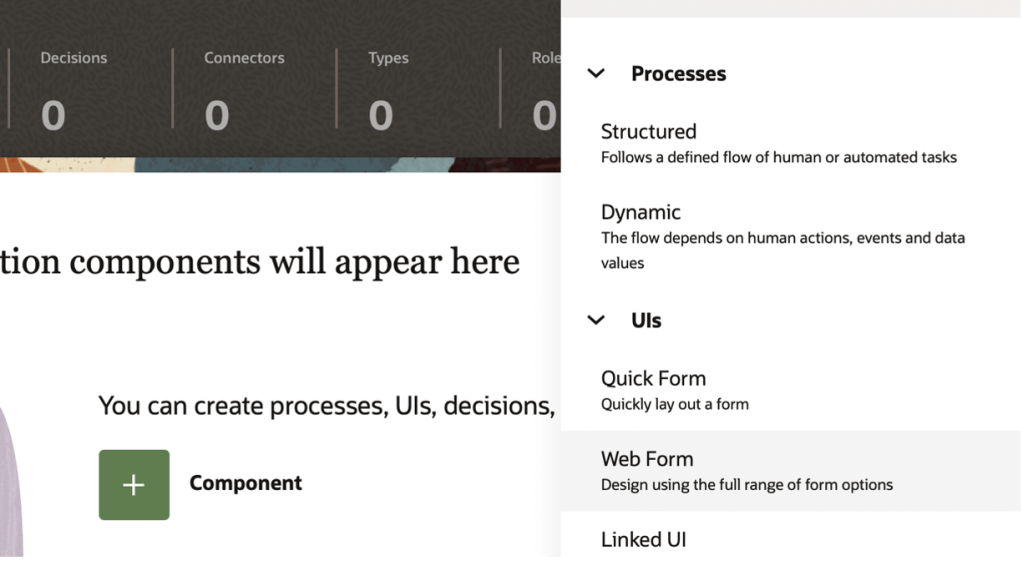
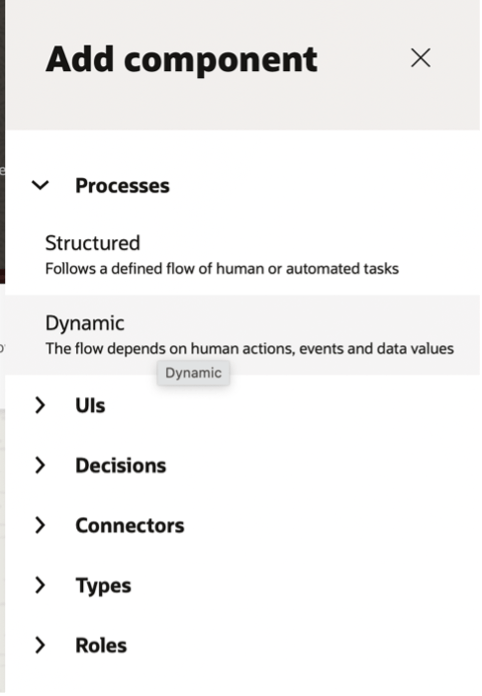
A new component can be added and in this case, that one about structured business process. Click on “+”
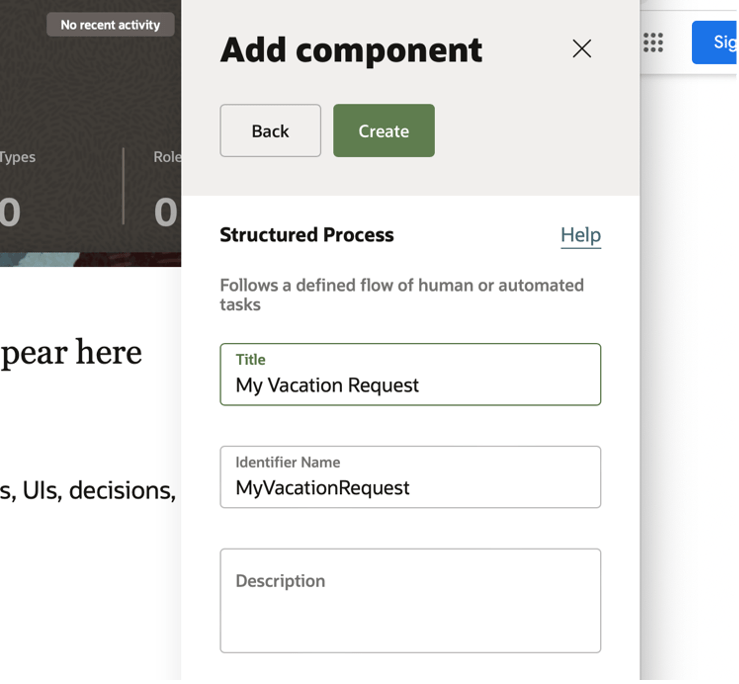
We can select the Structured Process option as the image below shows
and typing your details
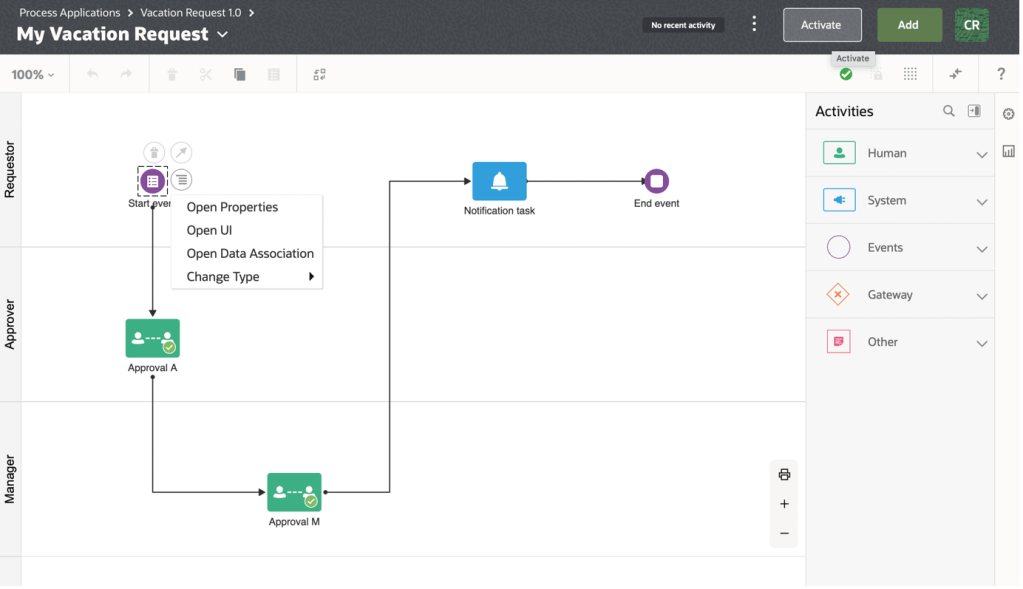
After having selected the “create” button, the screenshot below shows the process designer, how it looks like
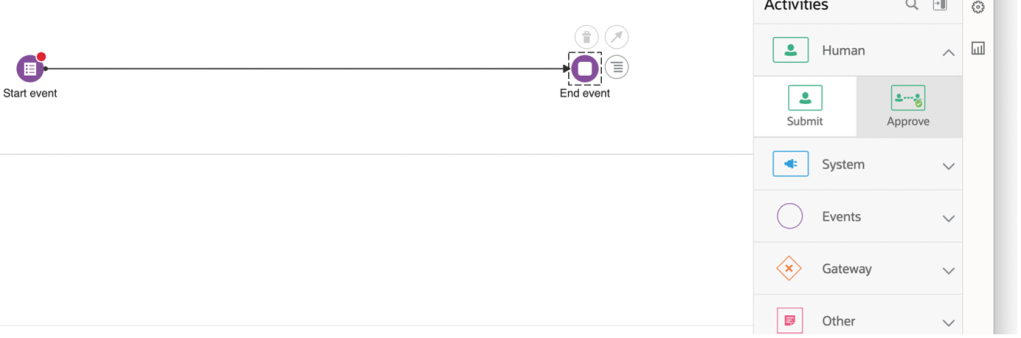
Now we can draw our business process adding the required activities to build a human workflow like this one… exaclty what we have in mind
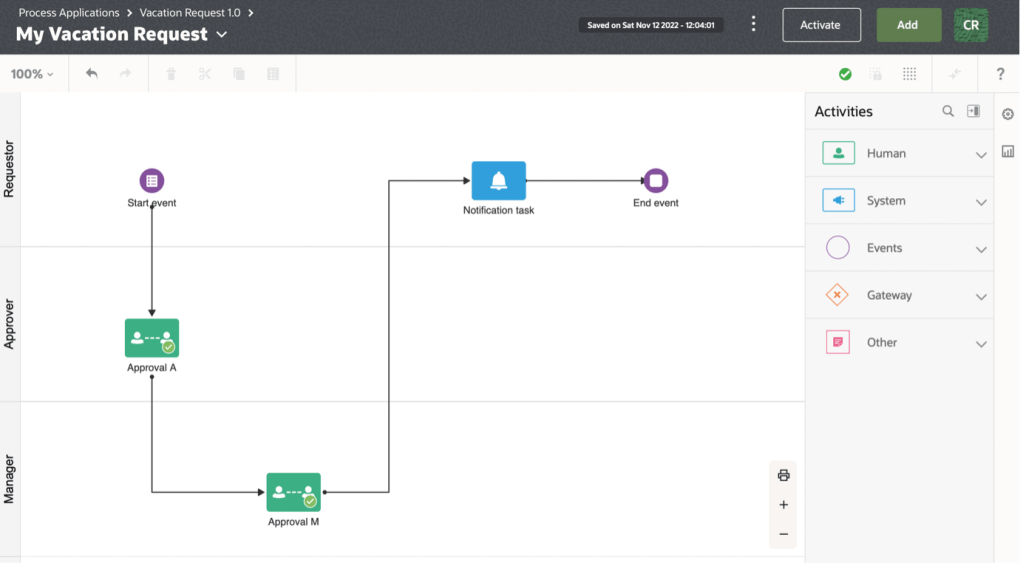
As I said, this one is a “happy path” process (very simple without rejections management) but the business logic can be more complex adding other BPMN activities to complete the process as we need
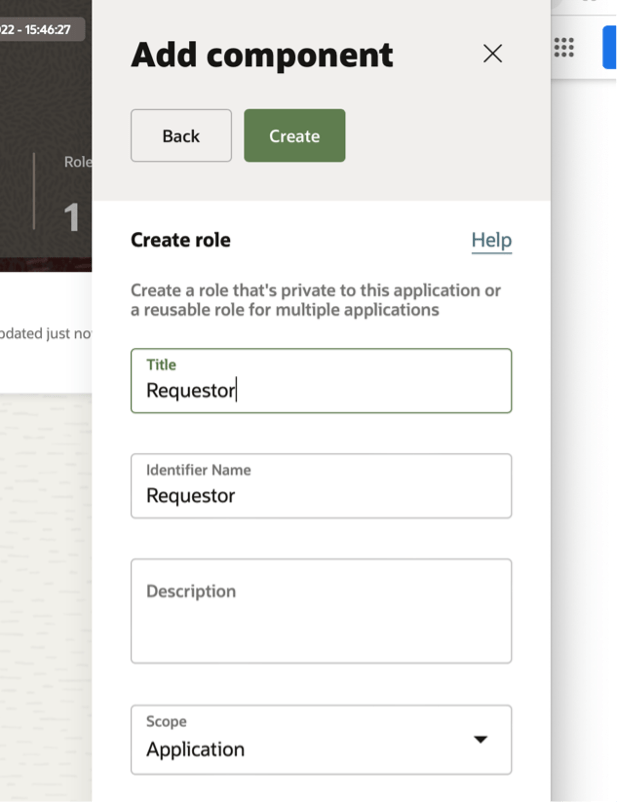
Now we can define our roles to be assigned to each swim lane
And filling the information as below shown
Following what previously designed we can add 3 different roles:
- Requestor
- Approver
- Manager
and including all the groups or the users that we need to profile that
Below, the screenshot shows how the web page looks like. In my case to further simplify the test, I have added the same user to all roles
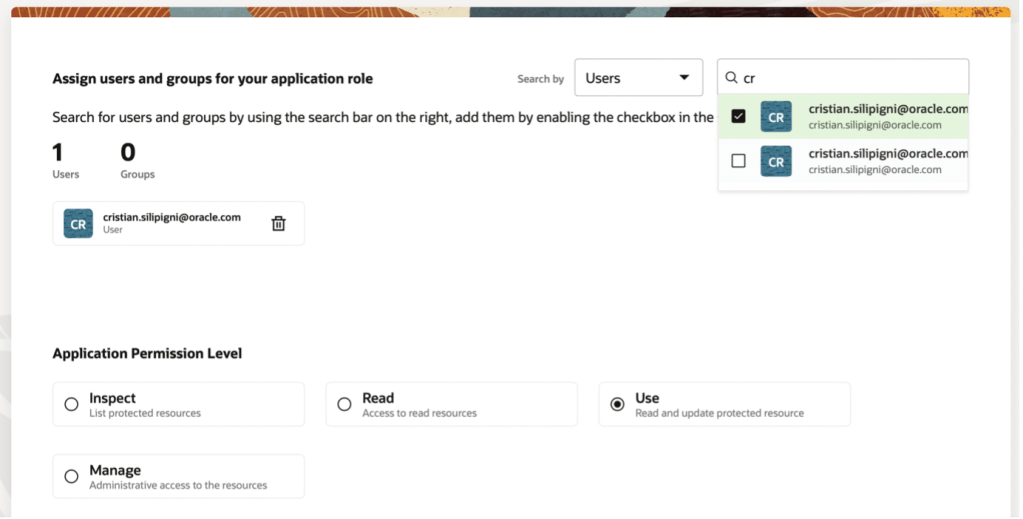
This step can be done again for all roles (users / groups) required by this example
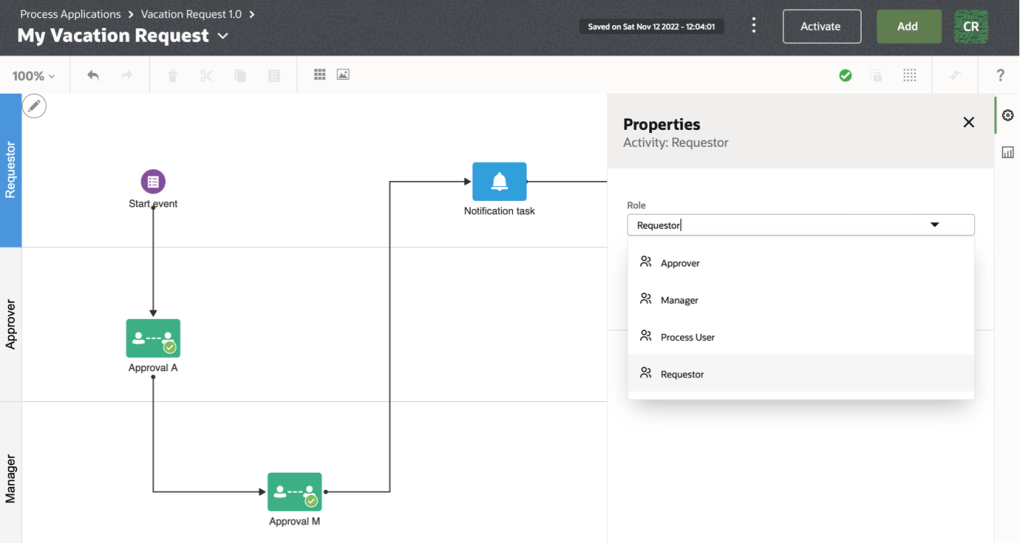
Now, going back to the BPMN representation, we can add the users to our roles so to profile them in our implementation just selecting the pencil close to the swim lane definition (on the left of the web page) and selecting the right role for this
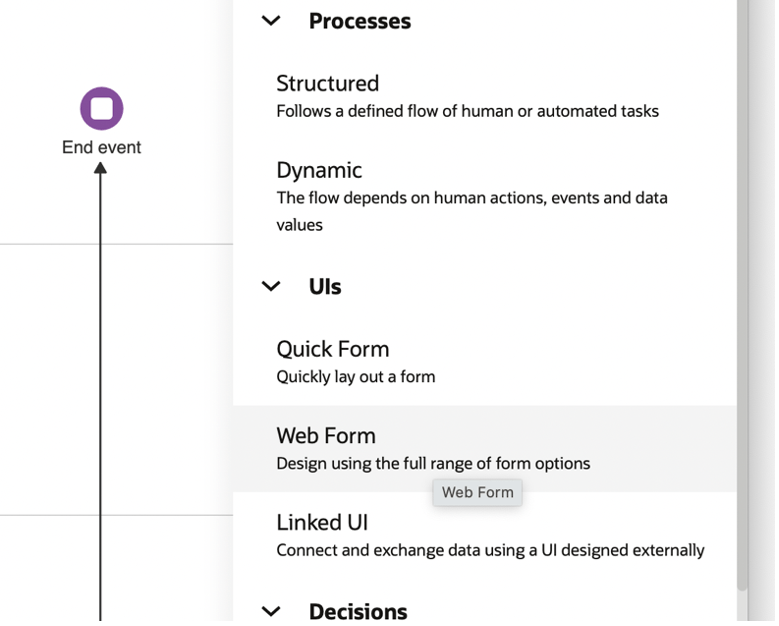
Now it’s time to build the Web UI to be used by end users to submit and manage the requests
Click on “add” component again and select the Web Form option
Now, just using “drag&drop” functionalities we can build our own web page in a very quick way simplifying and speeding up the implementation
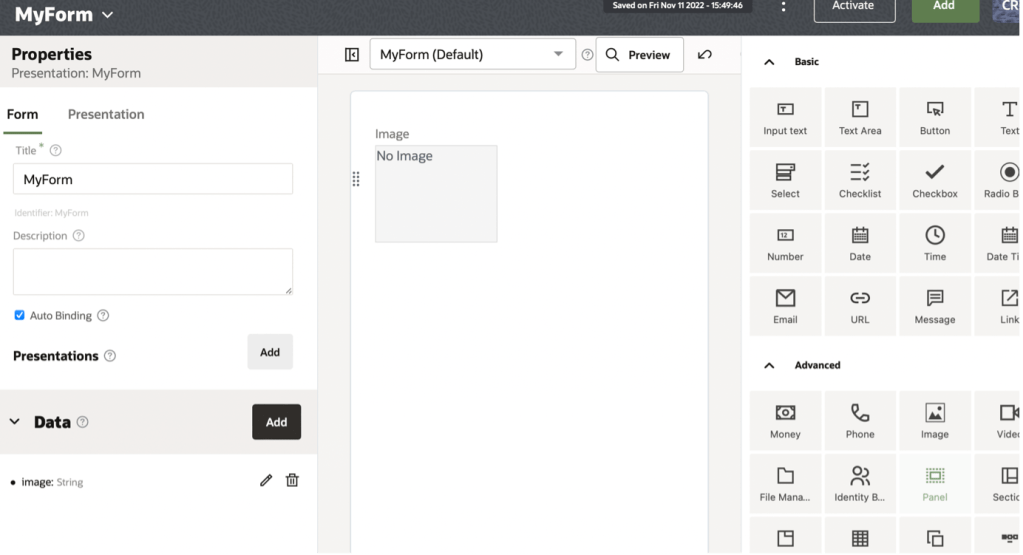
We can include images, text fields, dates, … all we need to build something meaningful to our scope using all the components which usually are available in HTML applications
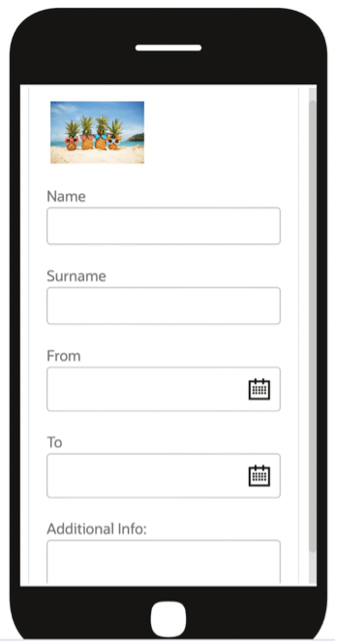
For example, below the emulation of what I have built to be configured with the process; in this case a mobile phone preview has been built
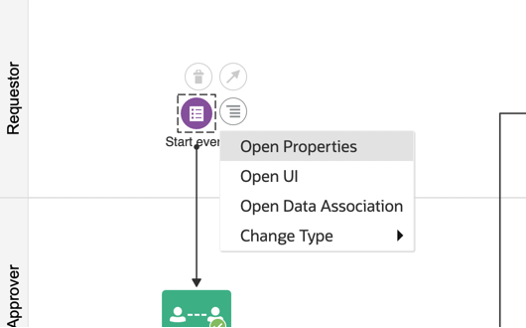
Now going back to our BPMN representation, we can click on each activity (start event, Approval A and Approval M) selecting “open properties” and configuring the missing info about “title” and “web form” to be used by the end user. “MyForm” is that one just built for this purpose

Select “Open Properties”
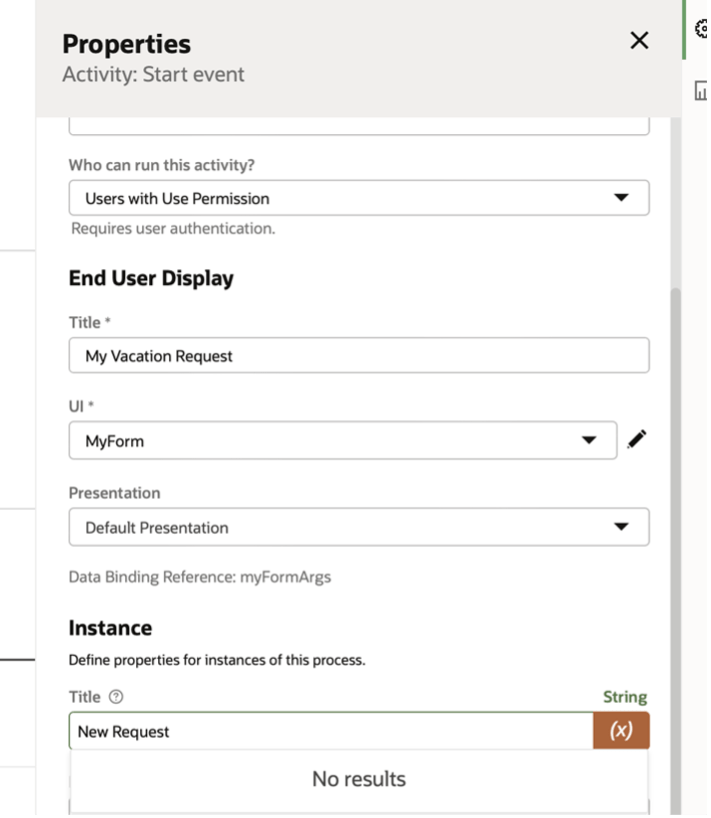
And now ready to complete the required info
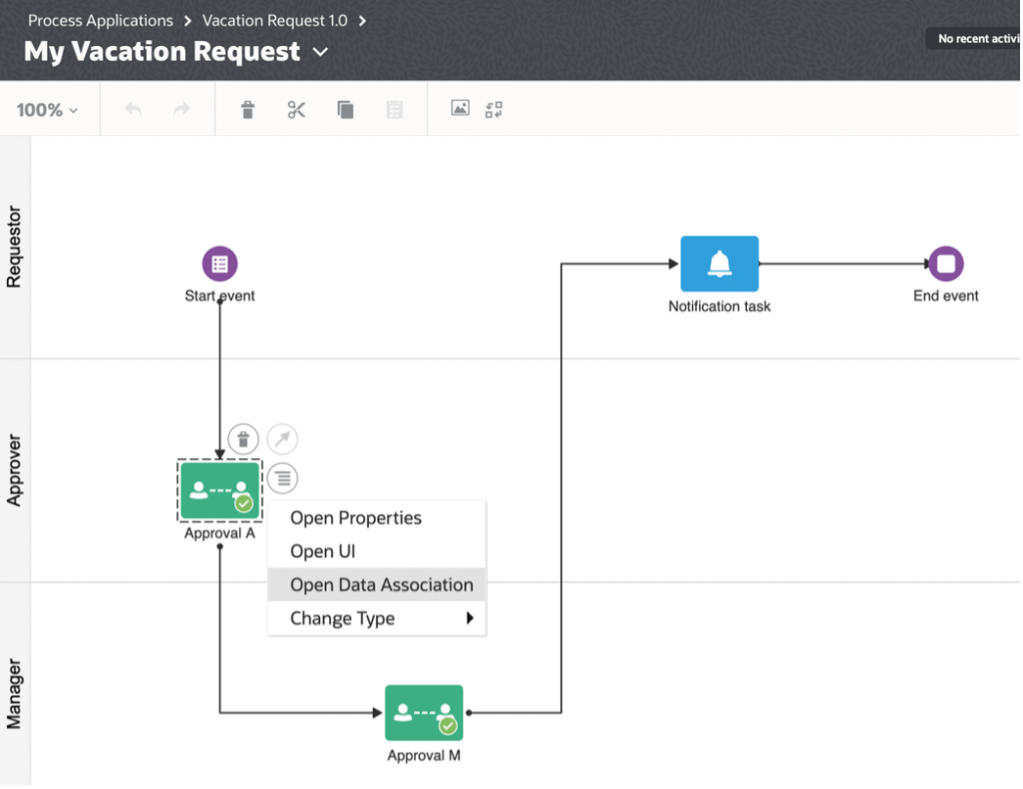
Now, we are really close to complete our job; last mile to be covered is about the data mapping… all the information that must be filled by the end user need to be mapped so each role can properly manage the data provided
Click on each activity and select “Open Data Association”
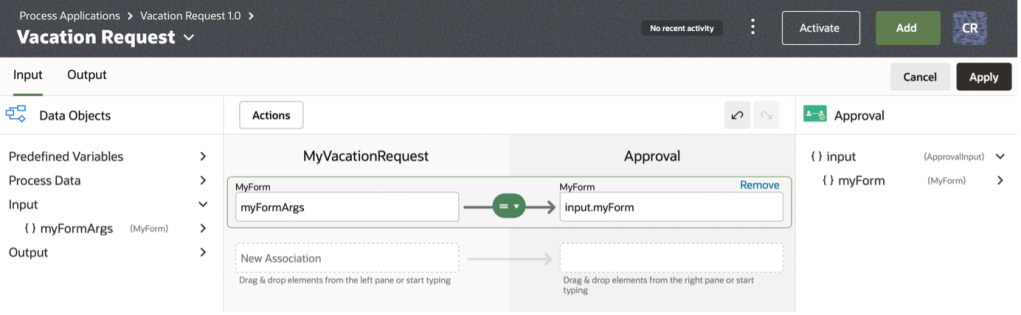
Reproduce what below included into your mapping and select apply to save your configuration. This one for each activity of the process
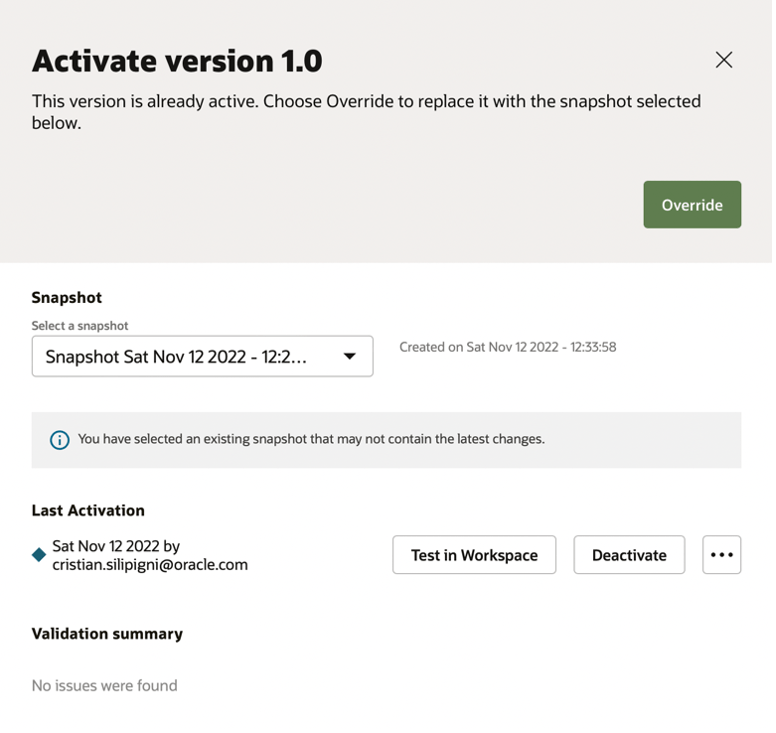
Well done!! Our first implementation is ready to be published
Click on the activate button to publish our process
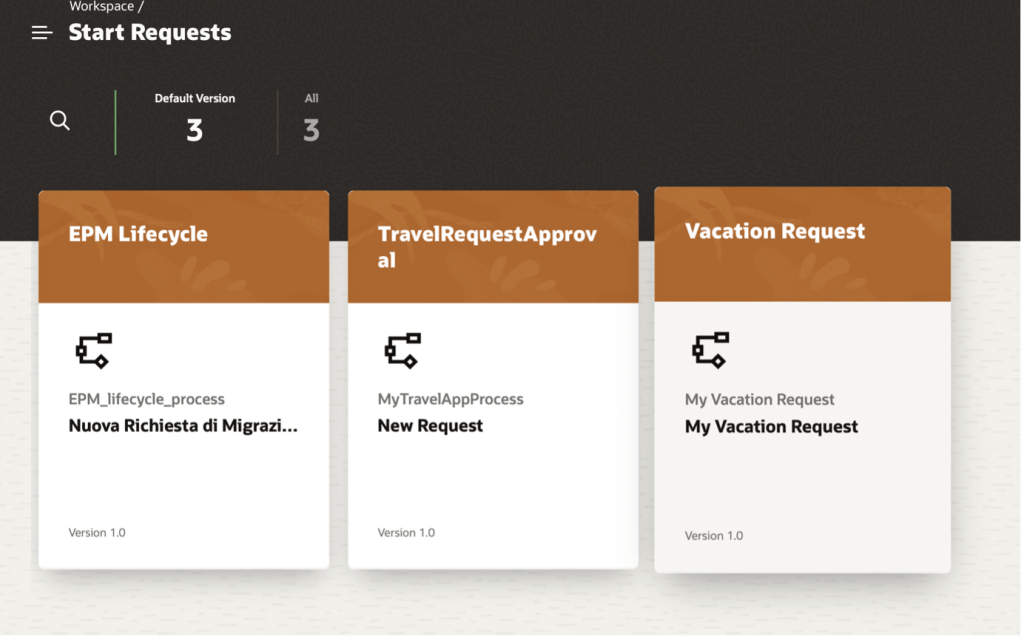
Our business process is now published and ready to be tested. Click on “Test in Workspace” to run your first instance
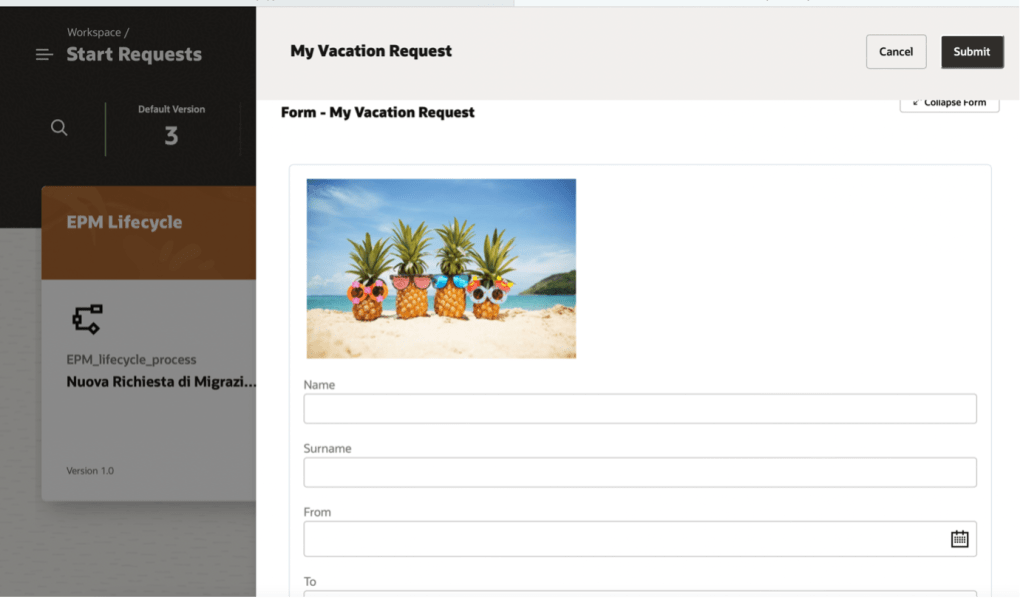
This is the “look&feel” of our web application with redwood style. We can now click on “My Vacation Request” to start the first request
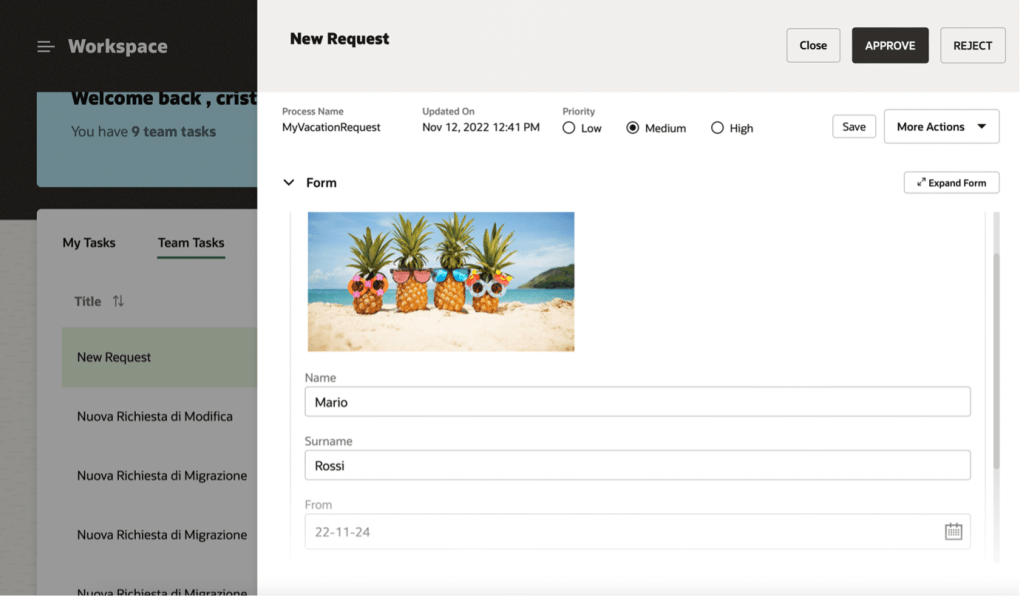
The web form, previously built, appears and ready to include our data
After having submitted our detils, a new task will appear in our workspace as below described
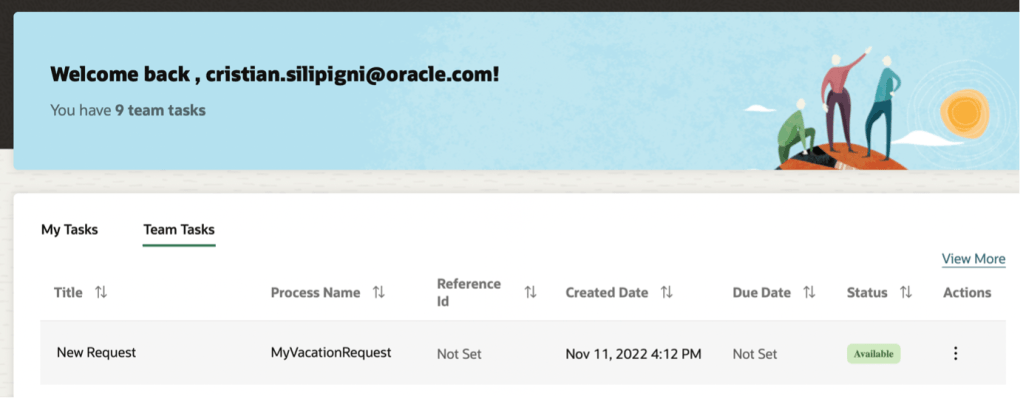
And opening this one we can decide to approve, reject or generally speaking, manage our tasks
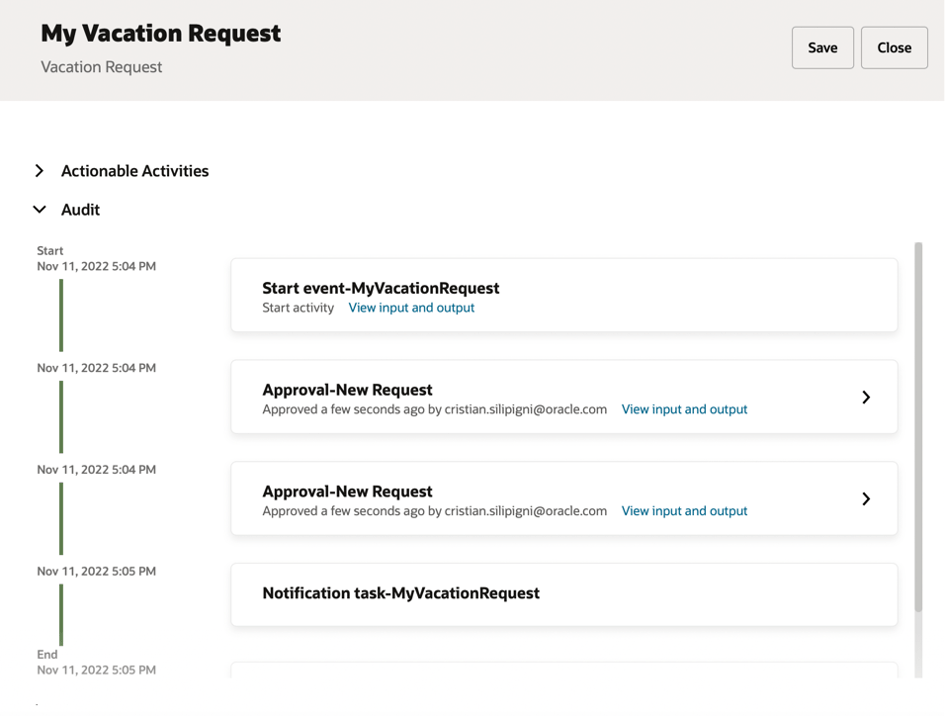
Once all the tasks are completed, this specific execution will appear in our task list as a “completed” instance
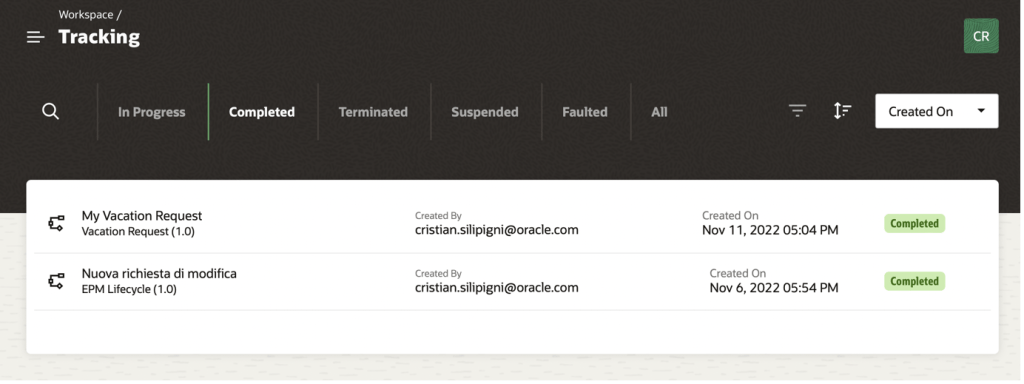
We can also use this tool for audit purposes, so to track in our environment who did what and when… exactly the case if we need to gain visibility into our business
Several customers are already using OCI Process Automation to automate business processes extending SaaS applications or simply building new standalone processes to avoid phone calls and/or emails managing not properly some internal business processes
Frankly speaking, I believe OPA is the best way to simplify our job being production in few hours!
Additional info:
https://docs.oracle.com/en/cloud/paas/process-automation/
https://docs.oracle.com/en/cloud/paas/process-automation/training.html

One thought on “Process Automation helps you to rapidly design, automate, and manage business processes in the Cloud”