
Data Warehouses have been around for a long time and they bring multiple benefits, but these also come at a cost. Some of the associated challenges that are easily identified when talking about traditional Data Warehouses include:
- Complexity and Expensive
- Inability to manage data and user growth
- Hard to deploy and maintain
Oracle Autonomous Data Warehouse aims at easing these challenges with the ability to:
- Provision a data warehouse in as little as 15 seconds.
- Full automation of management of the Data Warehouse
- Instant scaling with zero-downtime
- Automated Tuning
- Migration tools, e.g. Redshift
In this blog, let’s show can easily we can provision a new Oracle Autonomous Data Warehouse, load data into it and run some data visualization on top.
Before we start
In this blog I assume the following:
- You have an Oracle Cloud account, if not request a free trial. Here: https://cloud.oracle.com/tryit
Ok then, let’s have fun!
Provision a new Oracle Data Warehouse instance
- First login to your Oracle account and customise your dashboard if needed to show the Autonomous Data Warehouse (ADWC) cloud service.
- Click on the burger menu and Open the ADWC Service Console

- The ADWC console will open. In the medium left of the screen, select the compartment where you want to create the new instance.

- Click on “Create Autonomous Data Warehouse” blue button to create a new instance.

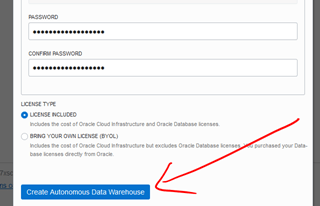
- Enter a Display name and database name. Also select the CPU Core count and Storage (TB). Finally enter your desired credentials (12 characters minimum).

- At the bottom, select whether the license is included, or you are bringing your own license. Then click on “Create Autonomous Data Warehouse” blue button.
- The provisioning will start and should not take longer than 2 minutes. Your page will refresh when done and will show the ADWC is Available.
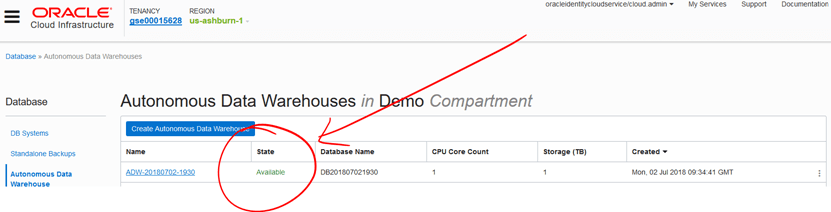
- Click on its Name and feel free to browse around the various tabs.

Some of the tasks you can easily do include:
- Scaling Up/Down (CPU and Memory)
- Reset Admin password
- Create a backup manually
- Restore from a previous timestamp
-
Stop/terminate
- When you are done exploring, click on Service Console.

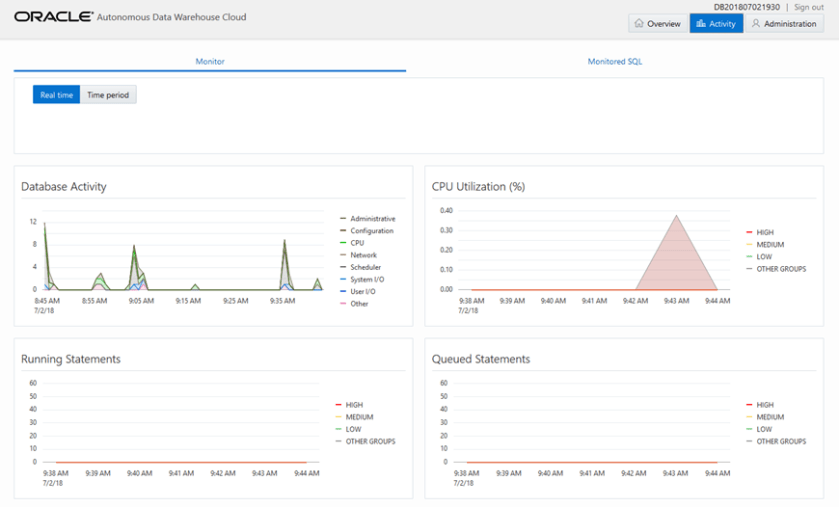
- Login with admin and use the password that you entered previously when creating the ADWC instance.

- Since we just provisioned this instance, it will show very little activity.
- Click on Administration and the click on “Download Client Credentials”, to download a zip file that we are going to need later to connect to our ADWC instance.
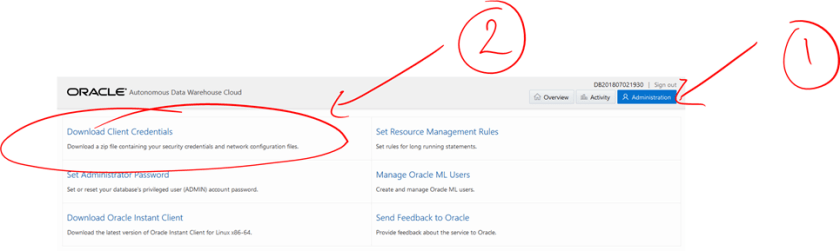
- Enter a password that will protect using your wallet. Then save it in a safe location by clicking on Download.

-
That’s it, your ADWC is ready to be used.
Connect into your new Oracle Data Warehouse instance
In order to connect to our new ADWC instance, we are going to use SQL Developer. You can use whatever other software you prefer by adjusting the following instructions respectively.
- In SQL Developer, select New DB Connection.
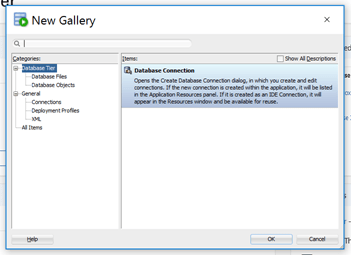
-
Setup the configuration as follows:
- Username: admin
- Password: Enter the password that you used when provisioning the ADWC instance
- Connection Type: Cloud PDB
- Role: default
- Configuration File: Select the Wallet (zip file) that you downloaded previously
- Keystore Password: Select the wallet’s password that you entered when downloading your wallet.
- Service: Select a service you want to use.
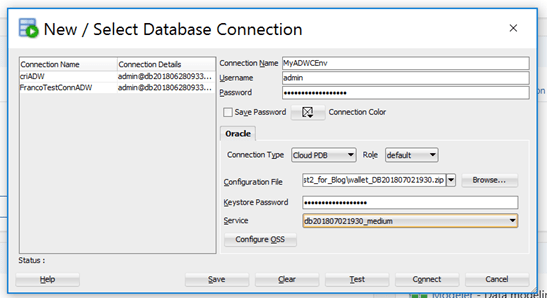
- Makes sure you get a successful Test.

- Save and then click Connect.
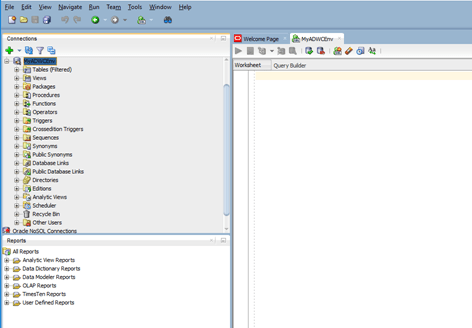
- Congratulations, your ADWC instance connection is ready to be used.
Load some data into your new Oracle Data Warehouse instance
We are going to use SQL Developer to trigger loading lots of data stored in flat files in Oracle Storage Cloud Service (object storage) into our new ADWC instance.
It looks like this:
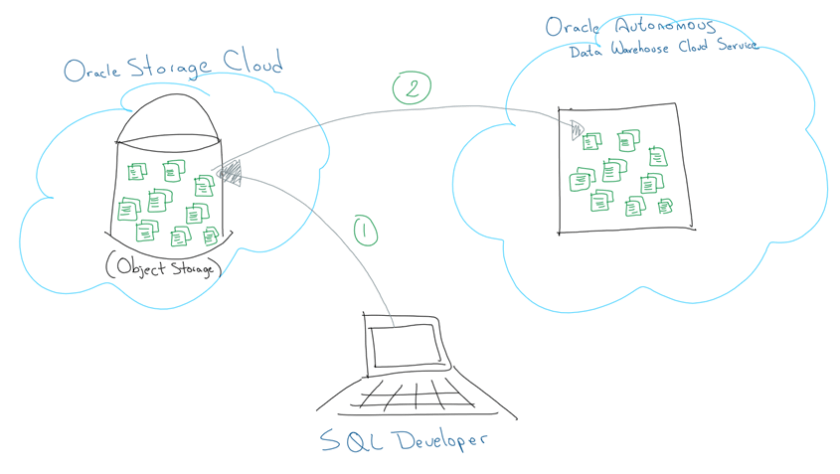
For more information reference the official Oracle documentation here.
For this, first we need to create a bucket in the Oracle Storage Cloud Service and upload the data there.
- Click on the burger menu at the top left and select Object Storage Cloud Service.

- Click on “Create Bucket“

- Enter a bucket name and if you want to some tag key and value. Then, click Create Bucket.

- Download and unzip the files that we want to upload into the bucket.
- Upload all objects by browsing or drag and dropping each downloaded file.
- At the end all 10 files should be uploaded into the bucket.

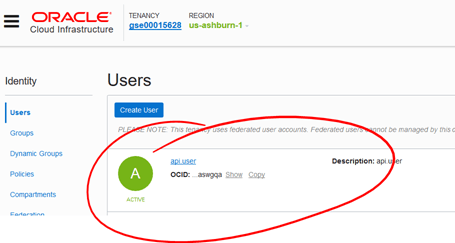
- Now, we need to generate an Auth Key Token to easily authenticate into our Oracle Storage Cloud from SQL Developer. For this, click on the burger menu on the top left and select Identity – > Users.

- Select the user that you are planning to use to connect into Oracle Storage Cloud from SQL Developer e.g. api.user in my case. In case you don’t have a user yet, create one.
- Click on Auth Tokens

- Click on Generate Token. Enter a description if you like.
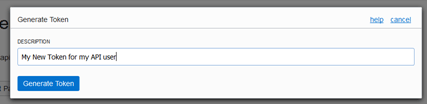
- Click on Generate Token. Copy the generated token into a safe location. We will need it soon.

- Ok, we are ready to load some data into our new ADWC from SQL Developer. Go back to your new SQL Developer DB Connection and re-connect in case you are not connected already.
-
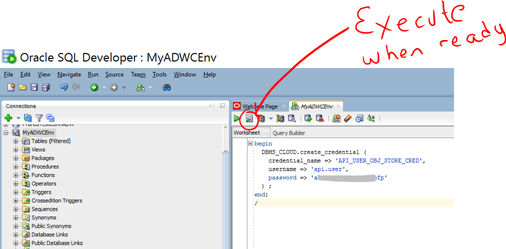
In the blank SQL pane, enter and execute this command to create your Object Storage credentials.
- Replace OBJ_STORE_CRED by your own name
- Enter the username and password – These are the username (e.g. api.user in my case) and Auth Token that you just configured in the last step.
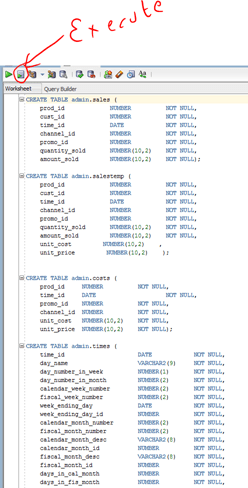
- Next, grab and execute these commands to create all the 10 tables that correspond to the data that we want to upload.
-
Finally, grab and execute these commands to instruct copying the data from the 10 files stored in Oracle Storage Cloud, into the new 10 tables we just created in our ADWC instance.
-
Replace YOUR_TENANCY by your own tenancy name. You can see it at the top of your Cloud Console.
For example, in my case:

- Replace YOUR_OBJ_STORE_CRED by the name that you used in the last step when creating your Object Storage credentials. E.g.
-

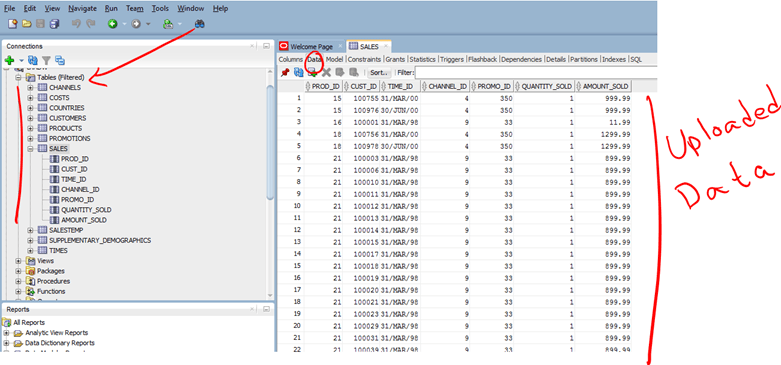
- That’s it, after the execution completes your ADWC should be loaded. Feel free to expand your connection on the left and Tables. Then click on any of the tables and select Data to show the uploaded data.
Congratulations!!! You have enough to start provisioning and using Oracle Autonomous Data Warehouse for your own projects. It’s quick and easy!
I will keep publishing more advanced topics as I keep playing with the new generation of Oracle Autonomous Cloud Services. So, you better stay tuned!
I hope you found this blog useful. If you have any question or comment, feel free to contact me directly at https://www.linkedin.com/in/citurria/
Thanks for your time.

Great article Carlos 🙂
LikeLike