
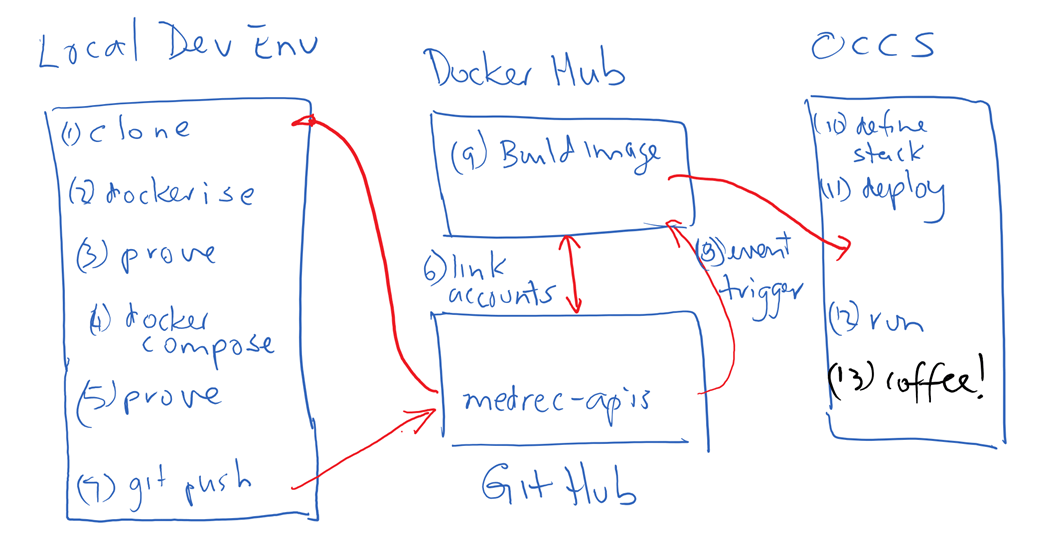
In my previous post in this series I covered linking GitHub and DockerHub and configuring the environment such that a build of a Docker image was triggered on updates to GitHub. In this final post of the series I will take you through the steps to pull the image from Docker Hub into OCCS in order to run the application. It should be noted that the image built on Docker Hub in my example is only the web tier that contains my Node.js project (APIs and SwaggerUI). The MongoDB component of my OCCS Stack is pulled directly from Docker Hub when my Stack containing the Web Tier and Database Tier services is deployed to OCCS.
Deploy the Stack on OCCS
Create a new stack in Oracle Container Cloud Service (OCCS) that references the Docker Hub repository / image
According to the web site , the “Oracle Container Cloud Service provides an easy and quick way to create enterprise-grade container infrastructure. It delivers comprehensive tooling to compose, deploy, orchestrate and manage Docker container-based applications on the Oracle Cloud for Dev, Dev/Test, DevOps, and Cloud Native use cases.”
I now wanted to run my Stack that was comprised of two services on the OCCS. The steps I took are as follows;
First I logged into the OCCS Service Console which was part of my Oracle Cloud subscription. I already had a Container Service Instance created called occsPlaypen.
You will notice that I only had 2 OCPUs allocated to the Service Instance and as one of these is consumed by the Management Console, I was left with only one OCPU to be allocated to my Worker Node / Host. In an ideal world I would have liked to have a lot of worker nodes so that I could do some other interesting stuff, but my temporary cloud subscription didn’t allow.

To launch the actual Container Console, I clicked the hamburger menu and chose Container Console.

I specified the username and password that I provided when I created the Service Instance.

The Container Console gives a summary view of the health of the occsPlaypen instance in terms of Number of Deployments, Number of Hosts and Resource Pools. Within the OCCS Console, the colour green tells you that things are healthy, orange indicates that things are not as good as they could be, and red that you have a problem. When you have a lot of Docker containers having a single pane of glass to see overall system health at a glance is a bonus.
You will also notice that there are 3 Resource Pools (default, Development and Production) but only the default pool has a single host assigned to it. This was because I was limited to the number of available CPUs in my subscription. It should be noted that it is easy to scale up the number of worker node (hosts) and add the hosts to your Resource Pool of choice.

I chose Hosts from the left menu and can view the private and public IP addresses for the worker node host.
I copied the public_ip address as I will need this once I have deployed my application stack to OCCS to prove that it all worked.

From the left menu I chose Stacks – A Stack is a composition of services. OCCS uses docker compose definition format internally but provides an easy to use visual editor to construct your stack from available services.

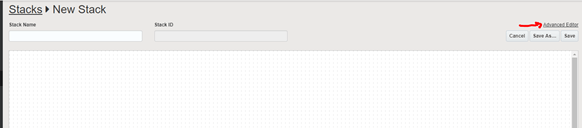
I wanted to create a new Stack for my two services as per my docker-compose.yml. In order To create a new stack, I clicked the New Stack button.

I could drag and drop services that I have in my OCCS environment onto the visual editor canvas in order to construct a stack, however as I had already created an occs_stack.yml file, I simply wanted to copy and paste the contents of the file into the Advanced Editor page.
Next I clicked the Advanced Editor link.
I copied and pasted the contents of my occs_stack.yml file and then clicked Done.
Note: The two services web ( my Node app) and mongo (the database tier).
Also the OCCS_PHASE_ID assigned to each service that indicates the priority order to service deployment and start up.

I then entered a name (MyMedRec) for my Stack.
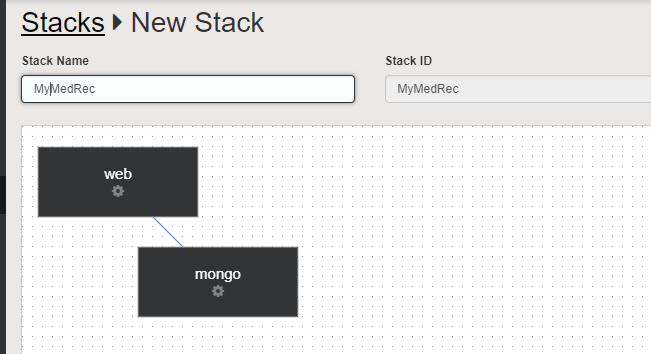
I clicked the Save button to save the MyMedRec Stack definition.

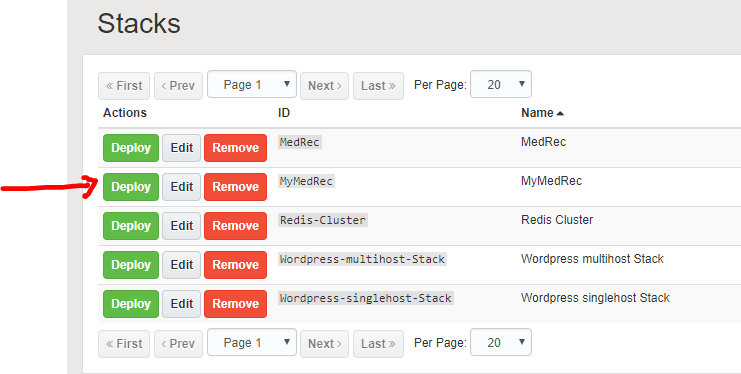
My new Stack (MyMedRec) now appears in the Stacks list.

My Stack is now ready to deploy to the Container Service.
Deploy the stack to OCCS managed container and test connectivity and application functionality
My occs-stack.yml file contained a reference to my application docker image on DockerHub, and also an implicit reference to MongoDB on Docker Hub. I first checked to make sure that I have a registry definition pointing to Docker Hub from within OCCS. Fortunately there is one provided out of the box, although for private repositories you will need the appropriate username / password entered..
To view the Registries that have been defined, click Registries in the left menu.

With my Docker Hub registry validated, I clicked Stacks and then Deploy to deploy the MyMedRec Stack.
In the Orchestration dialog window you can see the Drop-Down list of available Resource Pools. As my default Resource Pool has my solitary worker node allocated to it, then I will use this. You will notice also that the Orchestration is for both the Web (Node.js) and Database (MongoDB) services. I left the other settings as per the defaults, so that I would end up with 2 containers (one for web and the other for database) running on the same worker node.
I clicked the Deploy button.

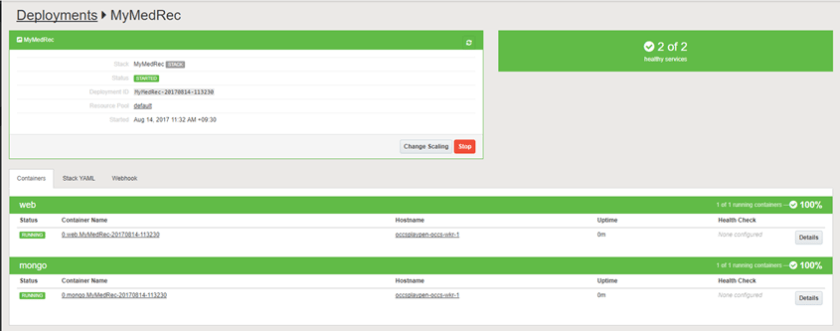
The Web and Database services that were defined in my MyMedRec Stack appear under the containers tab. As per my occs-stack.yml, the first container to start is the one for mongo (OCCS_PHASE_ID = 0). The Mongo image is pulled from docker hub. Once Mongo image has been pulled across the network into OCCS, it is started. The next thing I observed is the activity associated with the web application container. Again, this image is pulled from docker hub, and once it is successfully pulled across the network, the container is started.

As I previously stated, green means good in the OCCS Container Console. My two containers are now up and running.
The next thing to do is to prove that the application runs up and can connect / interact with the MongoDB instance. To do this, I simply pointed my Chrome browser to the external IP address of the OCCS worker node on port 3000. To get the Public IP address, you can simply click on Hosts, click the link to the worker node host of interest and click to show all IP addresses.
I did see that on occasions you may not see a public IP address. There is a known issue documented here, where a Worker Node Host’s Public IP Address No Longer Appears In Container Console. The published workaround worked and was pretty simple to implement.
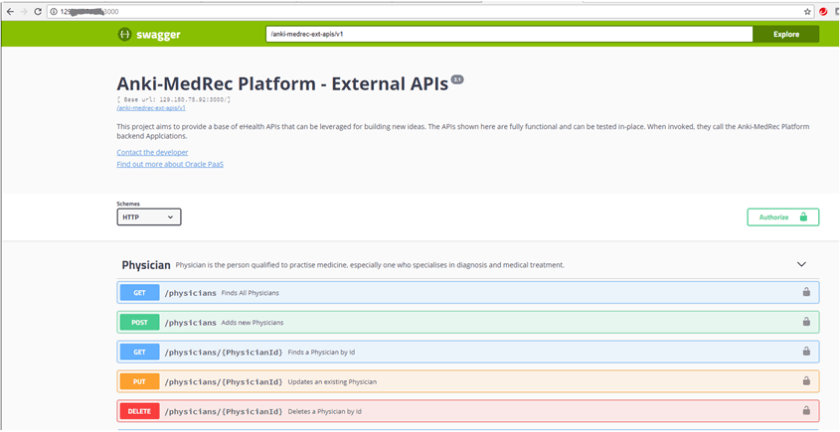
Click the blue GET button under Physicians
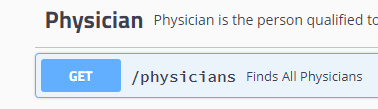
Click the Try It Out button

Click the blue Execute button

Note: The very first time you do this should result in an empty JSON collection for Physicians. My screenshot below shows that there was already data in my MongoDB from a previous interaction.

Now I tried ta POST operation, to make sure that I could add a new Physician. I clicked the green POST button.
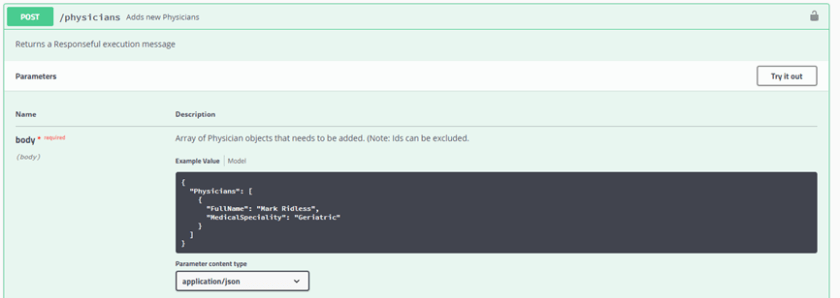
I click the Try It Out button.

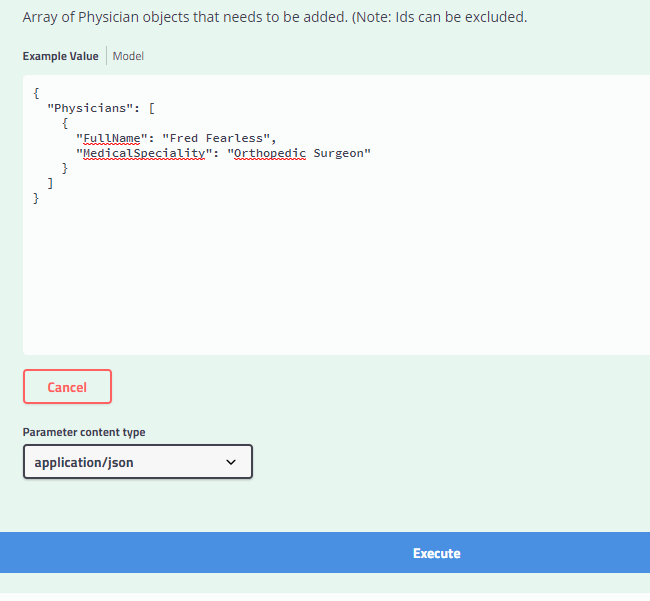
I then overwrite the example payload with my Physician data (Fred Fearless, Orthopedic Surgeon).
I click Execute.
In order to prove the data I entered had flowed through the API into the Mongo database, I then did another GET of Physician and confirmed that record I added showed up in the Physicians list.

Summary
For those who walked all the way through my jounrye, you will see that there are a lot of steps I had to work through in order to get my environment established. However, once you get the Git and Docker Hub accounts linked, as a developer you have a repeatable process. Personally I really like what Docker offers, and having the ability to trigger a build of a Docker image based on a code change within a Git Repository is really nice. Docker Hub provides a registry of available images to deploy (private / public), but you can either create your own Private Docker Registry or consume images from another Public Registry such as Oracle Container Registry.
In terms of where to from here I have a couple of things I would like to further explore with OCCS.
- You may have noticed that the last step in my process is manual. I initiate the pull of the latest image containing my updated app from Docker Hub. I would like to explore how automation of this step is achieved using WebHooks.
- Add front and back end load balancers into my OCCS Stack definition so that I can demonstrate independently scaling tiers and split the web and database containers onto separate hosts. Of course I would need access to an environment with a few more worker nodes to make this possible.
I hope this series of blog posts has been of some value to you.

One thought on “Exploring GitHub Docker Hub and OCCS Part 4”