In my early experiences with docker, I successfully containerised a few simple Node.js applications as per some of my older blog posts (refer Exploring GitHub, DockerHub and OCCS and the MedRec Hands -On Labs section). As is often the case in the modern IT landscape some software (eg OCCS) falls out of favour as more industry support rallies around new capabilities such as Kubernetes. Oracle has thrown its support behind Kubernetes and has brought to market a capability called Oracle Container Engine for Kubernetes (OKE). OKE can be described as, ” A developer friendly, container-native, and enterprise-ready managed Kubernetes service for running highly available clusters with the control, security, and predictable performance of Oracle’s Cloud Infrastructure.” A benefit of leveraging this capability is you don’t have to install, configure and patch the Kubernetes environment you leave that to Oracle which allows you to focus on using the Kubernetes capabilities to deploy and run your container native applications. Essentially, with OKE you get the latest Kubernetes updates which helps you remain compatible with the CNCF ecosystem without the management and administrative overhead. OKE is integrated with your Oracle Cloud Infrastructure tenancy, and the good news is that Oracle doesn’t charge for OKE, you simply pay for the infrastructure you use for worker nodes and any storage requirements that you need to support your containerised application deployments.
In addition to OKE, Oracle also provides a private registry known as Oracle Cloud Infrastructure Registry (OCIR) for your container images. OCIR is, “a highly available private container registry service for storing and sharing container images within the same regions as the deployments. An integrated, performant platform offering, where users can store their container images easily. Access to push and pull images with the Docker CLI, or images can be pulled directly into a Kubernetes deployment”. You can use Oracle Cloud Infrastructure Registry as a private Docker registry for internal use, pushing and pulling Docker images to and from the Registry using the Docker V2 API and the standard Docker command line interface (CLI). You can also use Oracle Cloud Infrastructure Registry as a public Docker registry, enabling any user with internet access and knowledge of the appropriate URL to pull images from public repositories in Oracle Cloud Infrastructure Registry. In each region that is enabled for your tenancy, you can create up to 500 repositories in Oracle Cloud Infrastructure Registry. Each repository can hold up to 500 images. In this post I have recorded the steps to interact with OCIR.
One of my colleagues previously setup a Docker registry on Oracle Cloud Infrastructure-Classic and at the time I remember I was glad he was doing it as it seemed a cumbersome task to do. As an application developer I really don’t want to care about installing, configuring and managing registry services I simply want to use them. Of course there are capabilities available to me out there on the internet such as docker.io (Docker Hub) where I could choose to make my docker images private or public but there are times where I may want a private registry within my Cloud tenancy. In this brief post I want to share my first experience with the Oracle Cloud Infrastructure Registry and provide a worked example for anyone interested to follow.
Those who have used Docker would know that in order to build a docker image you have the choice of starting the process FROM SCRATCH or by getting a head start by utilising a suitable already built base image. In other words, you can choose to quickly and easily take advantage of what someone else has already developed and use that as your starting point. In practical terms, this might mean that you are using an image that someone else has developed and shared using docker hub (docker.io). The image might for example provide an operating system at a version (eg Ubuntu 14), and with Node.js of a particular version already installed. Simplistically, taking this approach allows you to focus purely on adding your application on top of this base image.
The base images that I have referred to, are commonly pulled from an image registry (by default the registry used is docker.io ). Once you have added steps into your Dockerfile in order to ADD / COPY your application code into the image, essentially extending the base image, the newly built image containing your application will be available within your local docker image registry. However, you may want to share that image with others and to do that you will need to publish (push) your image to a Docker Registry. Once the image has been pushed to a registry then others (with access) can pull it from there using the docker pull command.
The following steps cover what I did in order to utilise the private registry capability in the Oracle Cloud known as OCIR. The Oracle OCIR documentation walks through the steps, all I have done is to overlay my actual example. It is assumed you have access to Oracle Could Infrastructure tenancy and are in a group that has permissions / suitable access policy to interact with OCIR.
Step 1 – Get an Authentication token
As per Oracle documentation, in order to push / pull to / from the registry you need to create an OAuth token, simply click on the Avatar in top right and select User Settings.
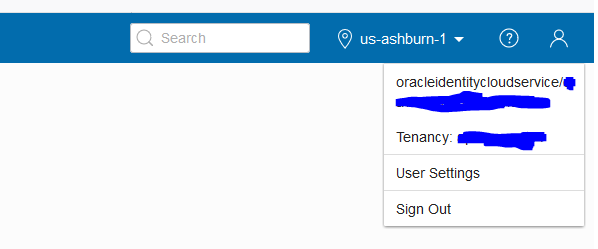
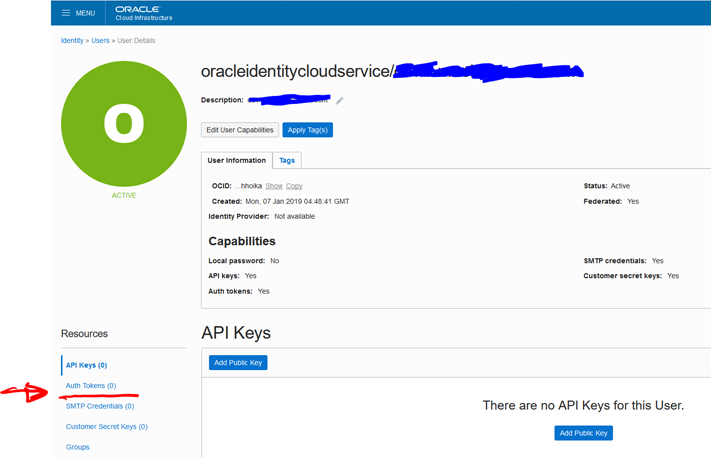
Assuming you don’t already have an Authentication Token created, click the Auth Tokens link. In the following screenshot your username is shown (mine is obfuscated). If you have a federated identity tying you back to Oracle Identity Cloud Service then you will see a prefix of oracleidentitycloudservice/your_username. This is important to note as the format of your connection string to OCIR will vary slightly.
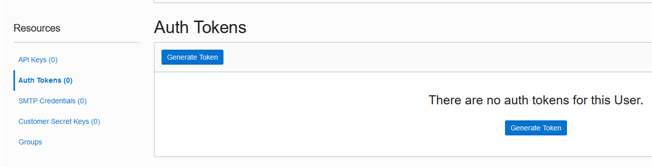
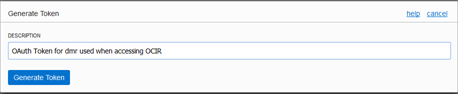
Click the button to Generate Token.
Enter a description for the token and press the button to Generate Token.
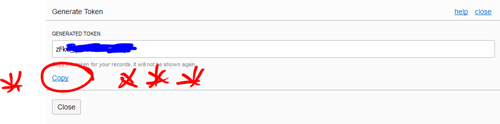
Important Note : When you press Generate Token – the Auth token will be displayed. You must copy it and store it somewhere secure eg a password wallet as you won’t see it again but you will definitely need it.
You should see that you now have a token listed in your Auth tokens however if you click the show link as per below screenshot it will only display the Oracle Cloud ID (OCID) for your user and not the actual generated Token as per previous screenshot.
It is the Auth token that you will use as the password value when connecting to the OCIR.

Step 2 – Access the OCIR service
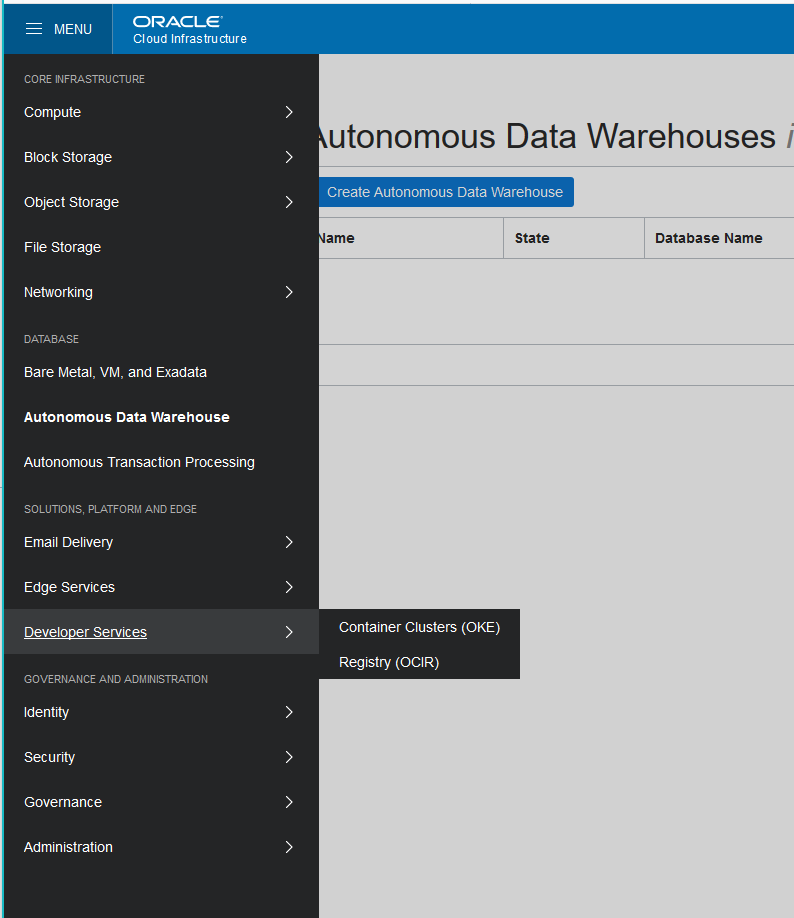
In the OCI Console, click the hamburger menu in the top left and then select Developer Services –> Registry.
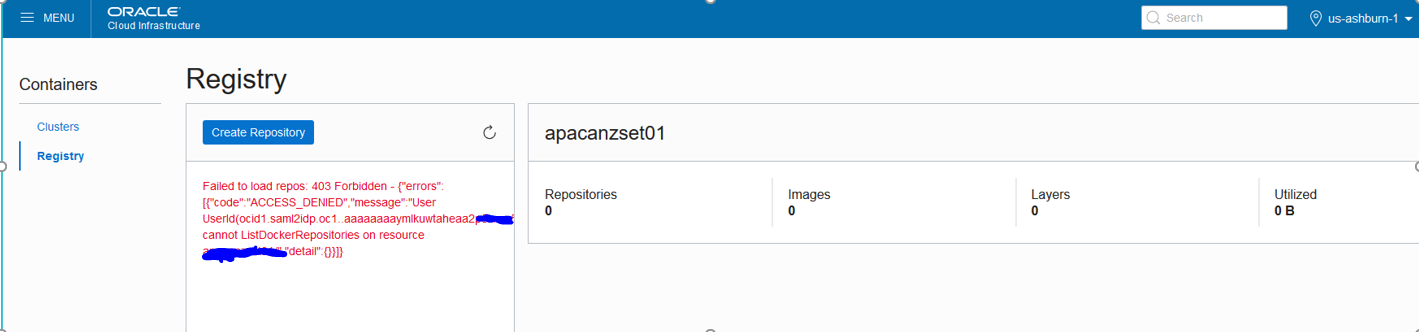
Note: if you see the following error it is because you don’t have privileges.
Once you have required access privileges to the registry you can optionally create a repository using the Registry Console UI, you simply click the Create Repository button, enter a name and then create a Readme to describe the purpose of the repository if you want.
However it is possible to create the repository from the docker cli which is covered in the next step of the blog post.
Step 3 – Login to the Registry using the Docker CLI
In order to login to the registry, you need to know which region your OCIR instance resides. There is a list of Region Codes for OCIR from which you will need to find the one that matches your OCIR location.
For the Ashburn US region, the code is iad and therefore the registry I had to login into was iad.ocir.io .
In my ssh session I entered
docker login iad.ocir.io

Now enter your username and use your Auth token as the password (remember you have this stored in a safe place – right !)
Note: If your tenancy is federated with Oracle Identity Cloud Service, use the format <tenancy-name>/oracleidentitycloudservice/<username> otherwise you enter your username in the format <tenancy_name>/<username>.
Assuming a tenancy name of mytenancy-dev and a user of mickey.mouse@movies.com then you would use … mytenancy-dev/oracleidentitycloudservice/mickey.mouse@movies.com otherwise you would use mytenancy-dev/mickey.mouse@movies.com.
As mentioned previously you will see your Username under User Settings (or it is also shown if you have any created repositories) and work out if you user has been federated with Oracle Identity Cloud Service if you are unsure.
In order to view my local docker images I entered
docker images

I then tagged my image of choice (apisforsapol) to associate it with the OCIR Registry in the iad region. To do this I used the following command;
docker tag apisforsapol:0.1 iad.ocir.io/mytenancy-dev/apisforsapol:0.1

To see what has happened I entered the following
docker images
Note that I have two repository references to the same image ID, one for my local (internal) docker repos and the other to OCIR.

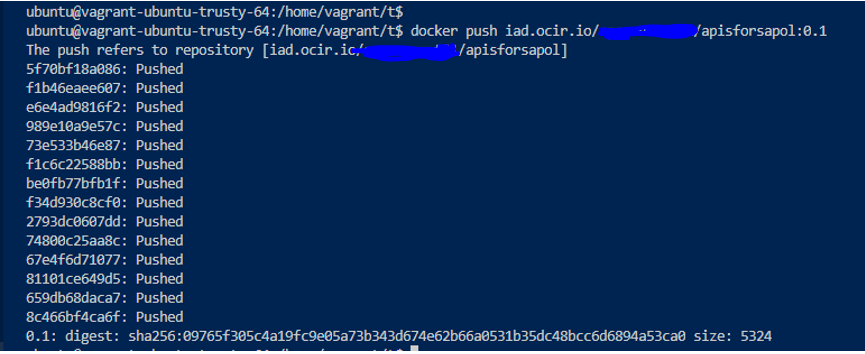
As I am logged into the docker registry, I can simply now push my image to it using the following command.
docker push iad.ocir.io/mytenancy-dev/apisforsapol:0.1
Note: if you have an old version of docker installed you will see a message like below. To address the error you will need to upgrade your docker version to a more recent version eg docker-ce.

If you have a suitable version of docker installed , then the push should just work as per screenshot below.
Step 4 – Verify Image Push into your OCIR repository
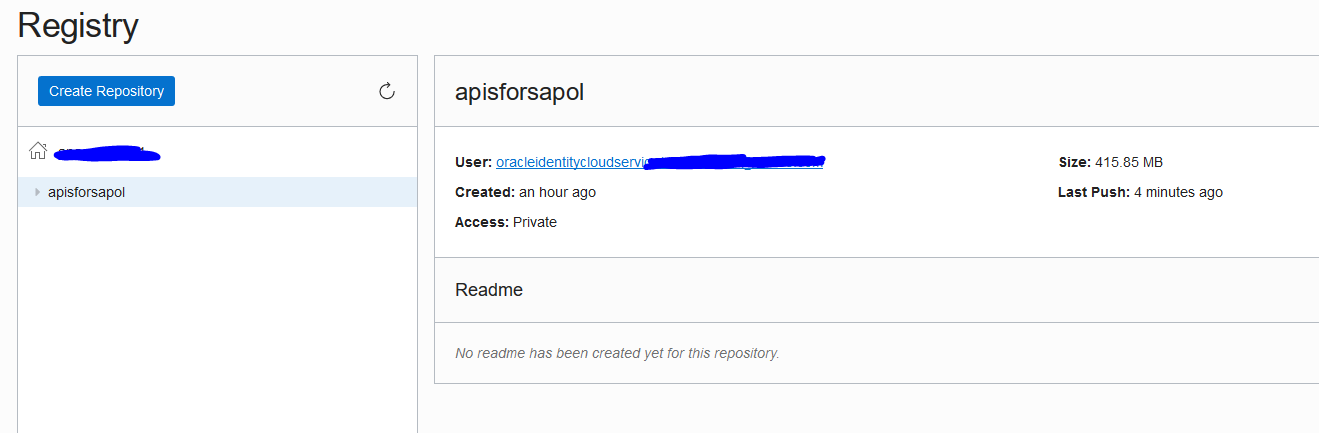
Navigate back to the OCI Console and access the OCIR page. You should now see that you have a repository created.
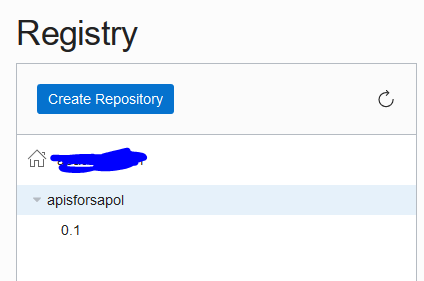
If you click on the repository you will see the current tag of your image. In my case 0.1
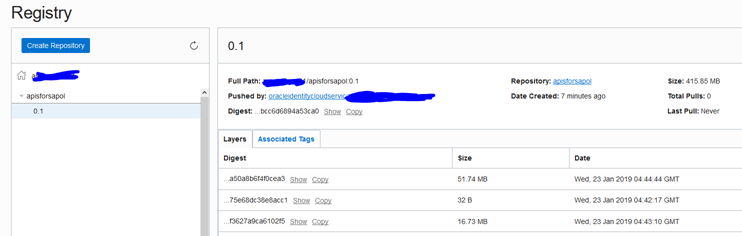
If you now click on the tag you will see the layers that have been pushed across for your image.
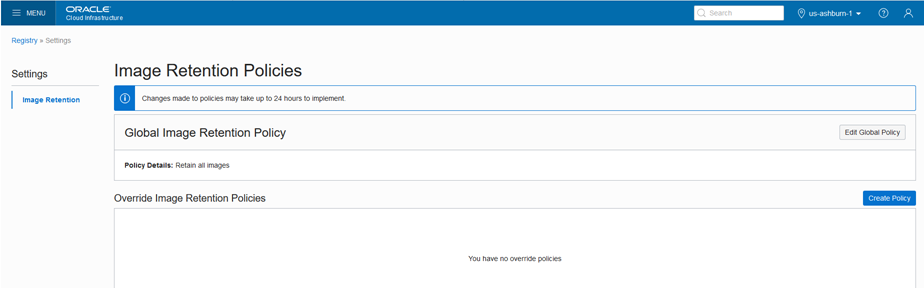
Finally, under the Registry, Settings you can see where you can setup your custom image retention policies, assuming you are not happy with the global image retention polcies.
That brings me to the end of this post. My planned next step will be to reference my image held in OCIR from my deployment configuration on Oracle Container Engine for Kubernetes. I hope you found this helpful.