
In this blog, I am going to show you how to use the API gateway from the Oracle API Platform, to secure the access to backend Applications. These internal applications might already be exposing REST APIs, but given these are internal APIs, being exposed by backend applications themselves, we simply don’t want to directly expose them into the public Internet.
There are many reasons for this, for example, the backend application might not have the right ability to fully secure its APIs for external use, nor to have the right ability to control access authorisation, throttle requests, apply different policies, validate custom headers, apply API-KEYs, run analytics, etc. Normally only an API Gateway can do all these different things.
I can think of the 3 most common ways to securely get access to backend applications behind a corporate firewall.
- Using secured APIs exposed externally
- Connecting through a secured VPN tunnel
- Using a messaging pattern, like with the Oracle Integration Cloud Service Agents deployed locally and then gathering access externally via Integration Cloud Service console or APIs
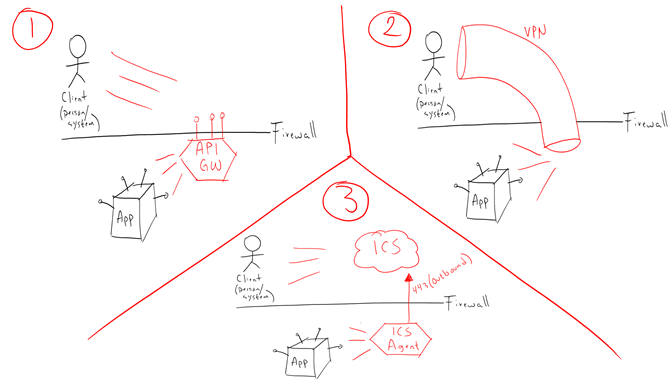
In this blog, we are going to explore option number 1.
Let’s test our internal/system API first
First, we need to decide what specific application we need to expose as external REST APIs. In my case, I have a Notification Application that I built using NodeJS. It gives me the ability to send notifications via different channels, including SMS and Voice calls. However, the backend application could be a big enterprise application, such as EBS, JDE, SAP, legacy applications, etc.
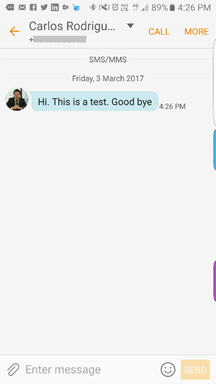
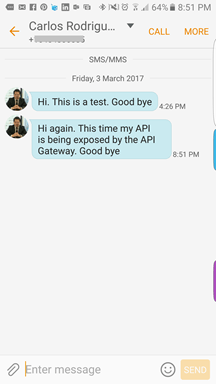
My Notification Application exposes multiple REST APIs, but as I said previously, the application itself wasn’t designed to fully protect the APIs for public access, but just for internal usage. For example, one of the internal APIs from my Notification Application is in the following form:
- URI: [local_server]:3005/sms
- Method:
POST -
Body:
{“to”:”+615550505″,
“msg”:”Hi. This is a test. Good bye”}
When I run it locally within my LAN, the API works perfectly and I get the SMS message…
Building your external API
Ok, let’s expose this internal API to the public internet in a way that it is fully secured with Oracle API Platform.
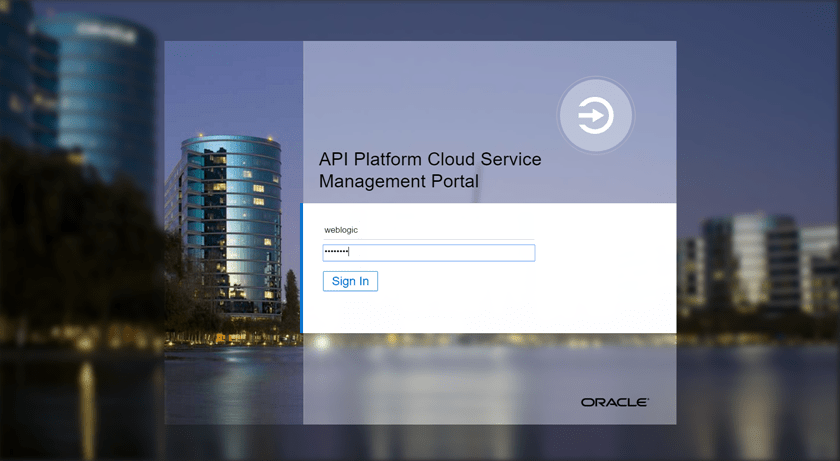
- Login to the API Platform console as an API Admin
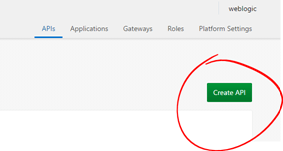
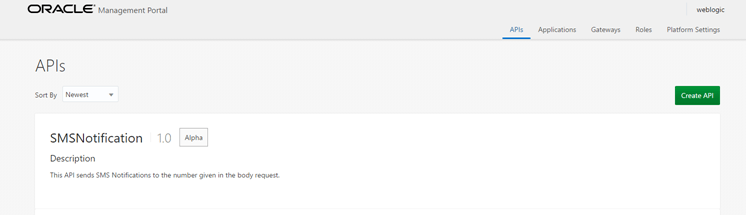
- Once logged in, click on Create API.
- Give it a good name, version and description

- Your API will be shown, click on it to configure it
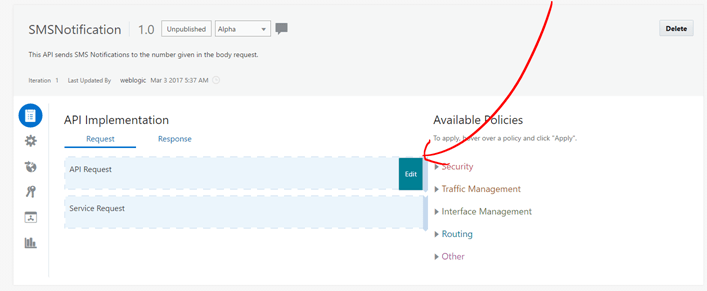
- Mouse over API Request and click Edit.
- Enter Comments if you want, then click Next.
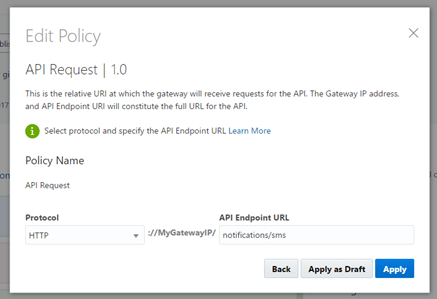
- Define the Protocol that you want to use to publish your API and then define the REST API URI that you wish to expose. Then click Apply.
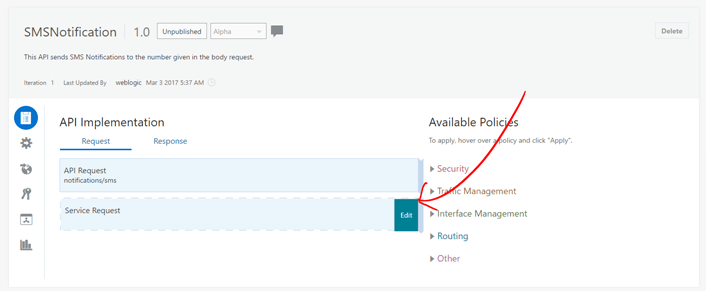
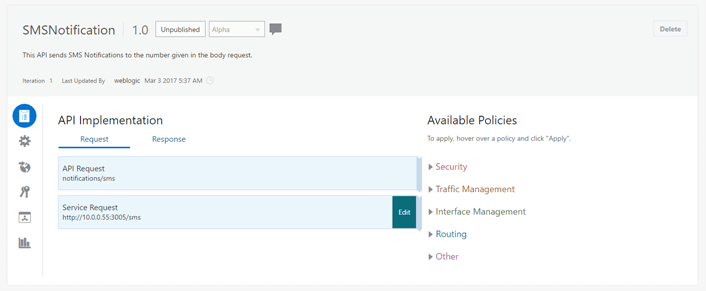
- Now, it is time to point to our internal API. Mouse over Service Request and click Edit.
- Enter Comments if you want and then click Next.
- Enter the Backend Service URL
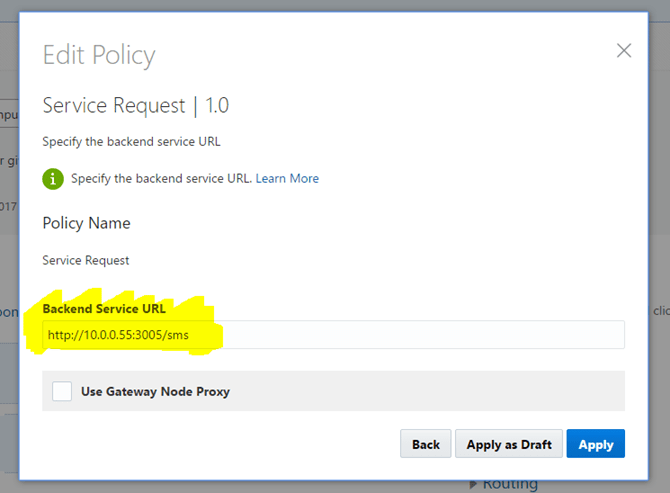
Notice that I entered an internal IP Address here… Why is that? Aren’t we working from the Oracle Public Cloud?
Well,
this is a fundamental principle of the Oracle API Platform that is important to discuss…
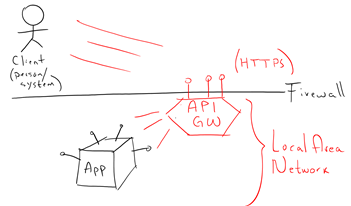
Although Oracle API Platform is managed from the Oracle Public Cloud, API Platform comes with an API Gateway that can be installed either in the Cloud (Oracle or others), as well as on-premise, inside a corporate firewall. That way, the Gateway can have access to internal Applications running on internal IP Addresses, because it is running locally near them. Once the API Gateway is running and discovered from the API Platform (Public Cloud), we can then simply push the APIs that we create externally into the API Gateways and voila, the APIs will be local to the actual backend applications!
This is a great design, because that way, the firewall can be kept completely closed for non-secured ports and just allow HTTPS traffic to the API Gateway, which has the big muscles to provide strong security, IP validation, authentication, authorisation, API throttling, Header or Body content validation, etc.
- Your API should looks like this:
-
We don’t have to do anything on the response, so for now let’s push this API into the API Gateway running inside my firewall.
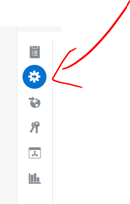
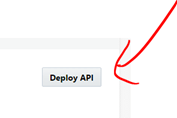
For this, click on the Deployments icon (as shown below) and then Deploy API.
- Tick the box for the API Gateway that you want to use to deploy your API. In this case I only have one API Gateway deployed (Production Gateway) and then click on Deploy
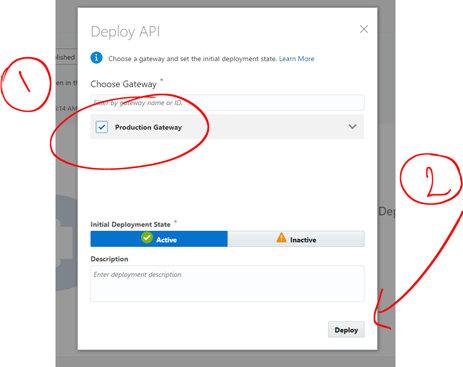
- Wait for the API to be deployed. In a few seconds, it will go from Status “Waiting” to “Deployed”.
-
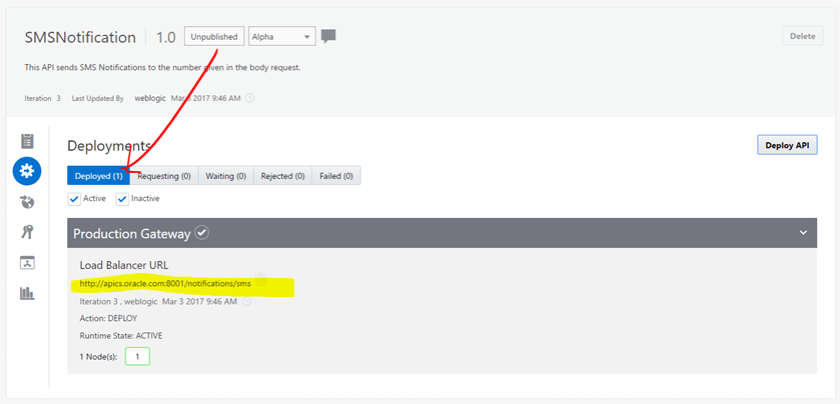
Ok, the API is deployed into the API Gateway and running on http://apics.oracle.com:8001/notifications/sms
Let’s invoke this API. For this, I am using Postman:
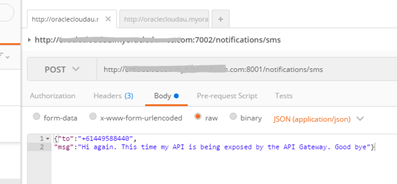
And it’s not a surprise that it works perfectly!
That’s great, now we can access our internal API externally via the API Gateway. Now the next step is to add some security.
Adding Header and Key Validation
In the API Platform, we can apply complex Security, Traffic Management, Interface Management, Scripting logic, etc.
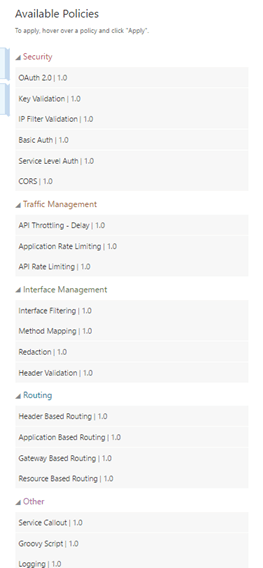
For now, let’s just add header and Key validation.
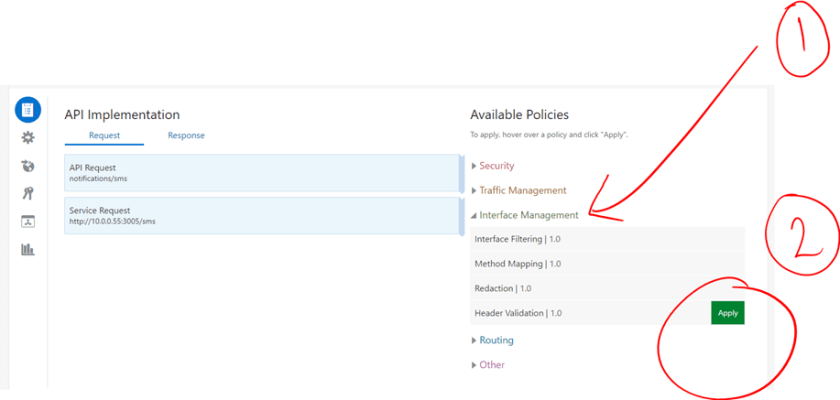
Adding Header Validation
- In the right Policy Menu, expand Interface Management and Mouse over Header Validation and click on the green Apply button
- Enter some comments if you want. Then click Next.
-
Let’s create a custom Header with a REJECT validation.
Let’s say: REJECT when header SHOULD_WORK != true
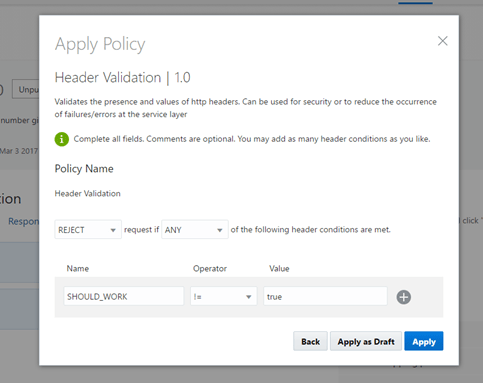
- Click Apply when ready.
Adding Key Validation
Now, let’s add Key Validation. This is a policy that I personally like, because it allows API developers to create their own Applications that come associated with an Application Key ID that will come in the Headers of the API Request. This way, we can now exactly which Application is using our APIs.
- Expand Security and mouse over Key Validation. Click on the green Apply button.
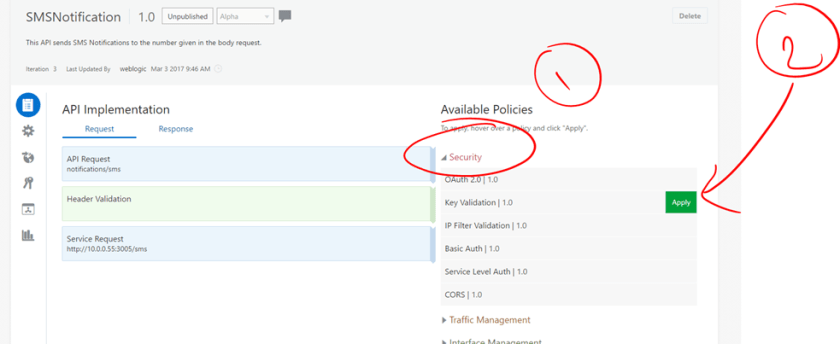
- Add comments if you want to. Then click Next.
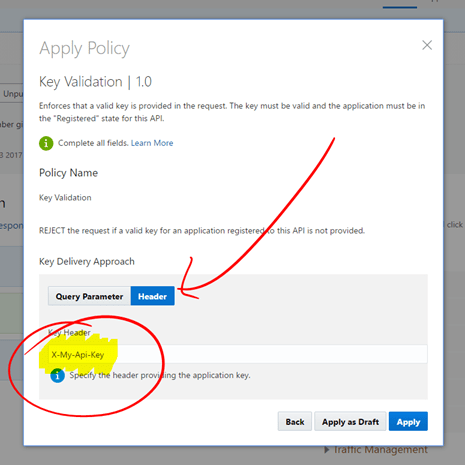
- Click on Header and enter the name of the Key Header. In my case I decided to call it X-My-Api-Key. When ready click Apply.
- The API looks like this so far:
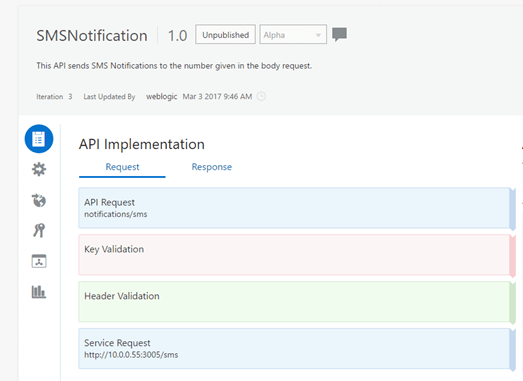
-
Re-deploy your API.
- Ok, so far we created a Header for Key Validation, but we still have not created any Application. Let’s create one as an API Developer.
- For this, we have to publish the API to be Developers Portal. Click on the Publication icon and enter a name for the URI of your API to be published to.
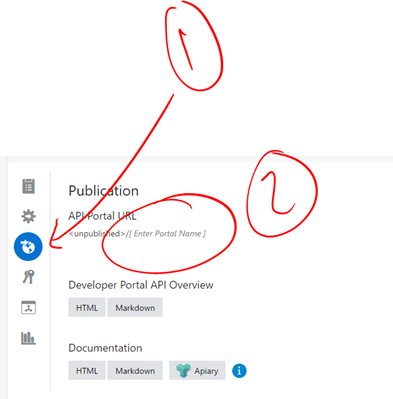
- It will look like this:
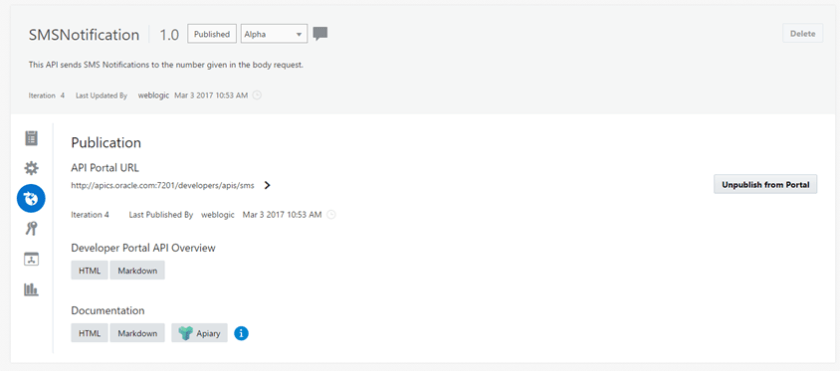
-
Click Save Changes and then click on Public to Portal.
Creating a new Application and subscribing to our API
So far, we have been using the API Platform console. Now it’s time to use the API Developers console.
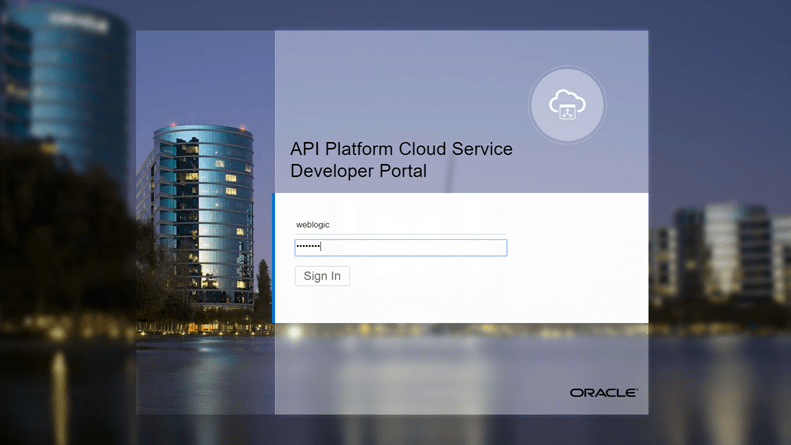
- Open a new tab in the browse rand go to the API Platform Developers console and log in as an API Developer.
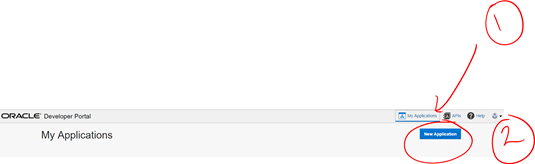
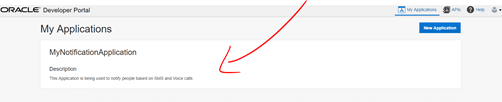
- Click on My Applications and then New Application.
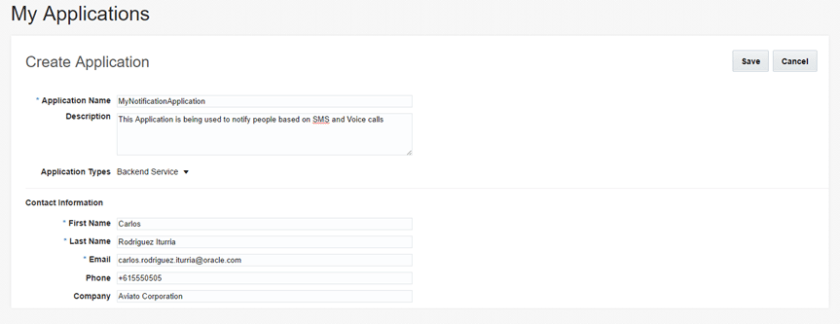
- Enter some information and click Save.
- Now click on your new API Application
- Notice that our Application issued a new Application Key. This is the one that we are going to use to call our API and with this associate our calls to this Application.
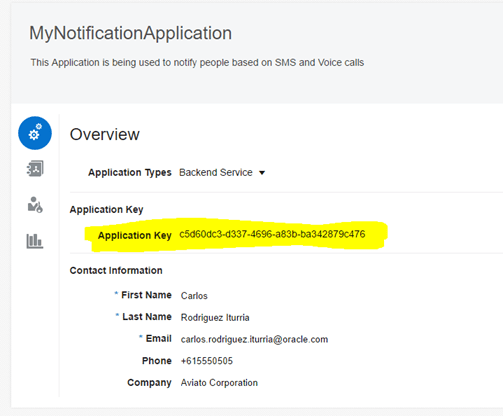
-
Copy this Key, as it is the one that you will have to provide as part of your API Requests from now on.
Also, notice that you can re-issue a new Key at any time. This is convenient if you notice an abuse in requests at some point and decide to block existing users and provide real users with a new key
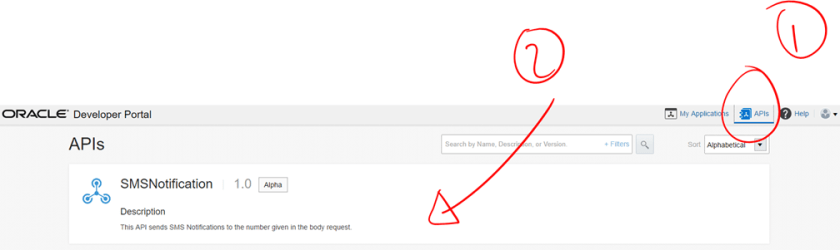
- Ok, now, click at the top right of the page on the APIs link.
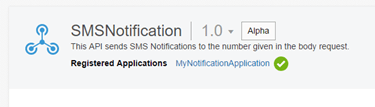
- Your SMSNotification API will appear. Click on it
- Click Register and tick on the box with the Application that we created previously and click on Register API.
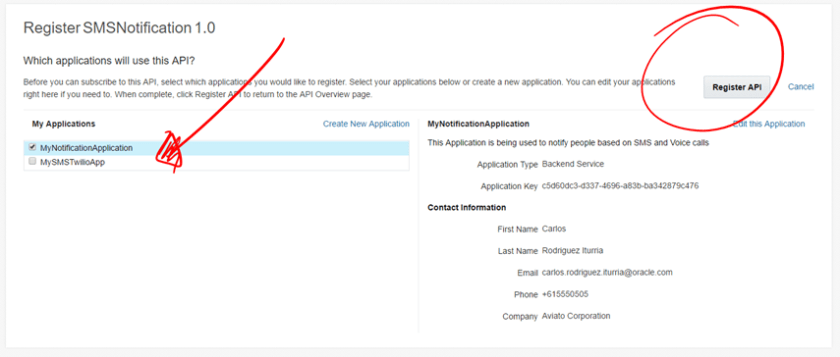
- That’s it, now your API is registered for your Application.
-
Great, let’s just re-run tour test again.
You will notice that this time, the test request will fail with a 401 Unauthorized error.
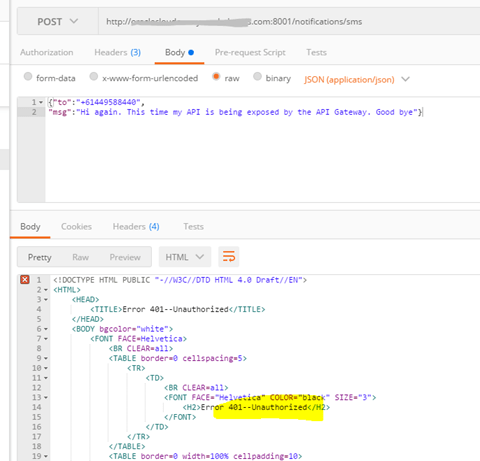
- This is expected, because now we need to comply with the two policies that we applied: Header and Key Validation.
-
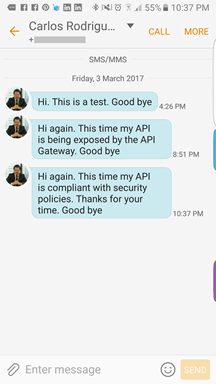
Add two new headers as part of the API request and try the request again.
- Add the custom header that we defined previously
- Add the Application Key

- This time, it works, as now we are compliant with the required polices!
I hope this blog was useful to see how the Oracle API Platform, with its versatile API Gateway, can be used across Public Clouds and inside corporate datacentres to simplify access to backend applications via Secured REST APIs.
If you have any question about this blog, do not hesitate to contact me directly.
Thanks for your time.

Thank you for a good comparison. Your advice helped me a lot.
LikeLike