
The first part of this series explored how to setup a connection between Oracle Integration Cloud (OIC) and OCI Object Storage, and how to use Object Storage as a location to write files as part of an integration.
In this blog I will show you how to use Oracle Integration Cloud to consume objects from OCI Object Storage, including listing, reading and deleting those objects. To do this I have prepared an integration which showcases a common integration pattern; consuming a staged file in order to load data into an enterprise system. In this case, the integration will load financial data from Object Storage into Oracle’s ERP Cloud application. Specifically, this integration will:
- List Account Payable (AP) Invoice files available on OCI Object Storage
- For each source file that it finds in the cloud bucket, it will:
- Read & transform the file to the format required by Oracle ERP Cloud
- Upload the transformed file to ERP Cloud and trigger the required Import jobs in the application
- Delete the now processed file from the OCI Object Storage bucket
If the above flow seems familiar to you this is likely because you have come across requirements to integrate with ERP Cloud before and have used one of the File Based Data Import (FBDI) jobs to load data from a file into the application. Most FBDI import patterns utilize a FTP/SFTP server to host the transient files prior to upload in ERP Cloud. In this blog we are mimicking this pattern and simply are replacing the file storage method with OCI Object Storage. I touched upon a number of reasons you would want to do this in the first blog in this series, but the primary one is that it significantly reduces operational overhead by utilising the fully managed object storage mechanism provided by Oracle, rather than requiring you to run and manage your own FTP server. While fully managed FTP servers are available, Object Storage offerings are typically very inexpensive in comparison, and in this scenario, there is no need for the additional features that FTP services often provide.
So without further delay, let’s step through this integration flow which will provide us with the opportunity to discuss the remaining operations that we can perform against OCI Object Storage:
Integration Flow:

As can be seen from the above integration flow, this is a scheduled based integration that will run periodically, selecting all available files to process. Usually most customers would run the AP invoice process daily, however if you have more frequent requirements than you could either define a shorter interval between execution cycles in your scheduler or you could implement a near-real-time option by triggering the above flow on the arrival of a file. This latter approach, can be achieved by using Oracle’s OCI Event and Function / Notification service to notify Oracle Integration Cloud whenever a new file has been created or updated in a cloud bucket. I intend to cover this in a a separate blog at a later stage.
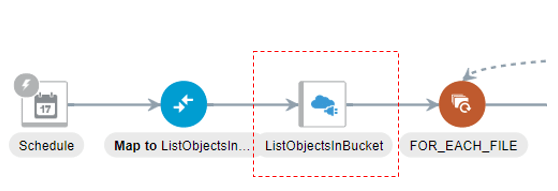
In the ListFiles step I am listing all files that reside in a specific Object Storage bucket.
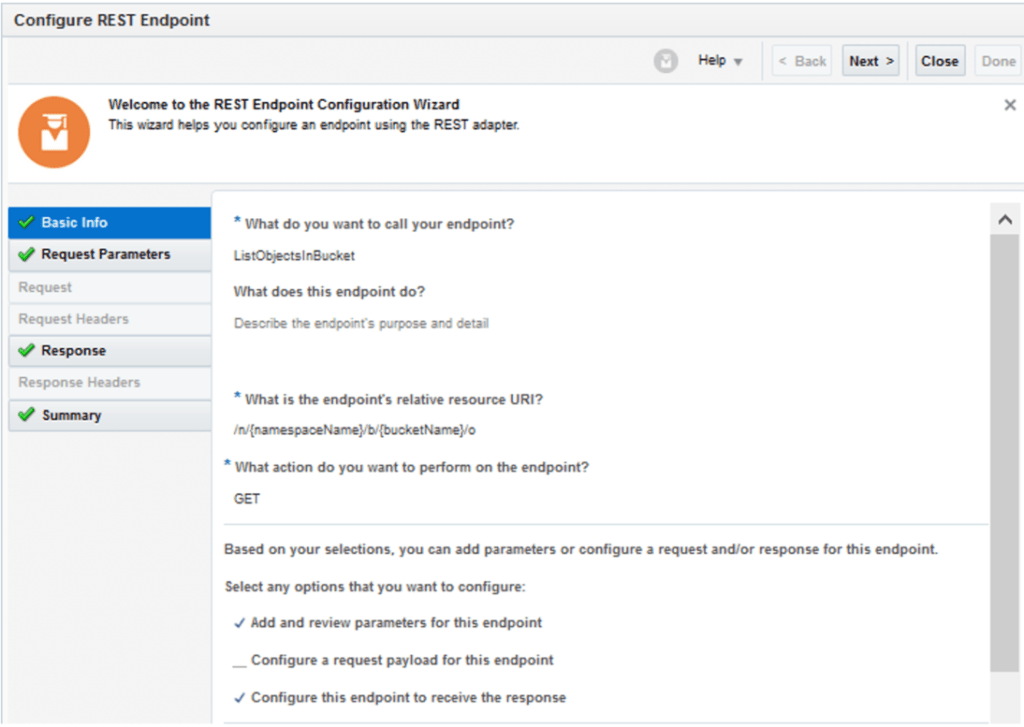
To perform the ListFiles action, we need to leverage the ListObjects operation of the Object Storage API defined here.
For details on establishing an OCI connection to OCI Object Storage, please refer to part 1 of this series.
This operation uses the GET method to query a specific bucket for all objects. There is no request body that needs to be passed and this is reflected in my configuration below. Notice however that I have defined my relative URI as /n/{namespacename}/b/{bucketName}/o . Note also that we are configuring this endpoint to receive a response:
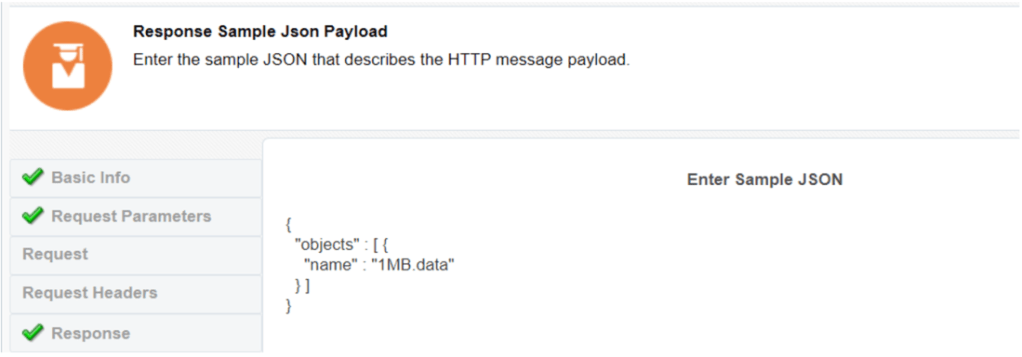
For the response body I have used the following sample JSON payload which is provided in the OCI documentation:
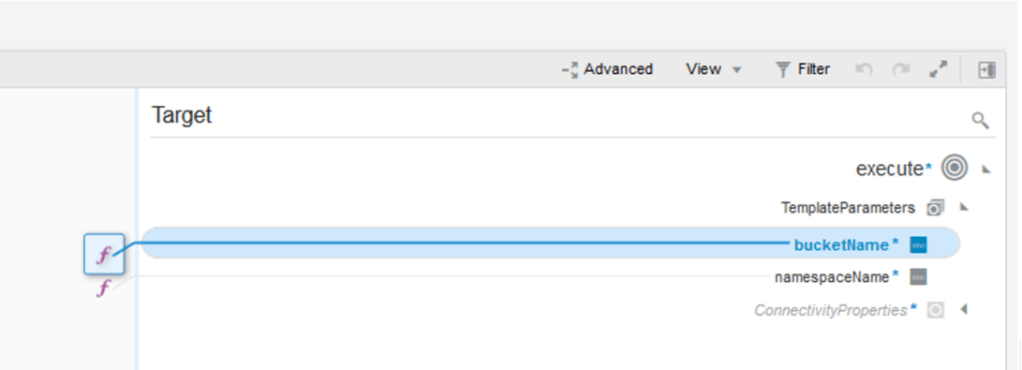
In the auto generated mapper for the ListObjects step I have chosen to use static values for my bucket and namespace name which I am sourcing from an OIC lookup:
If you are unsure what values you should enter for the bucket or namespace name, please have a quick look at part 1 of this blog series.
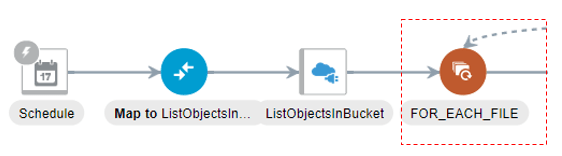
The for-each loop in my flow ensures that we are able to process multiple objects from a bucket in a single integration run.
Here we are simply using the repeating element “objects” returned by the ListObjects REST API call to loop through each file that we need to process

Note if you need to perform any filtering (process only files with a certain extension or prefix) you can do so by adding an additional step (e.g. switch activity) before the for-each loop or leverage the query parameters of the ListObjects API.
Now that we are in the for-each object loop we can perform our GET object call.

You can find the specific API documentation for this operation here. This operation is very similar to the List Objects call that we made previously, the difference here is that we are now passing the specific objectName in the GET request as an additional parameter (relative URI set as /n/{namespacename}/b/{bucketName}/o{objectName}). Note that here we also want to configure this endpoint to receive a response:

In the response details page, we need to define the payload format as binary and the media type as application/octet-stream:

With the GET Object REST connection defined, we need to map the template parameters (bucketName, namespaceName & objectName). You can see my mapping below, the one thing worth noting here is that you will need to source your object name form the current for-each object loop element:

The subsequent set of steps are responsible for:

- Reading the object storage file
- For each record:
- Transforming the source file to the format required by Oracle ERP Cloud and creating a temporary AP Header & Line File
- Creating a property file that will be used to drive the parameters for the AP Invoice import in ERP Cloud
- Zipping the produced files (AP Header & Line & property file)
- Invoking ERP Cloud and triggering the Import Payables Invoices ESS jobs (behind the scene this will upload the zip file to UCM/WCC within ERP Cloud, extract the zip files, read the property file, trigger the import job to the interface tables and finally trigger the import and validation steps into the application core tables).
As these steps are not related to our current topic I will not go through them in any more detail.

The one thing that I did want to mention is that in the read file step above, you can simply refer to the stream reference returned by the GetObject REST API call:
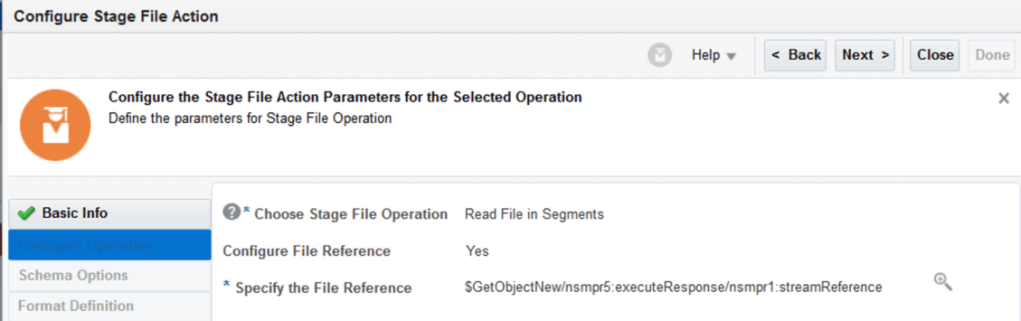
Note also that in this step you will need to define the schema of your source file.

Now that we have triggered ERP Cloud and passed our payload to it, we can remove the source file from Object Storage.
In a real customer implementation, I would not do this step in this flow as the correct place for it is the ERP Callback integration. However to keep things simple I have added it at the end of my flow after triggering ERP Cloud.
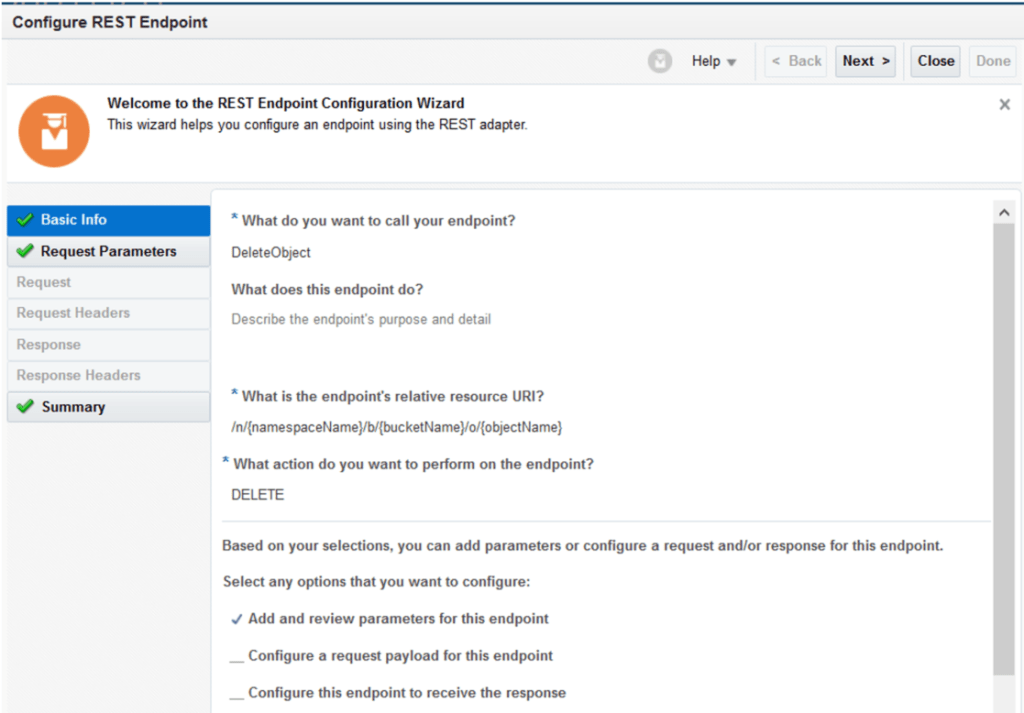
You can find the OCI DeleteObject operation documentation here.
The request uses the exact same template parameters to identify the namespace, bucket, and object (/n/{namespacename}/b/{bucketName}/o{objectName}) as the GetObject operation with the notable exception that the method is now DELETE. The request or response for this API carries no body and you can see this reflected in my configuration below:
The template parameters mapping is defined below but essentially it is the same as the one that we performed for the GetObject operation:

With all of these defined, I am able to activate my integration and am ready to test.
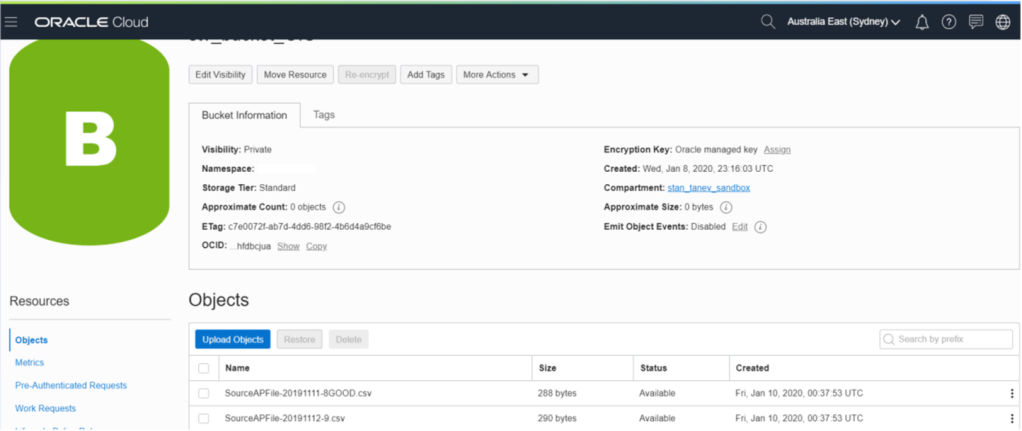
First I have placed a couple of source system based AP invoice files in my Object Storage Bucket:
I have then kicked off my schedule based integration:

… and after a few minutes, the integration has completed:

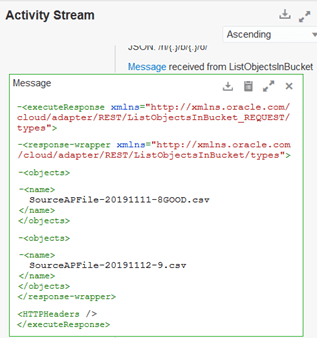
And in the activity stream we can see that the ListObjects command is working as expected and has picked up both of the files that we loaded to object storage:
The GetObject request and response also match my expectations (only file 1 shown):

As does the DeleteObject operation (only file 1 shown here):

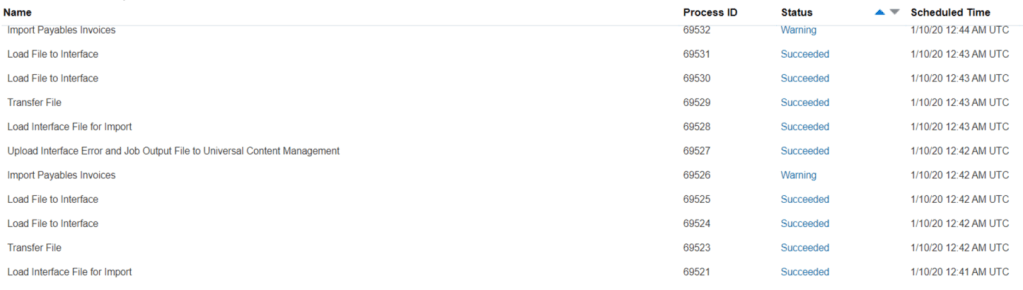
A quick check of ERP Cloud, shows that two import Payables Invoices jobs have been triggered (one for each file):
And finally we can see that the objects have been deleted from my OCI bucket:

Before we wrap up, a quick note on exception handling. Notice that i have defined a Scope activity within my for each file loop that lets me handle any file related errors. This ensures that a problem with one file does not impact any subsequent files that OIC needs to process.
As for my implementation, i am performing the following activities for a file in error:
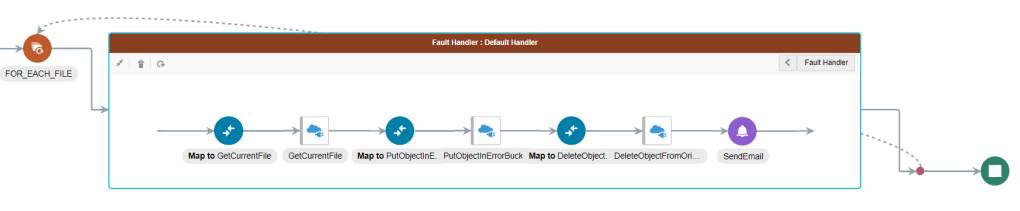
- Get the current file again (this step is required because the fault handler in the for each loop only carries the current file name and not the stream reference which we need for the next step)
- Create the file in an separate bucket (a bucket containing error files only). This ensures two things;
- firstly we isolate files with errors from future runs
- secondly, we preserve the original file for analysis & for re-processing
- Delete the file from the original bucket. We do this to ensure that the error’ed file is not re-processed by OIC until we have identified and corrected the issue.
- Send an Email Alert, notifying key stakeholders that a file has failed to process. This email should contain the file, bucket name and any associated errors (fault codes & messages)
With the above steps in place, if a file is received that contains unexpected data / or data that is non-conformant to the agreed structure, or it carries a different extension, OIC will isolate the file (move it to an error bucket), notify required stakeholders and continue processing other files.
I hope this series of blogs have demonstrated how you can use Oracle Integration Cloud to interact with OCI Object Storage. Furthermore i hope that after reading these blogs, you have the confidence to use OCI Object Storage as a viable alternative to a traditional FTP server in some of your integration use cases.
Thanks for reading and I hope you have enjoyed this blog … until next time

6 thoughts on “Object Storage with Oracle Integration Cloud – Part 2”