
In my previous article, Securing Applications with Multi Factor Authentication I discussed how to roll out basic MFA. While this is great if your requirements are very straightforward, there are times when you’ll need a more sophisticated approach. One of the most common examples that I get asked about is how to challenge users for Multi Factor Authentication only when they are connecting remotely from home or when traveling.
In this article I use an example where the business requirement is to enforce MFA for people in the Customer Relations department who are accessing protected applications when they are not on the corporate network. I’ll explain how to configure policies and rules that allow users connected to the corporate network to login with just their User ID and Password, while users connected remotely will need to use Multi Factor Authentication to access protected applications.
Before we configure the policies, there are some simple things to setup first in Oracle Identity Cloud:
- Create a group called Customer Relations
- Add an application and add the Customer Relations Group. This application will ultimately be protected by MFA when users connect remotely
- Create a user and add the Customer Relations group to the user
- Download the Oracle Mobile Authenticator App to your smartphone
The next step is to configure the Multi Factor Authentication Settings under the Security Tab as shown in the screenshot below. I have enabled Mobile App OTP, Mobile App Notification and Bypass Code. I have also unchecked the Enable Trusted Computer checkbox to make it easier to test my configuration. You can re-enable the Trusted Computer feature once you’re happy with the configuration.

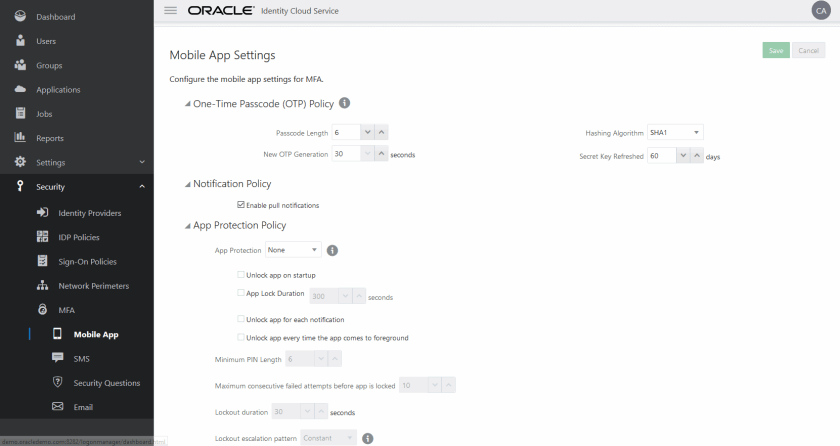
Next, you need to configure the Mobile App settings under the MFA Tab. Ensure that you have checked the Enable pull notifications checkbox.
Now it’s time to define your corporate network by adding at least one Network Perimiter (again, this is under the Security Tab). Enter the exact IP address or IP addresses, IP range, or masked IP address range for the network perimeter. The network structure in my home office is flat so I only need to add one masked IP range which I have called Office Network.
 Tip: It’s important to remember that the IP Ranges must be the public addresses, not the internal IP Addresses allocated to your computers on the corporate network.

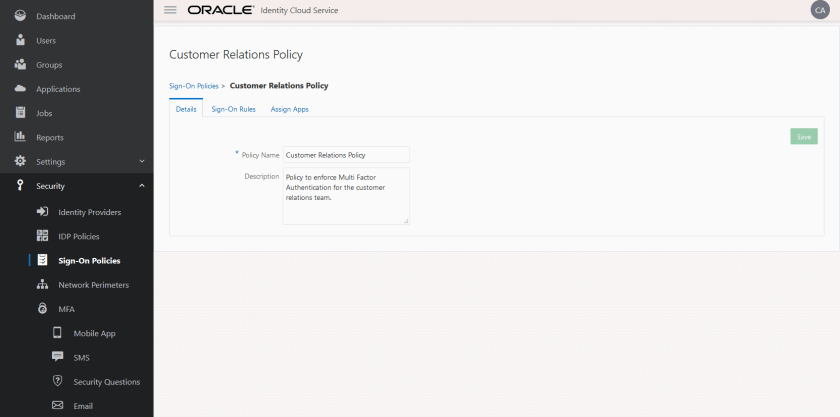
It’s time to define the Sign-On Policy (again, this is under the Security Tab) as shown in the screenshot below. I have called the policy Customer Relations Policy.
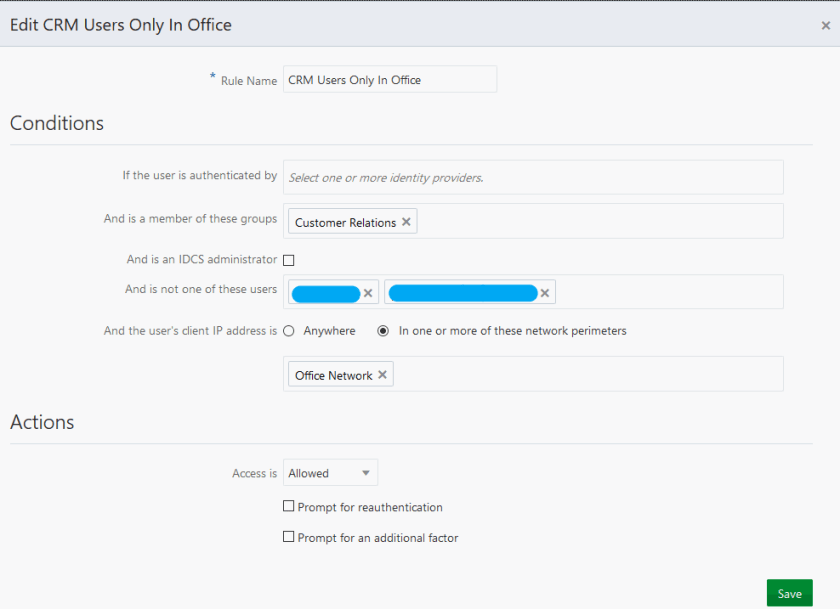
Click on the Sign-On Rules tab and add the first of two rules. This rule allows users from the Office Network to sign on to applications with just their User ID and Password. Make sure that you add the Customer Relations group then check the radio button: In one or more of these network perimeters and add the Office Network perimeter. I have also excluded specific administrators from this rule. Click on Save when you’re happy with the settings. Here’s a screenshot of what it should look like:
Add the second rule to prompt users from anywhere other than the Office Network for an additional factor. Make sure that you add the Customer Relations group, check the Anywhere radio button and set the Access is dropdown to Allowed. Check the Prompt for an additional factor checkbox, set the Enrolment to Required and check the Once Per Session radio button to I have also excluded specific administrators from this rule. Here’s a screenshot of what it should look like:

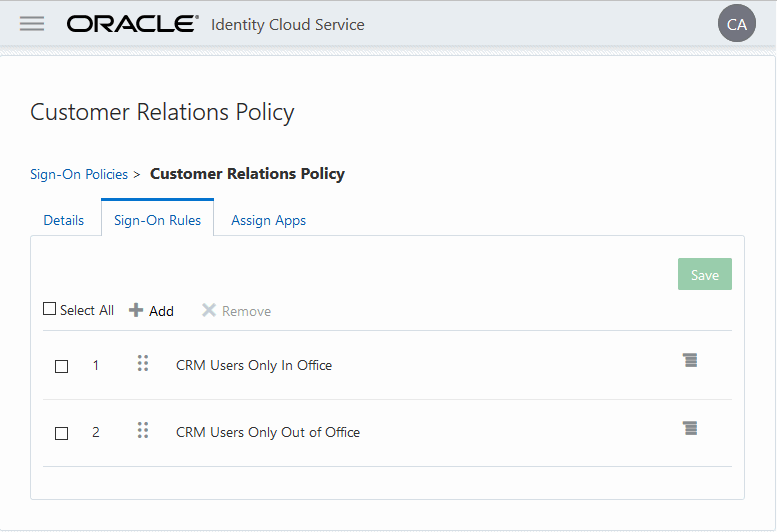
 Tip: It’s important to make sure that the Sign On Rules are in the correct order. The first rule should be CRM Users Only In Office followed by CRM Users Only Out of Office. You can change the sequence simply by draging the domino icon on each rule. The order should look like this.
Congratulations! You have set up policy based Multi Factor Authentication. Let’s try it out as the test user.
Log out from Oracle Identity Cloud and make sure you’re not connected to your corporate networks. I disconnected from my home office network and used a 4G dongle to connect to the internet in this example.
Login again as the user that you created at the beginning of this exercise. You should be taken to My Applications Screen which should display the protected application that you setup at the beginning. The screen should look like this except it should show your application.

Click on the application icon and you should be redirected to the MFA Challenge Screen which should look like this.

A notification should now appear on your phone which should look like this.
Finally, click on the Allow button and your browser should automatically redirect to your application.
Congratulations! You have successfully configured and tested policy based Multi Factor Authentication using Oracle Identity Cloud.
In conclusion, Oracle Identity Cloud uses policy based multi factor authentication to quickly and effectively manage risks associated with remote user access to protected applications. I hope you found this article helpful.

One thought on “Policy Based Multi Factor Authentication”