
APIs are becoming the window to the digital assets of the modern business. Well documented, well governed and easy to use APIs are key to their successful uptake, longevity and associated business success. Yes, I did say well documented. In this instance I am talking about the documentation required to describe the APIs capabilities in a manner that is meaningful for your ultimate audience, the “API Consumers”, however it will also provide the template for the API Developer to develop their code from. In the modern business climate, we probably don’t want to produce War and Peace, we simply want to take a minimum viable approach to our API documentation. But where would I find a capability that will simplify our task as API Designers, capture the design documentation for our APIs, allow us to do some initialise testing to validate the usefulness of our design before any code is cut, and also have the documentation ready for consumption by team members and interested parties using a standards based approach. Where indeed ! Look no further than Apiary.io.
Oracle announced its plans to acquire Apiary in January 2017. This acquisition added a “hosted toolset for REST API Development, documentation, test and management to the Oracle Cloud Platform capabilities. Carlos and I had already been exploring the features of the Oracle API Platform Cloud Service to virtualise and secure our API’s as part of our MedRec API Playpen initiative, however I really wanted to explore options available to support a Top Down Approach to API Design and documentation using Apiary. Apiary supports Swagger and API Blueprint formats for API Documentation, so you can document the API requests and responses, including example data expected. This documented information is then used by the Apiary Mock Server so that you can quickly demonstrate, test and validate the usefulness of your API design it in a collaborative team environment. The combination of Apiary and API Platform Cloud Service provides Oracle customers with an extremely capable platform covering the entire API Lifecycle.
I also wanted to investigate the use of a test framework called Dredd to get some practical insights into the value it could provide in context of API governance. For those unfamiliar with the Dredd framework, in a nutshell it tests HTTP API implementations against their API design documentation. According to the Apiary website , “Dredd is a language agnostic command-line tool for validating HTTP API description document against its back-end implementation. Dredd reads your API description and step by step validates whether your API implementation replies with responses as they are described in the documentation.” Local tests of the API implementation code against the API Design Document using dredd will result in Test Results being pushed to the Apiary website for the API project lead to review any drift from the original API design document. Dredd also supports using hooks which allow you to define before and after steps in order to unit test your APIs. For instance, before you test your Delete Customer API, you would need to create a customer. For more detail, refer to the official Dredd documentation.
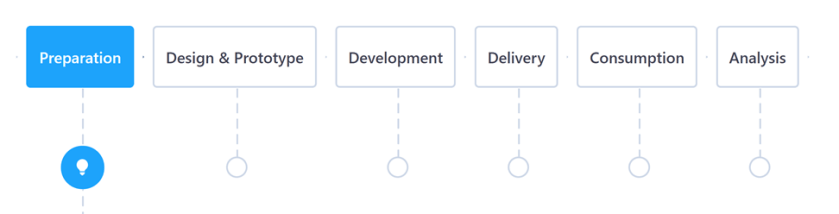
My top down approach would look something like the flow in the following diagram.
In this blog I have drifted somewhat from the Top Down sequence described above. My excuse is that I found an example project that really helped me demystify the moving parts and allowed me to get the learnings I wanted out of this exercise much more quickly.
The example project contained a swagger file containing an API design document, a node.js api implementation and some pre-defined dredd tests.
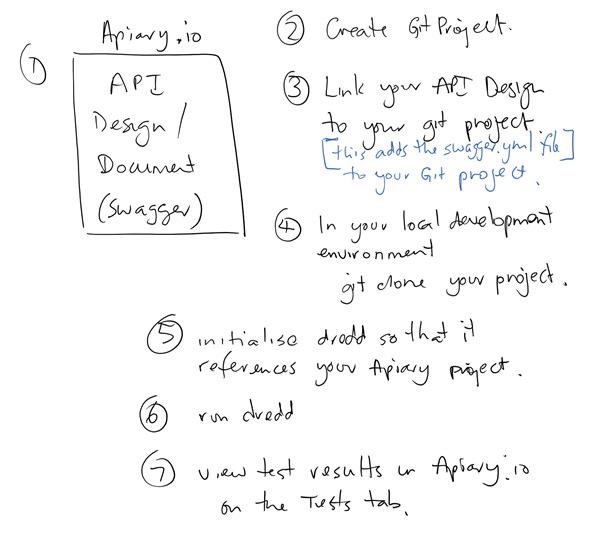
Below are the steps that I took to get this working in my environment. I have tried to group the steps in order to minimise the number of hops between Apiary, Github and the local development environment and make this blog post more readable.
Once these steps have been followed I hope that you will see the clear possibility of using Apiary to support your top down design approach and dredd to test your implementation against your design documentation as per my flow described above;
-
On GitHub.com
- Create account on GitHub
- Fork the Dredd-Example project
-
Local Development Environment
- Git clone the forked project
- cd to project directory
- Install Dredd and other dependencies
- Run the app locally
-
On Apiary.io
- Create account on Apiary
- Create an API project
- Copy the swagger.yml file contents into the Apiary project
- Link Apiary project to GitHub
-
Local Development Environment
- Initialise the local dredd-example project
- Run initial dredd tests
-
On Apiary.io
- View test results
-
Local Development Environment
- Modify the application to correct variations from API design documentation and push changes to GitHub
- Re-Run dredd tests
-
On Apiary.io
- View test results noting improvement.
On GitHub.com
Create account on GitHub
If you don’t already have one then signup on GitHub.
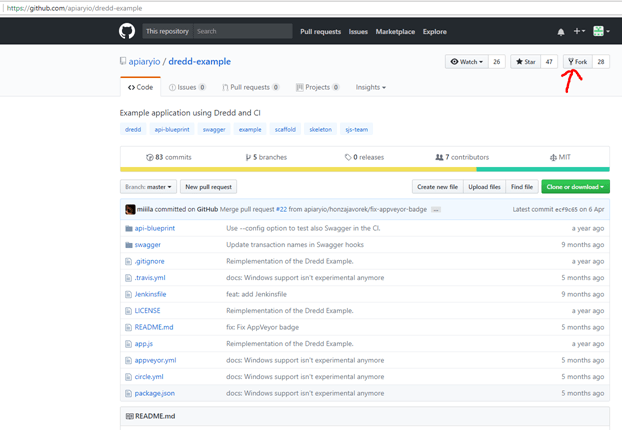
Fork the Dredd-Example project
After logging into GitHub, search for the project https://github.com/apiaryio/dredd-example
Once you have opened this project, click the Fork button in the top right.
Taking a closer look at the dredd-example project, you will discover that it is a Node.js project that has an implementation of a few APIs relating to Gists.
A gist is a paragraph that provides the substance or general meaning of a speech or a document, and the APIs simply allow the creation and deletion of Gists.
It provides a really great way to get started learning about how Apiary, GitHub and the Dredd testing framework can work together as part of the API Lifecycle.
Local Development Environment
Git Clone the forked project
I signed into my GitHub account.
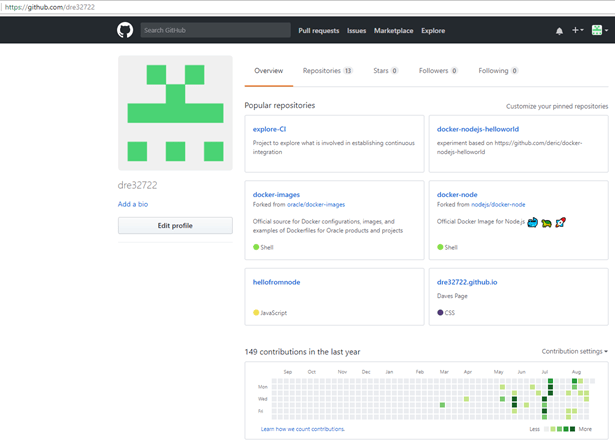
I now needed to access the forked copy of the Dredd-Example project. This project will be visible under the Repositories tab for my GitHub account (dre32722) as per screenshot below.
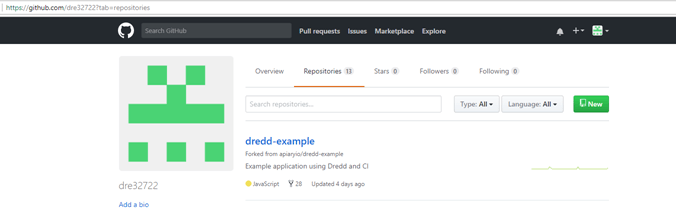
Click the dredd-example link.
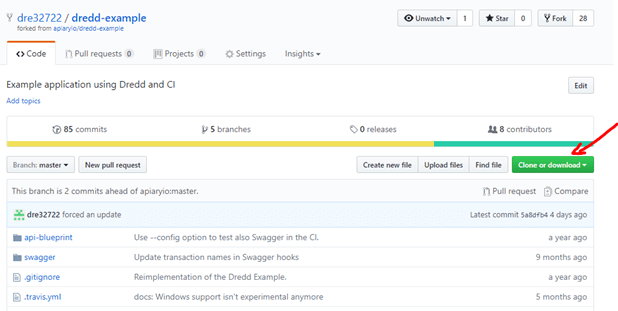
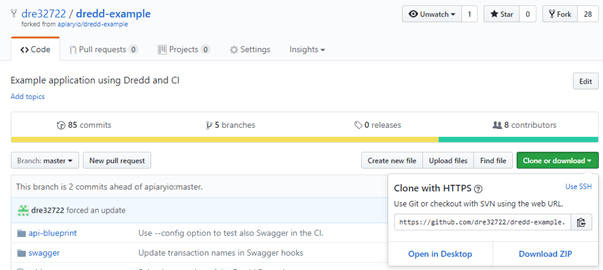
I then copied the web URL for the dre32722/dredd-example repository.
cd to project directory
In my local dev env, I cd to my /home/osboxes/gitprojects directory.


As I have multiple user accounts for various public and private Git projects I now cd to my /home/osboxes/gitprojects/dre32722 directory.

I git clone my fork of the dredd-example project.


The above step creates a directory under my /home/osboxes/gitprojects/dre32722 directory.

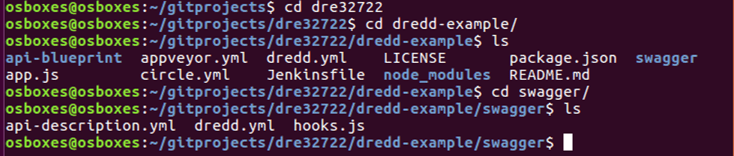
I cd into the newly created dredd-example directory.

Install Dredd and other Dependencies
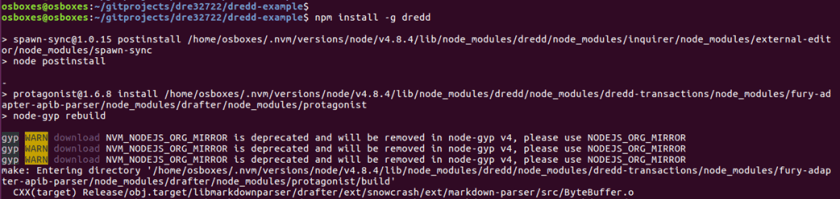
With my API example (dredd-example) application downloaded, the next thing I did was to install dredd by doing the following;
npm install -g dredd
The install takes a few minutes.
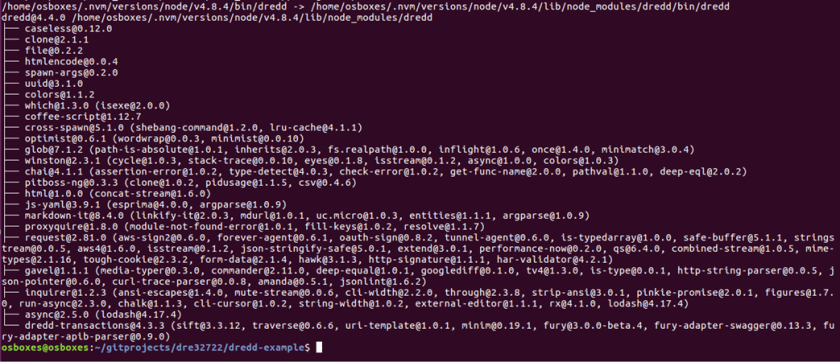
To determine the version of dredd I did the following;
dredd –version

With dredd successfully installed, I then had to install some of the dependencies for the dredd-example project.
The dredd-example is a node.js project and there are a number of dependencies specified in the package.json file that are required in order for it to run.

npm install
The above command will install all the required modules for the dredd-example project.
These dependencies include mongodb, express, body_parser and dredd.
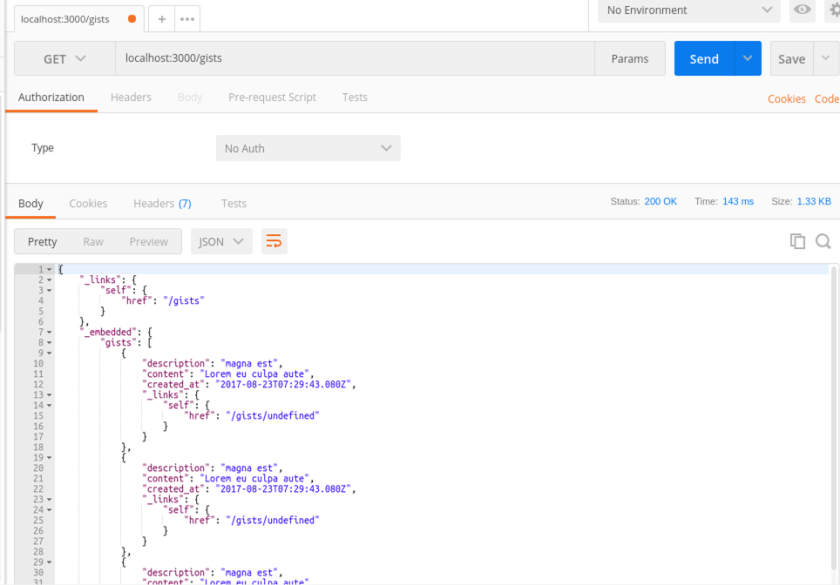
I then confirmed that I could successfully run the app and access the APIs using Postman.

I launched my REST client -postman and executed an HTTP GET of localhost:3000/gists as per screenshot below.
On Apiary.io
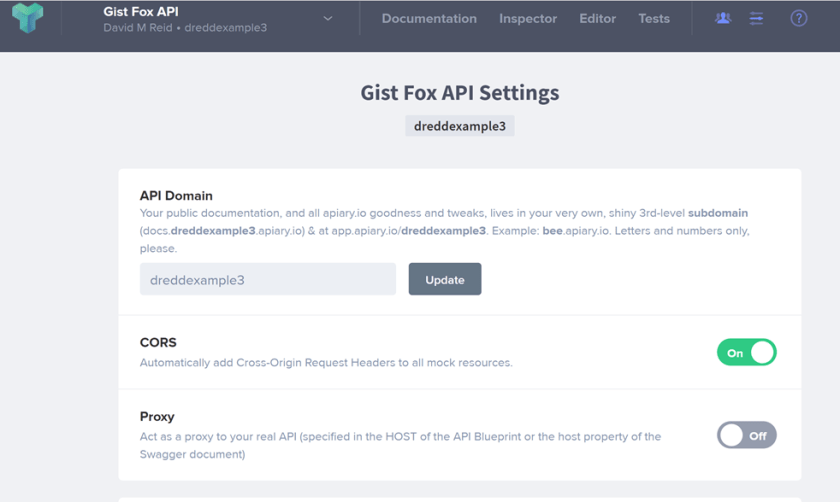
Create account on Apiary
Having proved that my API application was working, I then turned my attention to address the tooling requirements for my API Design. I pointed my browser to the Apairy web site. As I mentioned earlier Apiary is a web based repository for API documentation. Apiary also provides server mocking, code samples, automated testing, and GitHub sync. It is currently available with different subscription plans, free, standard (team) and pro. These different plans provide capabilities to suit most needs including both public and private API documentation.
Apiary supports both Swagger and API Blueprint for API Description formats.
- Swagger is the world’s largest framework of API developer tools for the OpenAPI Specification(OAS), enabling development across the entire API lifecycle, from design and documentation, to test and deployment.
- API Blueprint is simple and accessible to everybody involved in the API lifecycle. Its syntax is concise yet expressive. With API Blueprint you can quickly design and prototype APIs to be created or document and test already deployed mission-critical APIs.
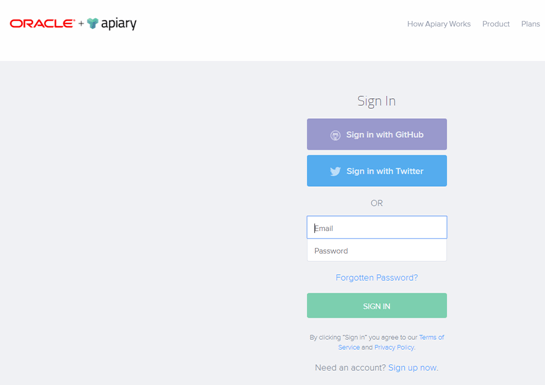
I click the SignUp button.
You have the choice to either specify your username, email address etc, or use your GitHub account to complete the sign up steps.
I chose to signup using GitHub.
Create an API project
After a successful signup on Apiary, I created an API project. To do this I click Create New API Project.
Note: Screenshot may vary as I had already created an Apiary project.
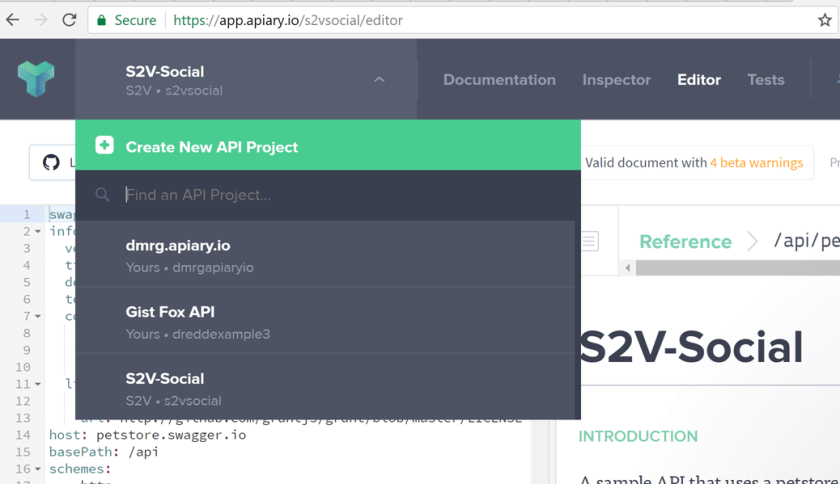
I clicked Create New API Project, specified a name.
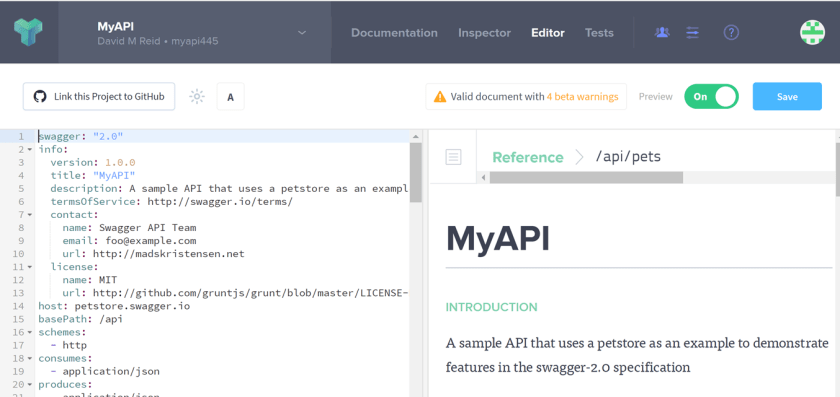
In the dropdown list (highlighted in red circle below), I chose Swagger format and then pressed the Create API button.

You will notice that when the API project is created, that the PetStore API sample is automatically populated as your project API design, as per my “MyAPI” project screenshot below.
Copy the swagger.yml file contents into the Apiary project
From my forked project dre32722/dredd-example I copied the contents of the swagger.yml file.
I then pasted this into my Apiary project, overwriting the PetStore API definitions.
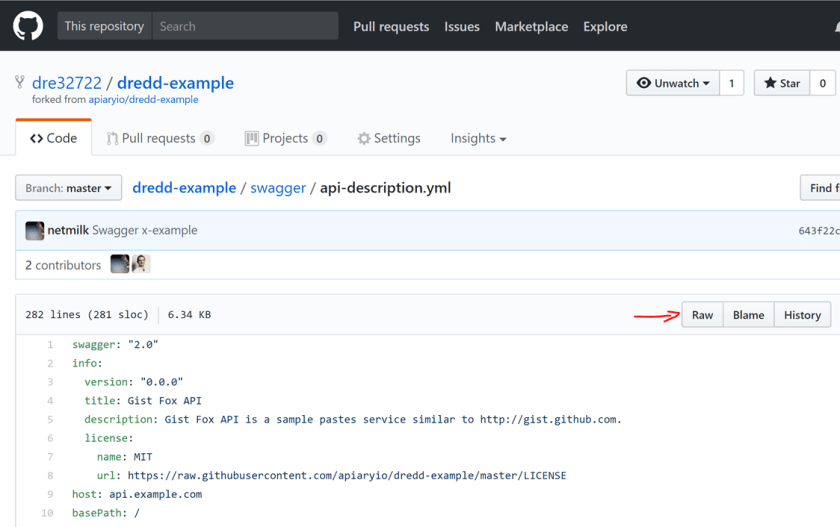
I clicked the Raw Button and then copied the content.
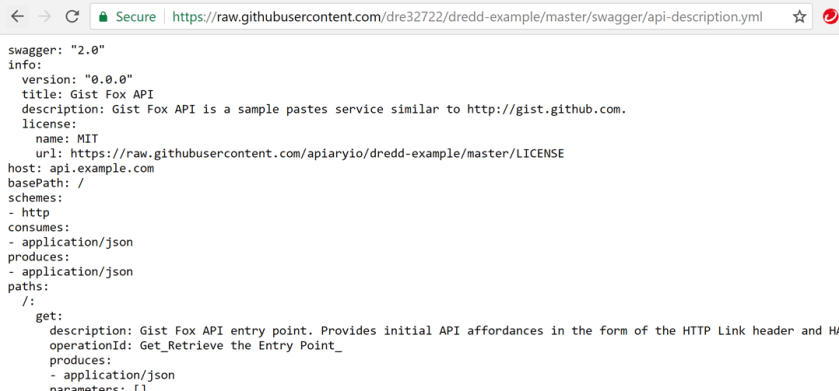
I then pasted the Gist Fox API content from the api-description.yml file into my API project.
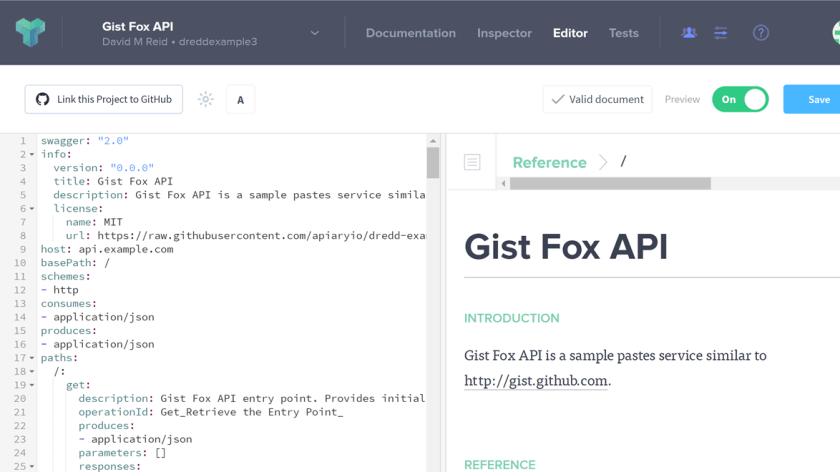
You should see that your document is Valid. Press the Save button to save the changes made to your project API design.

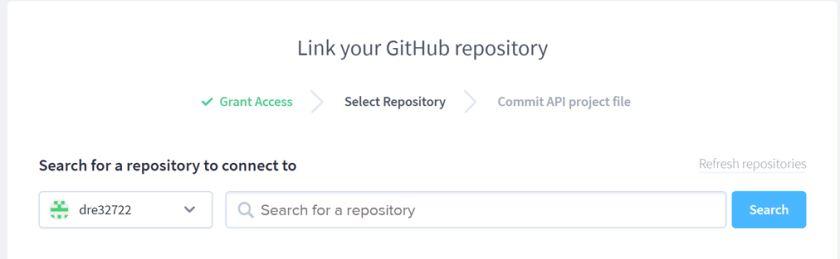
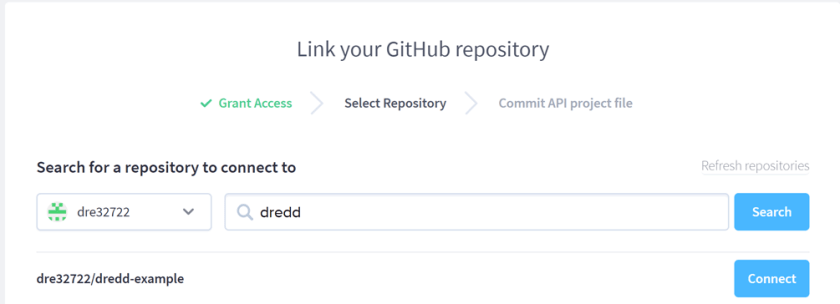
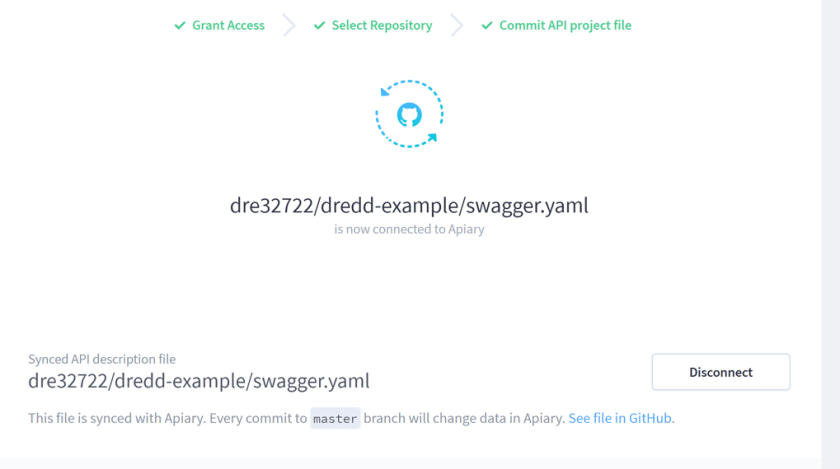
Link Apiary project to GitHub
Click the button in order to link the Apiary project to the forked GitHub project. In my case dre32722/dredd-example.
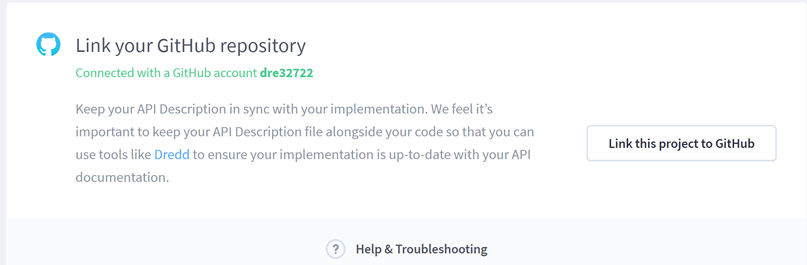
Click the Link this project to GitHub button.
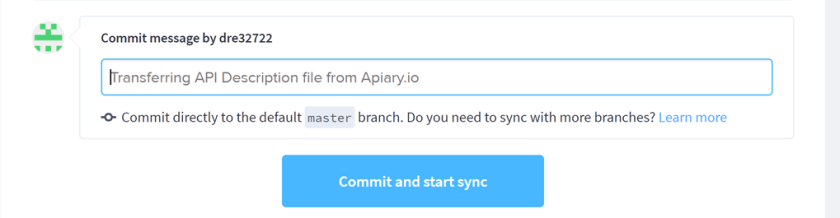
Provide a Commit Message or Accept the default message and then Press the Commit and start sync button.
Local Development Environment
Initialise the dredd-example project
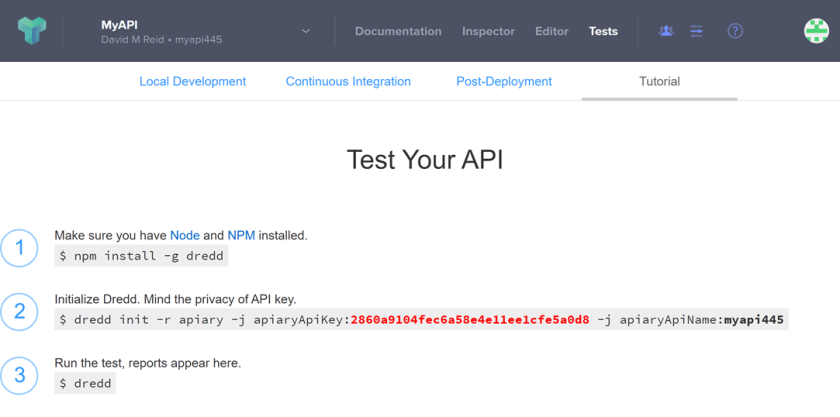
Next I needed to initialise my project so that my dredd tests and my Apairy project were linked. To do this I first had to find out the API key for my Apiary API project.
To get this information I clicked the Tests Tab and this provided me with the details describing how to initialise dredd to support Test Driven Development.
Note: My screenshot below is for a different project but I included it in order to indicate something like what you should see.
It seems that once you have initialised dredd for your project and started testing that this information is no longer available from the Apiary site in this format.
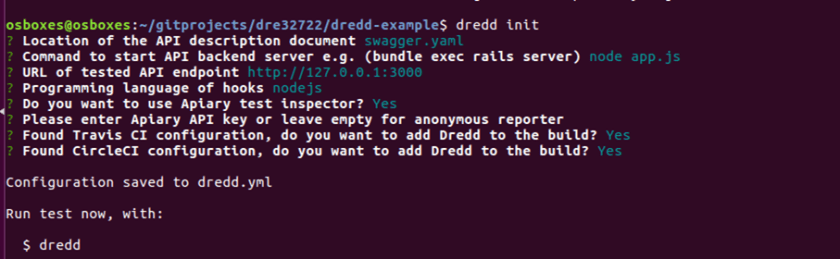
Of particular relevance is the point (2) which provides the information required to initialise my project. I copied this dredd init information.
If you ever require the API Key value after dredd has been initialised in your project, check out the dredd.yml file in your project.
As I had already installed dredd into my local development environment, I could skip step 1.
Next, I cd into the /home/osboxes/gitprojects/dre32722/dredd-example project directory.
I then executed the dredd init command as follows.

Introducing Dredd Hooks
According to the documentation … Similar to any other testing framework, Dredd supports executing code around each test step.
Hooks are code blocks executed in defined stage of execution lifecycle.
In the hooks code you have an access to compiled HTTP transaction object which you can modify.
Hooks are usually used for:
- loading db fixtures
- cleanup after test step or steps
- handling authentication and sessions
- passing data between transactions (saving state from responses to stash)
- modifying request generated from API description
- changing generated expectations
- setting custom expectations
- debugging via logging stuff
If you look inside the hooks.js file, you will notice the tests that dredd will run. One of the tests is shown in the screenshot below.

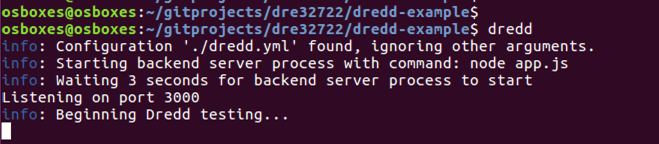
Run dredd tests
In order to run dredd to test your APIs against the Apiary design, simply do the following;
If you haven’t initialised dredd with your Apiary project you will get a warning message – Apiary API Key or API Project Subdomain were not provided.
If you don’t provide this, the test results will not be visible on the apiary.io project – tests tab.

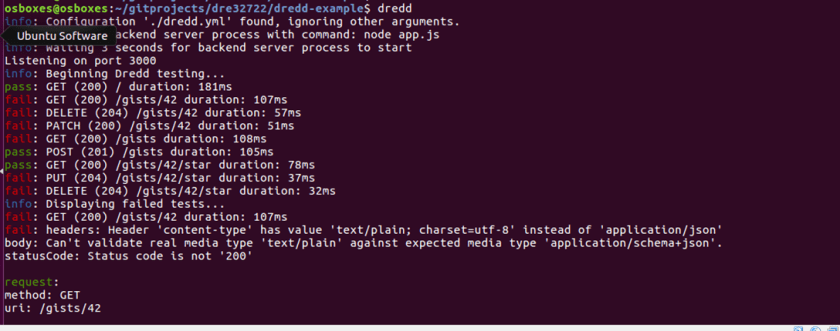
When properly initialised, when you run dredd command, it will start the node application and run the tests.
Each test result will be displayed on the screen but will also be pushed into apiary.
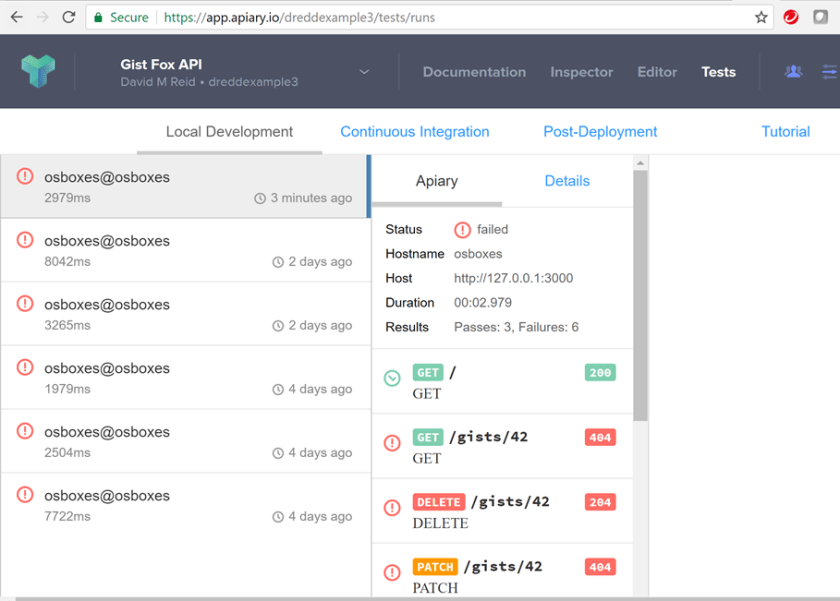
Please note below the link to the apiary project and the test results.
I copied the URL specified at the end of the test run / output and pasted into a browser in order to view the test results in Apiary.
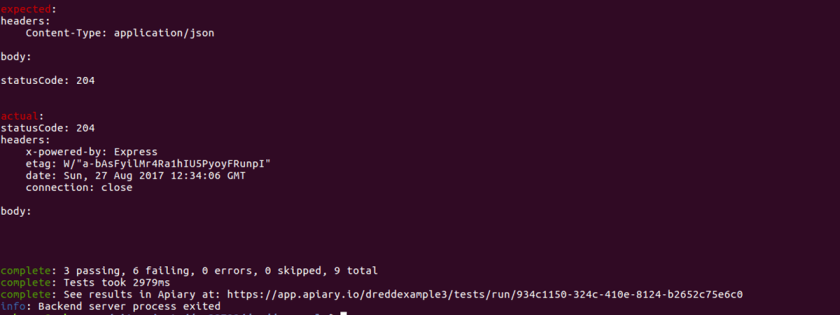
Note that the dredd tests have identified some drift from the API as documented versus the API as implemented, and as a result several of the tests failed.
This is essentially what I wanted to validate when I started this exercise, the dredd tests are highlighting that there has been some drift from my API design (Apiary – Swagger formatted documentation) and the implementation code.
On Apiary.io
View test results
I copied and pasted the URL from the dredd console output into my web browser and it resolved to the following;
Local Development Environment
Edit the app.js
Next step was to edit the app.js file in order to modify the API implementation code and change the references to application/Hal+json to be application/json
The above changes should mean that several of the failed tests in the first dredd run will succeed when I run the tests again.
Save the app.js file
git add app.js
git commit -m “changed Content-Type”
git push origin master
Re-run the dredd tests
Once again execute dredd to rerun the unit tests.
dredd
On Apiary.io
View Test Results
On apiary.io under your project, click the Apiary tests tab in order to see if you now have an improvement in the success rate of your tests.
Summary / Next Steps
I have attempted to walk you through the basic steps to get started with Apiary and dredd. I hope that you can see the potential to now do Top Down API Design, and validate your implementation against the documented design using dredd. My worked example shows a manual approach to initiating the dredd tests, so the next logical step will be to introduce a Continuous Integration Service configuration into my project. The good news is that
Dredd works with several Continuous Integration Services. It has been tested with CI tools such as Travis-CI, Circle-CI, Codeship, Semaphore, Teamcity, Jenkins, Atlassian Bamboo
I hope you have found this useful.
Useful Links / Recommend Reading
https://dredd.readthedocs.io/en/latest/how-it-works.html
https://relishapp.com/apiary/gavel/docs
https://blog.apiary.io/2013/10/17/How-to-test-api-with-api-blueprint-and-dredd
https://help.apiary.io/tools/automated-testing/testing-local/
http://dredd.org/en/latest/quickstart.html

2 thoughts on “Apiary designed APIs tested using Dredd”