
I’m sure we’ve all experienced it, either as a user, or as a system administrator. You know, that important SSL certificate everyone forgot about so didn’t renew, and now has expired?
When an SSL/TLS certificate expires it can create a number of problems, including:
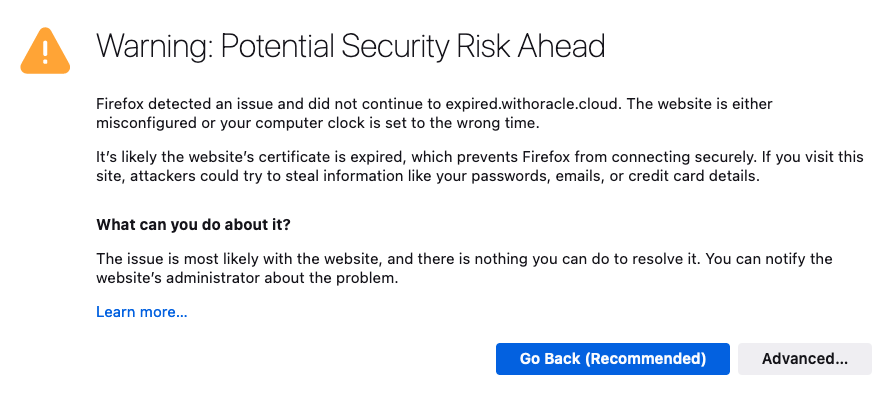
- Users’ web browsers will display warning messages, indicating that the website’s connection is not secure. This can lead to a loss of trust and deter user engagement.
- API clients will often refuse to establish a connection if an SSL certificate is not valid potentially disrupting crucial data exchanges and integrations.
- Search engines may flag the site as unsafe, leading to a drop in rankings and reduced organic traffic.
Also regularly encountering certificate warnings conditions users to accept future certificate errors, which makes them more likely to accept an SSL certificate warning should they be targeted in a Man In The Middle Attack.
To avoid these issues, it’s important to have enough advance warning that a certificate is going to expire so you can obtain a new one, install, and test it thoroughly.
If you’re already using Domain Validated (DV) certificates, such as those issued by Let’s Encrypt you might want to consider my automated Let’s Encryption Solution. This solution automatically handles the entire certificate lifecycle using serverless functions inside OCI. For those who prefer to bring their own certificates, these can be imported into OCI’s certificate service.
As at June 2023, certificate expiry monitoring in OCI is primarily focused on certificates associated with Load Balancers. To improve monitoring, I’ve developed a serverless solution that examines all certificates expiration dates. The solution emits logs and sends email notifications, also allowing for customisable lead time to align with your organisation’s certificate procurement process. Logs can also be forwarded to your SIEM solution if required.
Setup & Configuration
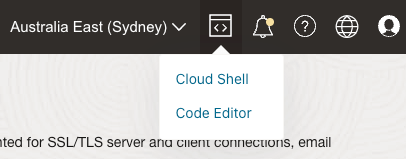
We’ll be using OCI Cloud Shell, which can be found in the top right hand corner. Click Cloud Shell and it will open.
You’ll also want to make sure you’re that Cloud Shell’s Network is “Public” This ensures Cloud Shell can connect outbound to the internet.
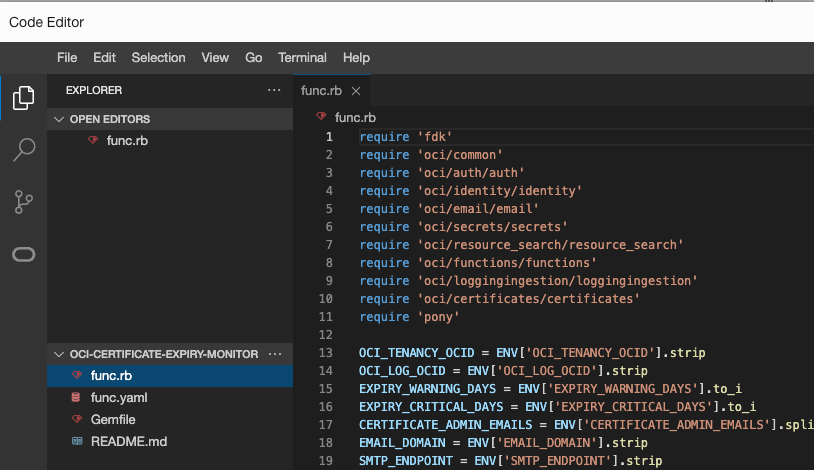
Download the function source code from Github https://github.com/scotti-fletcher/oci-certificate-expiry-monitor into Cloud Shell .
scott_flet@cloudshell:projects (ap-sydney-1)$ git clone https://github.com/scotti-fletcher/oci-certificate-expiry-monitor
Cloning into 'oci-certificate-expiry-monitor'...
remote: Enumerating objects: 8, done.
remote: Counting objects: 100% (8/8), done.
remote: Compressing objects: 100% (7/7), done.
remote: Total 8 (delta 0), reused 0 (delta 0), pack-reused 0
Unpacking objects: 100% (8/8), 3.34 KiB | 1.11 MiB/s, done.

scott_flet@cloudshell:projects (ap-sydney-1)$ cd oci-certificate-expiry-monitor/

scott_flet@cloudshell:oci-certificate-expiry-monitor (ap-sydney-1)$ ls
func.rb  func.yaml  Gemfile  README.md

scott_flet@cloudshell:oci-certificate-expiry-monitor (ap-sydney-1)$
As always I recommend inspecting any source code that you download from the Internet for security issues before use. You can use OCI Code Editor to do this.
To push the function to the OCI container repository you’ll also need an Auth Token which can be generated in OCI Identity by selecting your user, and clicking “Auth Tokens”. Note down the Auth Token.
Now we’ll create a Functions application. An application is just a logical grouping of functions, and in this solution I only have one application called “oci-certificate-monitor” and one function called “watchdog”. Before creating a Function you’ll need to create a VCN and subnet. This can be either a public or private subnet. Outbound connectivity via a NAT or Internet Gateway is required to allow the function to connect to the OCI API and SMTP endpoints. I already have a VCN called “tenancy-automation” with one private subnet and a NAT Gateway which I am going to use.
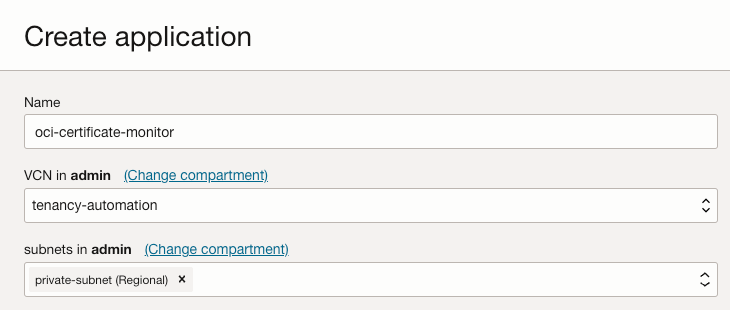
After creating the application, follow the “Getting Started” instructions 1-7 for “Cloud Shell setup”. During step four replace [repo-name-prefix] to ‘oci-certificate-monitor’ or something else you’d like to use.
If everything was successful you should see the Function you created:
scott_flet@cloudshell:oci-certificate-expiry-monitor (ap-sydney-1)$ fn list apps
NAME                    ID
oci-certificate-monitor ocid1.fnapp.oc1.ap-sydney-1.aaaaaaaacgoktsvwer26sdllal5b4bhlier32icuvwh62h5k5glmbkuelisa
You can now deploy your function. The first time you do this it might take a few minutes:
scott_flet@cloudshell:oci-certificate-expiry-monitor (ap-sydney-1)$ fn deploy --app oci-certificate-monitor


Deploying watchdog to app: oci-certificate-monitor
Bumped to version 1.0.7
Using Container engine docker
Building image syd.ocir.io/abcd/oci-certificate-monitor/watchdog:1.0.7 ....
Parts:  [syd.ocir.io abcd oci-certificate-monitor watchdog:1.0.7]
Using Container engine docker to push
Pushing syd.ocir.io/abcd/oci-certificate-monitor/watchdog:1.0.7 to docker registry...The push refers to repository [syd.ocir.io/abcd/oci-certificate-monitor/watchdog]
7ef637f5b3e9: Pushed
fdd0a6d22071: Pushed
aa9d27f83606: Layer already exists
49e664616072: Layer already exists
fd44519d4289: Layer already exists
84558af2ec10: Layer already exists
c9264e9aa767: Layer already exists
1.0.7: digest: sha256:082c772245ea908f811d86533bc20a4f40134adcc5fc3c60da3249755fed4870 size: 1782
Updating function watchdog using image syd.ocir.io/abcd/oci-certificate-monitor/watchdog:1.0.7...
Once created, you should be able to see the function in the OCI console under applications and also in the Container Registry.
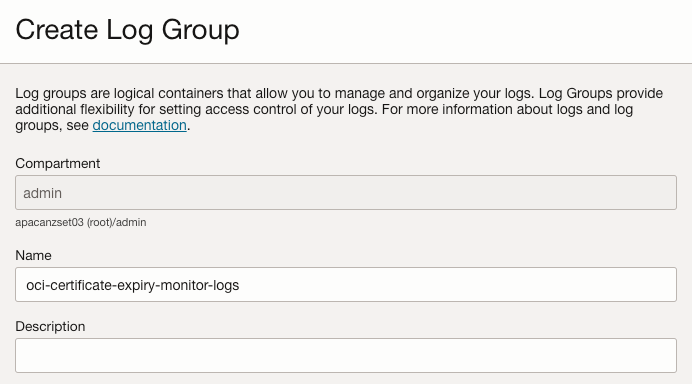
Now we need to create a Log Group to hold our Function specific logs. Create a log group, I’ve named mine “oci-certificate-expiry-monitor-logs”:
In logs, click “Create custom log” and call it “activity-log”:
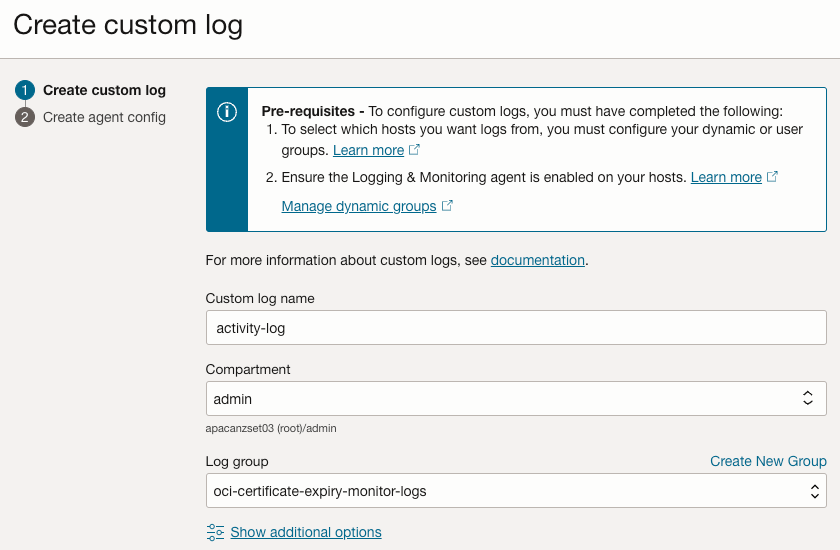
When prompted select “Add configuration later” and click create. You should see the log “activity-log” in the “oci-certificate-expiry-monitor-logs”. Note down the OCID of the activity log as you will need this later.
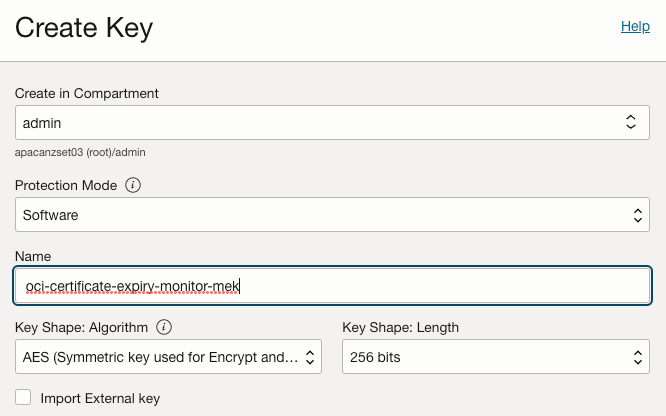
If you don’t already have a Master Encryption Key in OCI Vault then you will need to create one:
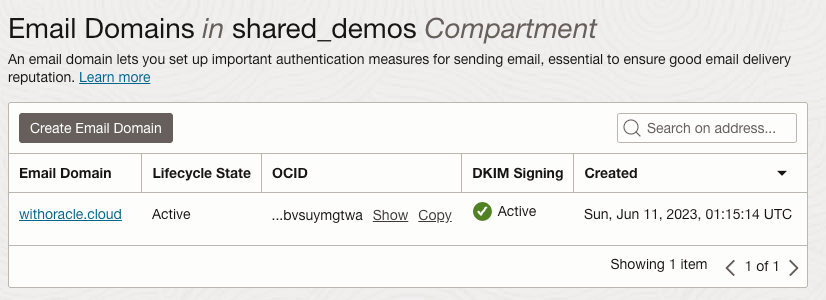
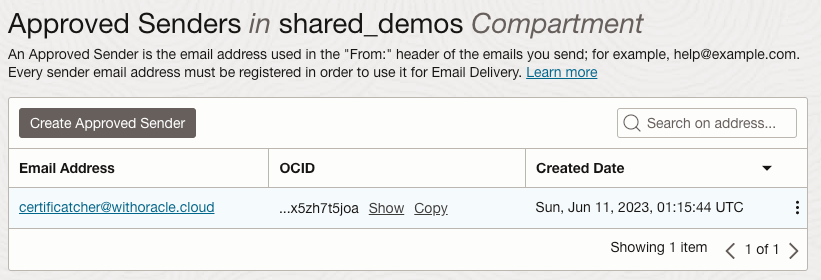
Now you need to create an email domain and approved sender in OCI’s Email Delivery Service. It is also advised to configure DKIM and SPF to ensure reliable email delivery.
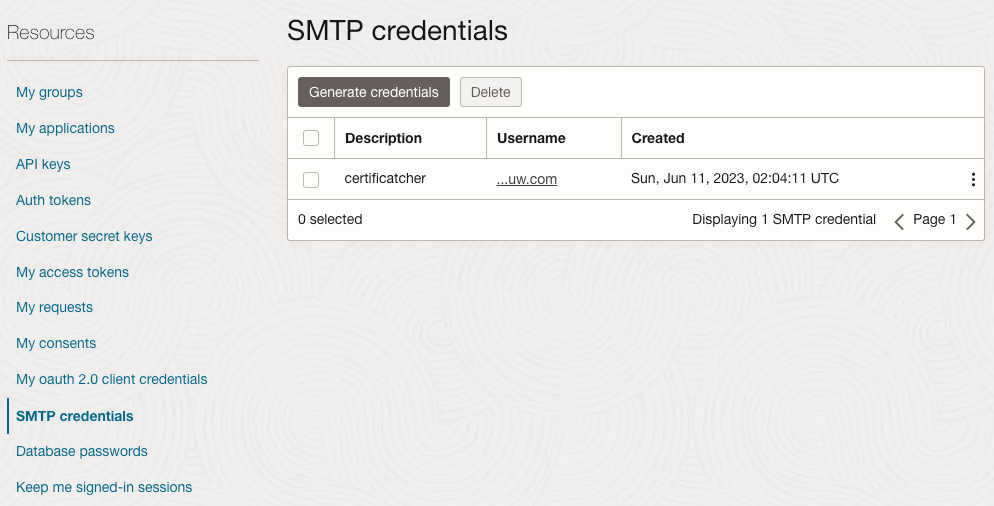
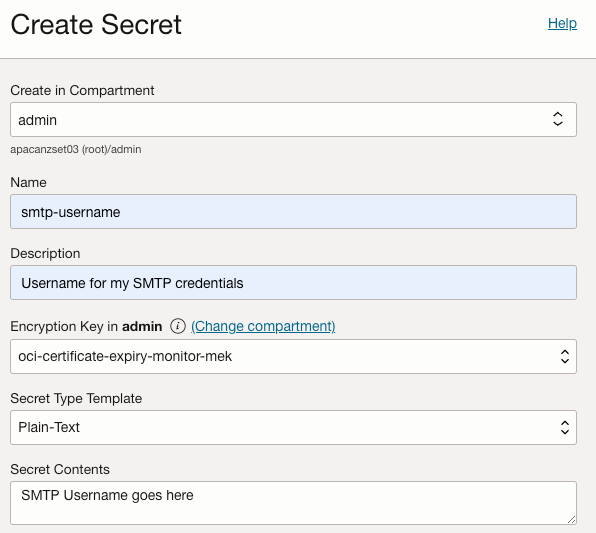
Now you need create SMTP credentials. You can find and create them by selecting “My Profile”. Note down the username and password.
In your vault, create two secrets, smtp-username and smtp-password. Place the SMTP username and password in their respective secret contents fields:
Now we need to complete the setup of the function and provide the required Environment Variables:

The following configuration key value pairs need to be configured:
- OCI_TENANCY_OCID. This is your tenancy OCID.
- OCI_LOG_OCID. This is the OCID of the “activity-log” we created earlier.
- EXPIRY_WARNING_DAYS. This is the number of days prior to a certificate expiring that you want to start receiving warning emails and logs.
- EXPIRY_CRITICAL_DAYS. This is the number of days prior to a certificate expiring that you want to start receiving critical emails and logs.
- CERTIFICATE_ADMIN_EMAILS. This is a comma separated list of email addresses that should receive the email notifications. Note at least one email is required.
- EMAIL_DOMAIN. This is the name of the email domain you created earlier.
- SMTP_ENDPOINT. This is the public endpoint which is listed under configuration in Email delivery.
- VAULT_OCID. This is the OCID of the vault where you created the secrets containing your SMTP username and password.
- OCI_SECRET_SMTP_USERNAME. This is the name of the secret containing your SMTP username.
- OCI_SECRET_SMTP_PASSWORD. This is the name of the secret containing your SMTP password.
If you want to test the function immediately, set a high number for EXPIRY_WARNING_DAYS and EXPIRY_CRITICAL_DAYS. As my certificates are issued by Let’s Encrypt and expire in 90 days I’ve initially set these values to 100 but will adjust them to say 30 and 10 respectively post testing.
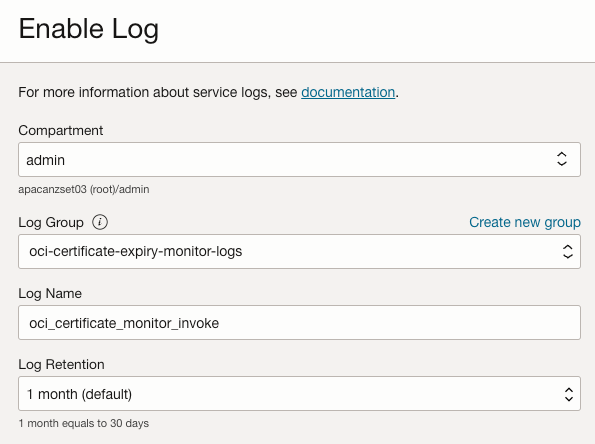
It is also recommended to enable function invocation logs. Invocation logs are useful to debug functions should they fail:
Now you need to create a dynamic group. Enter the OCID of the compartment where you created the function:

Lastly we need to create a policy to allow our function to operate:
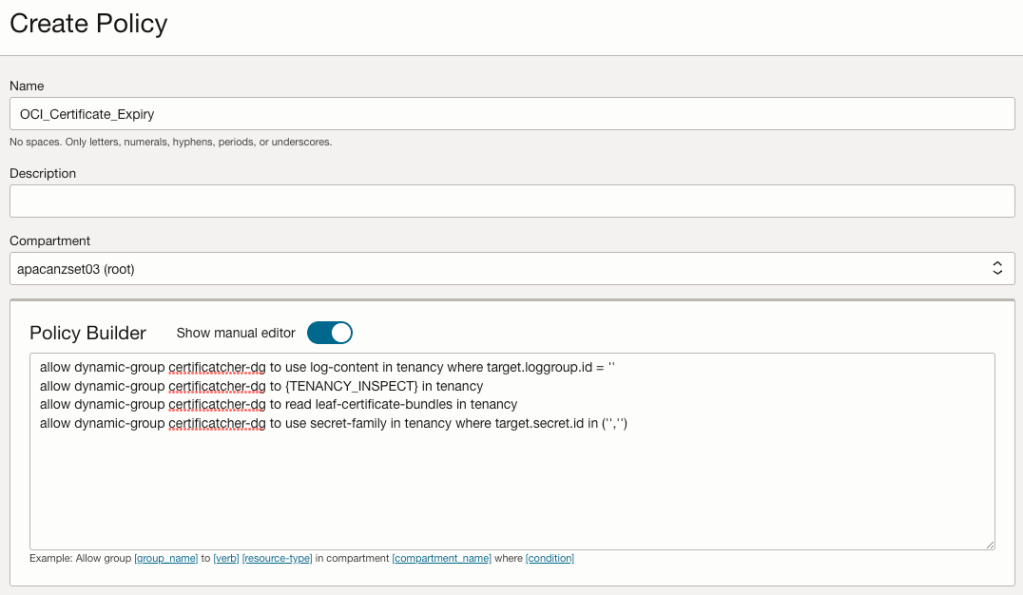
The policy needs to have the following statements:
- allow dynamic-group certificate-expiry-monitor-dg to use log-content in tenancy where target.loggroup.id = ”
- allow dynamic-group certificate-expiry-monitor-dg to {TENANCY_INSPECT} in tenancy
- allow dynamic-group certificate-expiry-monitor-dg to read leaf-certificate-bundles in tenancy
- allow dynamic-group certificate-expiry-monitor-dg to use secret-family in tenancy where target.secret.id in (”,”)
Note you will need to update the loggroup.id with the OCID of the log group. It. is the log group OCID, not the log OCID.
You will also need to update the target.secret.id in ”, ” values to be the OCID’s of the secrets you created to hold your SMTP username and password.
From cloud shell we can now invoke the function. If everything is configured correctly a success message will be displayed:
scott_flet@cloudshell:oci-certificate-expiry-monitor (ap-sydney-1)$ fn invoke oci-certificate-monitor watchdog
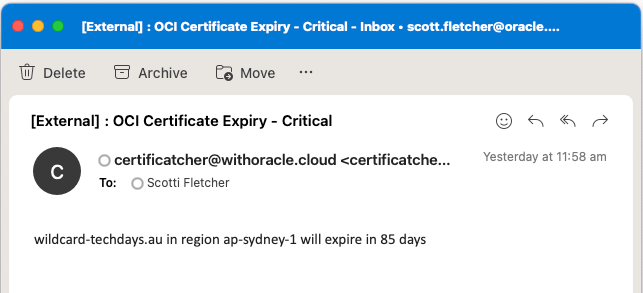
"Certificatcher watchdog checks completed 2023-06-15 06:12"If you have certificates that will expire within the number of days you configured in the function then you will see an email for each certificate:
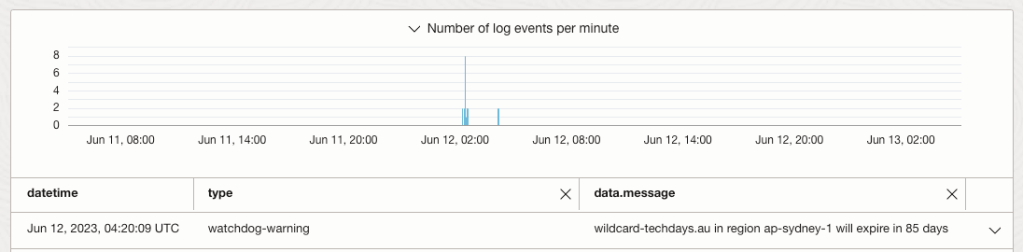
Log entries will also be generated in the activity log:

Note that the type key will be either “watchdog-critical” or “watchdog-warning”. This will be useful if you’re driving automation from a SIEM tool.
Because I don’t want to run it manually, and I don’t have a scheduler I’m going to use OCI Alarms to trigger my function once a day. My colleague @callanhp has a great article on how to do this https://redthunder.blog/2022/05/03/a-better-mechanism-for-periodic-functions-invocation/. It’s a good read and dives further into detail of how the approach works.
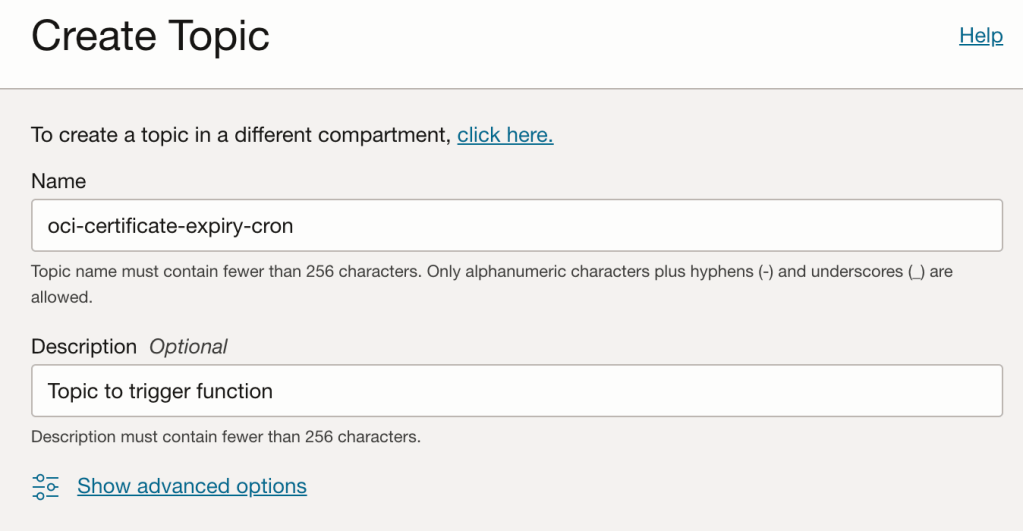
First we need to create a topic:
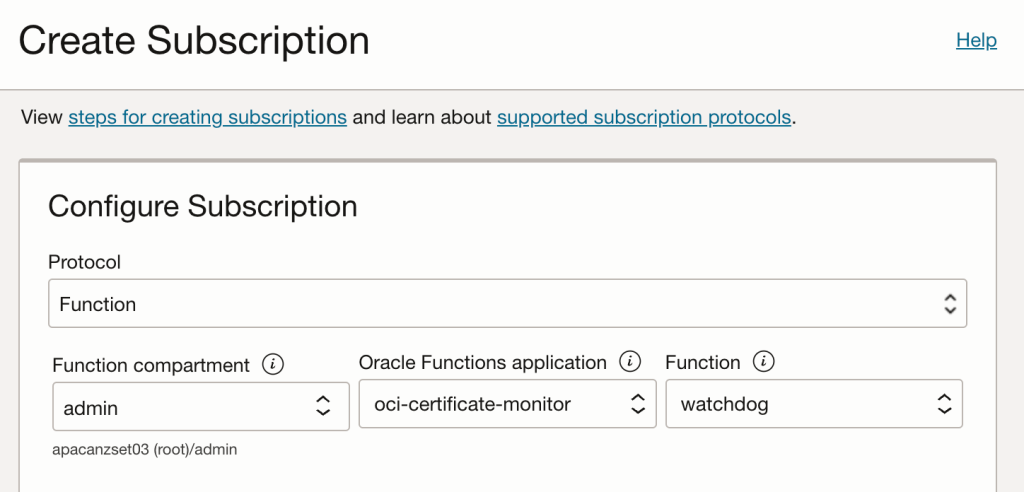
After creating a topic, create a subscription that will call our function:
Now we need to create an alarm:

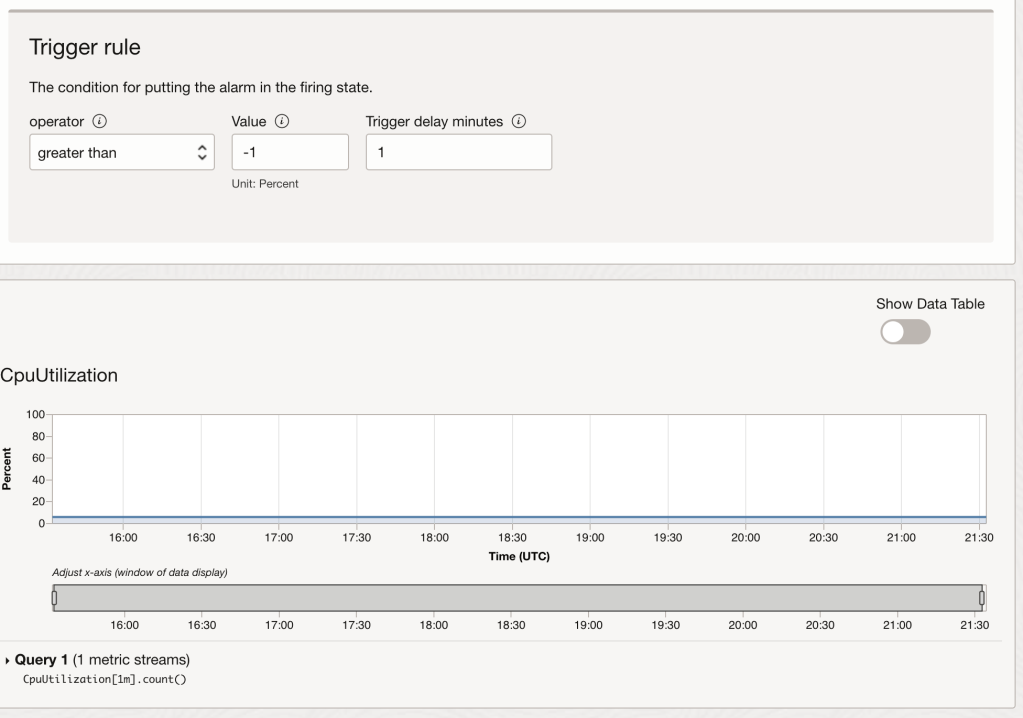
It’s important to choose a metric that will always fire. Because I’m running multiple compute instances I’m choosing a compute metric.

Trigger the rule for when the value is greater than -1, meaning the alarm will always fire. You may need to enter 1, then press the down arrow key to get to the value of -1. You can validate the metric will work by looking at the graph. The blue line indicates the metric will fire the alarm:
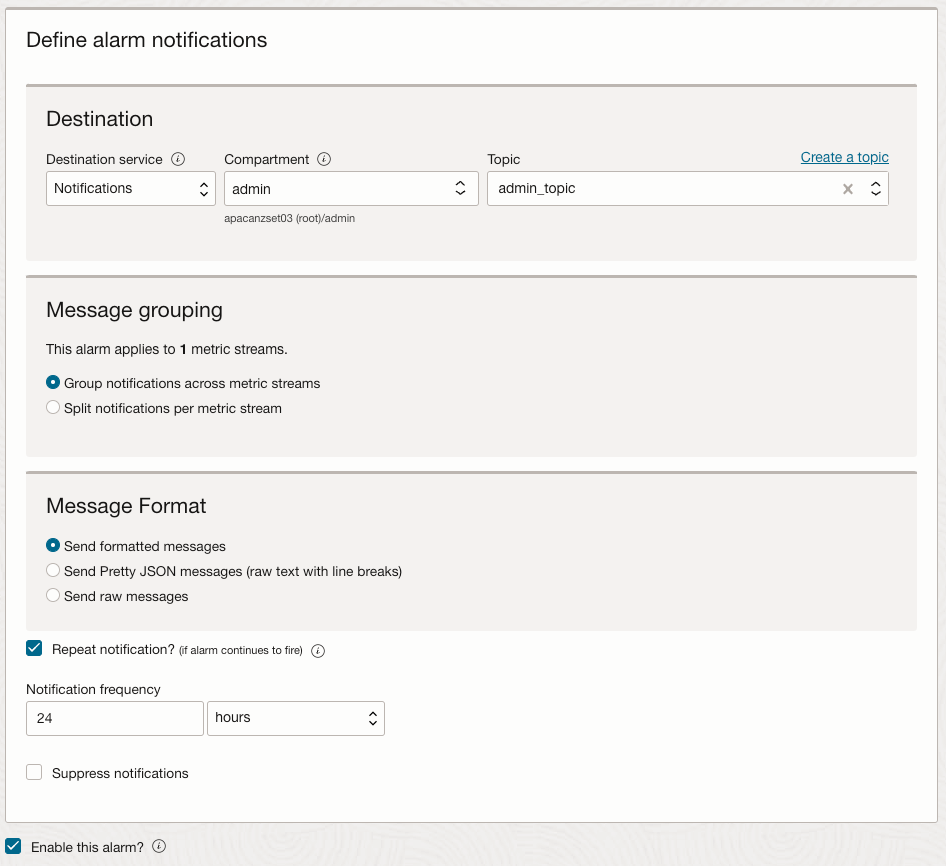
Now all we need to do is configure the alarm to send a message to our notification topic. Note I have configured the alarm to repeat the notification every 24 hours. This will ensure our function runs once a day:
To confirm the function is running each day, look at the Function metrics:

Awesome, now we have a fully automated solution that will notify us via email and logs when certificates are due to expire in any subscribed OCI Tenancy region.
