
Oracle PaaS services are typically protected by Identity Cloud Service (IDCS), which provides unified access management for the Oracle Cloud. This protection extends to their exposed APIs, which usually require you to present a valid access token as part of your invocation. Unfortunately, the documentation for a number of the services tends to assume that the reader has an in-depth knowledge of OAuth concepts, and IDCS operations.
Typically my blog posts are around specific proof of concept things I have been working on, or go in-depth into more advanced IDCS concepts, but I have realised (mostly because people kept asking me…) that many developers using these services don’t have a strong practical understanding of OAuth, and struggle to interpret the documentation around the authentication requirements for the services. This blog post is designed to provide a step by step explanation of what is required from an IDCS perspective, as well as an explanation of the techniques to obtain a an access token to use the service APIs.
A non-exhaustive list of PaaS services for which these instructions are applicable:
- Oracle Integration Cloud
- Oracle Blockchain Platform
- Oracle API Platform Cloud Service
- Oracle Mobile Hub
- Oracle Digital Assistant
Obtaining an OAuth token by which to invoke these services is a two part process. Firstly, you need to create (or have your Identity Admin create) an OAuth client in IDCS which is configured to allow access to the resources associated with the PaaS service. Once this has been done, you can use this application to obtain a token that can be passed to the service APIs.
These instructions assume you are going to be using a user token, as opposed to a client token. The reason for this is because user tokens can be used across all of these services, while support for client tokens is mixed (and needs some additional permission grants in IDCS which is on a per-service basis, and so is hard to provide generalised instructions for). It also assumes you just need to obtain an access token for API testing, so will provide the most straight-forward flow for doing this. If you need interactive login and provide a web interface, then you should probably spend some time doing some reading about the OAuth 3-legged flow, though this won’t be covered here.
In order to create an OAuth client in IDCS, you will need access to IDCS at least as an Application Administrator. If you have this role, you will be able to do this yourself; otherwise you will need to ask your Identity Administrator to perform these tasks for you. As I am often the Identity Administrator on the other end of these requests, I will also provide an example summary you can use in an email or similar such that they know precisely what to do.
Creating an IDCS Client as an IDCS Administrator
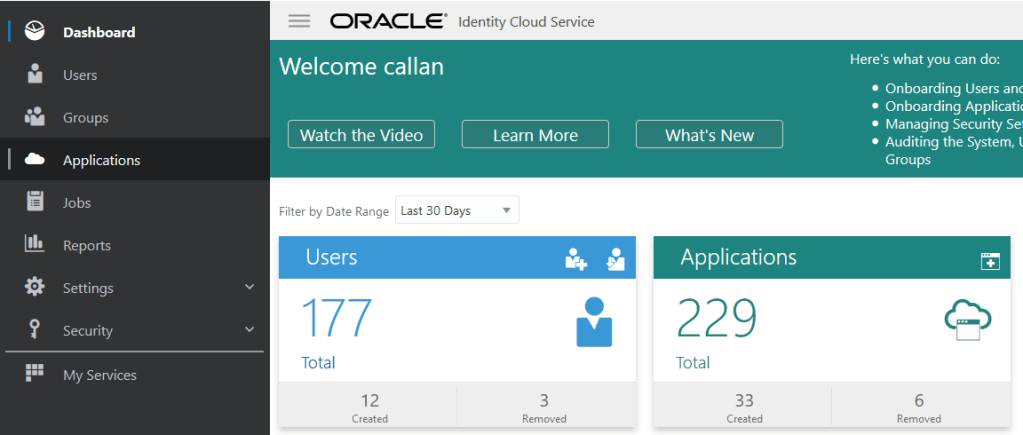
As an Application Administrator in IDCS, you will have access to the ‘Applications’ tab from the sidebar.
This section of IDCS contains a long list of applications, and includes representations of the Oracle PaaS services. For instance, Oracle Integration Cloud services are shown with the format ‘OICINST_<instance name>’. This representation is important, as it contains representations of the permissions you will need to grant in order to invoke the PaaS APIs.
To get started, create a new application, by clicking the ‘+ Add’ button at the top of the screen, then selecting ‘Confidential Application’. The reason for creating a new application here is to provide improved identity governance and auditing. By creating separate clients for separate purposes, you can associate invocations with that purpose, and more easily monitor individual actions. It also means that in the event of a compromised client, you can rotate a client secret without breaking everyone else’s access.
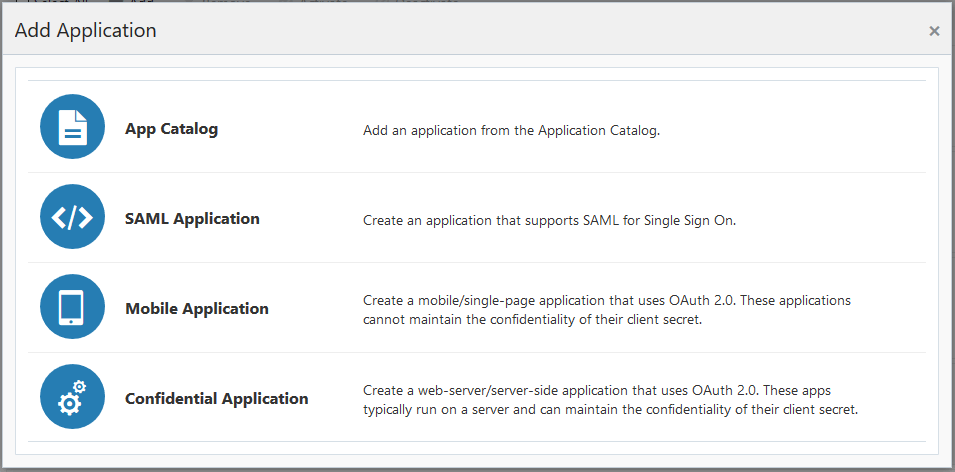
Give your application a name, and a description and/or tags to help with classifying it later, then click ‘Next’. On the following screen, you have the option to configure the application as a client. This is actually the only bit of configuration we need, so select ‘Configure this application as a client now’.
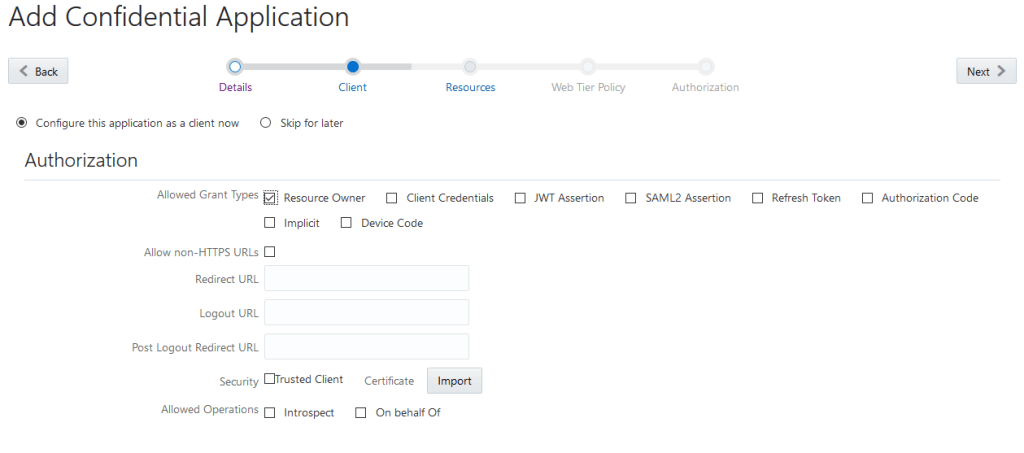
This screen provides a lot of options. For API testing purposes, we only need the ‘Resource Owner’ Grant Type in the ‘Authorization’ section, so select that before scrolling down to the ‘Token Issuance Policy’ section.
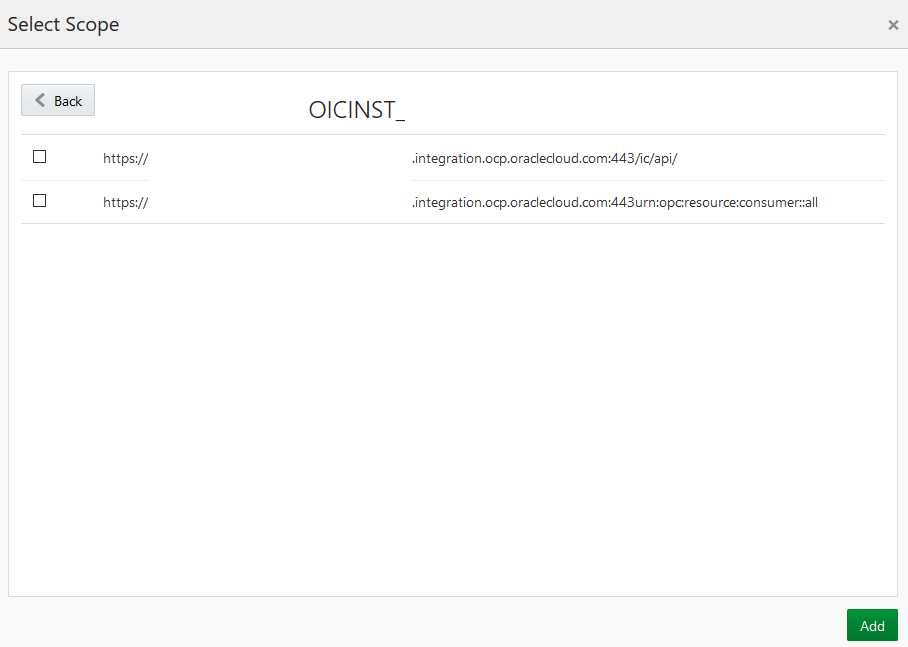
Here the important section is the ‘Resources’ one. Click the ‘+ Add Scope’ button to bring up a list of applications in the tenant. Unfortunately (at this time) there isn’t a nice search here, so you might have to scroll to find the representation of your PaaS service – here we are selecting one of several Integration Cloud instances.

Clicking the Arrow next to the instance then provides a list of scopes available for that app. In the case of Integration cloud, you need to grant the ‘urn:opc:resource:consumer:all’ scope. Generally the required scopes are pretty well explained in the Authentication or Authorisation section of the PaaS service API documentation. Copy the whole scope (including the initial URL section), as you will need it later. Check the checkbox next to the scope and click ‘Add’ to add it to the client.
At this point, the application is configured and you can simply click ‘Next’ several times to complete the wizard. I would however recommend locking it down further by selecting the ‘Enforce Grants as Authorization’ checkbox in the final ‘Authorization’ step. This means that in order to use this client to obtain an access token, you need to explicitly be assigned to the application. The PaaS services do their own authorisation, but this is just an extra control, and stops for instance, a different developer from using your client.
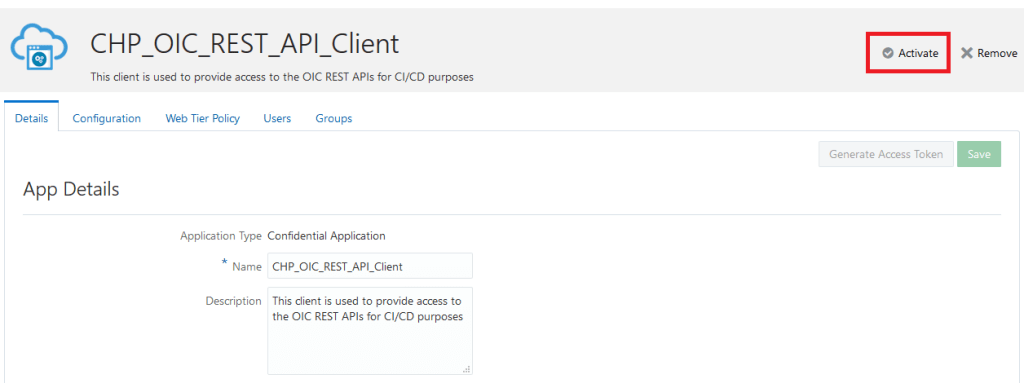
After clicking ‘Finish’, the client_id and secret will be shown. Note these down, you will need them later. Click the ‘Activate’ button on the top right of the page to enable the application.
If you chose the ‘Enforce Grants as Authorization’, you will need to navigate to the ‘Users’ tab of the app and assign the required users to the application.
Once this is done, ensure that the PaaS API User has the following strings:
- Client ID
- Client Secret
- Required PaaS service scopes
If you missed any of these, you can copy and paste them from the ‘Configuration’ tab of the application in IDCS.
Creating an IDCS Application as a PaaS User
If you are a PaaS service user, and don’t have access to IDCS to do this, you will need to ask your Identity Admin to do this for you. Here is a sample email you can send to help them with the configuration (though obviously go through your standard security processes if you have them):
Dearest Amazing Identity Administrator,
In order to use the REST APIs for <insert service name here>, I need an OAuth client configured. When you get a chance, can you set one up with the following configuration (these are the only relevant fields, the defaults are fine for the rest):
Confidential App
Grant Types: Resource Owner (just for testing at the moment)
Resources:
Can you add the scope associated with my <insert service type here>, the instance name is <instance name here>. According to the documentation I need the one labelled ‘<if there is one specified>’.
Once you have done that, can you provide me with the client id, client secret and the full string of the scope that is shown in IDCS?
Thanks,
Awesome Developer User
The end result of either of these flows is that we have an application configured in IDCS, and have the client id, secret and appropriate PaaS service scopes (you will also need to know your IDCS url, which you can grab from the URL of the sign-in screen among other places – it is of the form ‘idcs-<instance id>.identity.oraclecloud.com’). These values can then be used to obtain an access token that can then be used to invoke the PaaS service APIs. In order to obtain this access token, we are going to use an OAuth 2.0 flow called ‘Resource Owner Password’. The reason for this particular flow is simplicity of testing, since it allows for a single API invocation to obtain a user token. It is probably not going to be appropriate for production use cases, but it will enable you to get up to speed quickly.
In the ‘Resource Owner Password’ flow, we simply exchange the username/password of an authorised PaaS services user, as well as the client and scope information for an access token, via an API request that looks like the following:
POST https://idcs-<instance id>.identity.oraclecloud.com/oauth2/v1/token

Headers:
 Authorization: Basic <bas64encoded client_id:secret>
 Content-Type: application/x-www-form-urlencoded
Body (newlines added for clarity):
 grant_type=password
 &username=<username>
 &password=<password>
 &scope=<PaaS service scope>
The response to this request (assuming you entered all of the values correctly) should be a JSON object which includes an “access_token”. You can then use this access token to invoke the PaaS services by including it in the Authorization header prefixed by Bearer (space), i.e.
Authorization: Bearer <access_token>
If you run into issues using the token, it may be helpful to have a look at the content of your access token. The token itself is a set of base64 encoded strings, so you could decode it yourself for analysis or use a tool like jwt.io’s helpful debugger. If you take your token, and copy it (or if you are paranoid, leave off the last 50 or so characters to ensure the signature is not valid) into jwt.io, you will see that the payload contains something like the following (lots of irrelevant fields removed for clarity):
{
   "sub": "callanHP",
   "sub_type": "user",
   "scope": "urn:opc:resource:consumer::all",
   "aud": [
          https://ABC1DEF2GHI3JKL4MNO5PQR6STU7VWX8YZ.integration.ocp.oraclecloud.com:443
   ]
 }
These attributes in the token tell us that it is a user token (issued to me), it is intended to be consumed by an integration cloud instance (the ‘aud’ attribute stands for ‘audience’), and has been created with the scope ‘urn:opc:resource:consumer::all’. If the token you get back doesn’t have an appropriate audience and scope, it will likely be rejected by the PaaS service. The token subject also needs to be granted appropriate roles in the PaaS service, but if you are testing the APIs for your own service, I presume you have these.
If any of these are absent, you will need to check your token request as well as the configuration of the application in Identity Cloud. If your audience and scopes seem correct but you still can’t invoke the PaaS service APIs, you will probably want to check with your PaaS service admin, as you might not have the required roles to consume the APIs.
If you haven’t run into any of these issues, I am going to assume you are happily testing out the PaaS service APIs, writing your build scripts, etc. Most of the services provide very powerful integration capabilities and a number of use cases have been documented by other authors on this site, and if the implied complexity of the REST API documentation was holding you back from testing them out, I hope that this guide has helped. This documented the simplest flow available to begin testing, but as the API security for the PaaS services uses Identity Cloud Service, which provides a lot of flexibility in configuration, this simple flow can be extended and modified to cater for a wide variety of log in requirements.

Good Blog, well descrided, Thanks for sharing this information.
Oracle Integration Cloud Service Online Training
LikeLike