
In a previous blog on OCCS, I covered the steps required to provision the service. As an input to the OCCS Service provisioning I was prompted to specify the number of worker nodes I required, which for my example I set to be two. Having provisioned the service, I can now start to build and run my Docker images on these worker nodes. As part of the provisioned service, I have a node dedicated to the Container Console which provides a nice web User Interface that allows me to Build, Deploy, Run and Manage Docker Containers on the worker node hosts that I provisioned as part of my service. The two worker nodes are the hosts that I will ultimately deploy and running the image of interest such as WordPress, MySQL, Oracle Database, Tomcat, Nginx, WebLogic Server or whatever you want pretty much. The Container Console makes it very easy to build, run and deploy images via a web administration console.
For those not familiar with Docker I recommend that you check out this 12 minute video by Jake Wright https://www.youtube.com/watch?v=YFl2mCHdv24. Docker is being used by many developers as it provides a lightweight and repeatable way to provision a target runtime environment to support their application development and testing. The Docker based approach is less resource hungry than a VM based approach because the host kernel is shared across the containers but as with all things IT there is no silver bullet and there are limitations associated with using Docker in contrast to VMs. Docker functionality is evolving rapidly and some are now even posing the question, “Will Docker will replace Virtual Machines” ,https://blog.xenproject.org/2015/08/11/will-docker-replace-virtual-machines/ There are also some useful blogs that attempt to clarify what Docker is, what it isn’t and what it is – refer https://www.ctl.io/developers/blog/post/what-is-docker-and-when-to-use-it/ and “Why use Docker’s container software when VMs do the job?”, http://searchcloudapplications.techtarget.com/tip/Why-use-Dockers-container-software-when-VMs-do-the-job .
Anyway enough of the discussion, let me introduce you to the OCCS Container Console.

Using the console I can, for example, define a Resource Pool. A Resource Pool can contain zero or more hosts. As I chose 2 worker nodes, I could have two resource Pools of 1 host each or 1 resource pool of 2 hosts. When you deploy a service (or stack) you target a Resource Pool. So I chose Resource Pools from left menu.
Note that the resource pools in my environment are Default, Development and Production. These pools were provided as part of the service provisioning but can be added to or subtracted from.
Only one (the default resource pool) currently has any hosts associated with it. In my case the default Resource Pool has an association to the 2 worker nodes that were allocated.
I click on the “default” resource pool.
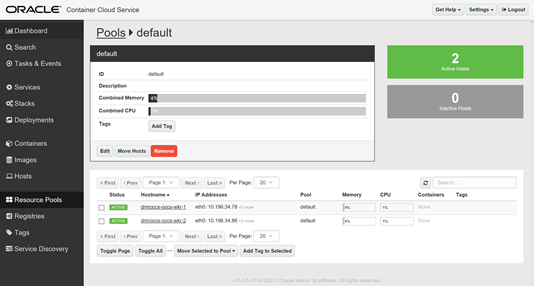
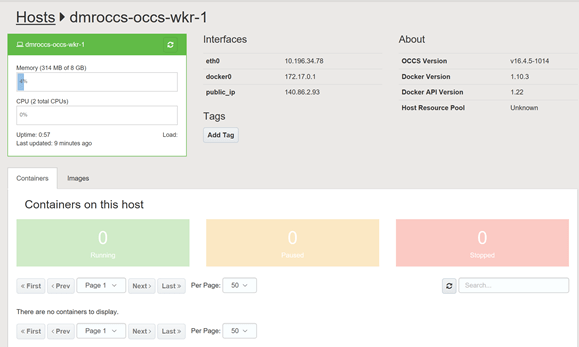
I can see in the console the hostnames and the IP addresses that are associated with the Default Resource Pool, the status of the hosts, memory used, CPU used and any containers that are associated with the host.
Under the heading IP addresses and immediately after the displayed IP address for worker host 1 there is link to show more details. When you click this link you will see the additional IP addresses for this worker-node / host. For instance in my environment when I clicked this it revealed the host IP, the Docker Container IP, and the Public IP addresses.
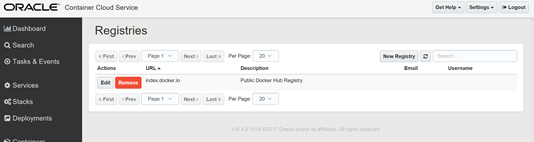
I now clicked Registries in the left menu and noticed that the Docker Hub registry is already pre-configured when my Container Service was provisioned. According to https://docs.docker.com/docker-hub, “Docker Hub is a cloud-based registry service which allows you to link to code repositories, build your images and test them, stores manually pushed images, and links to Docker Cloud so you can deploy images to your hosts. It provides a centralized resource for container image discovery, distribution and change management, user and team collaboration, and workflow automation throughout the development pipeline.”
You can easily add your own registries, including the recently released Oracle Container Registry which provides simple access to Oracle products to use in Docker containers. For more info, refer, https://blogs.oracle.com/linux/entry/monday_spotlight_announcing_the_oracle . Among the available services are, Oracle Database 12c (SE and EE), MySQL, Web Tier and WebLogic 12. It is anticipated that Oracle will add to this list in the future. For some additional detail on working with the Container Registry, check out this post from Craig Barr at RubiconRed – http://blog.rubiconred.com/a-first-look-at-the-oracle-container-registry/ .
I now click on Services and I see the available services from the Docker (Oracle or other) registry that I can deploy.
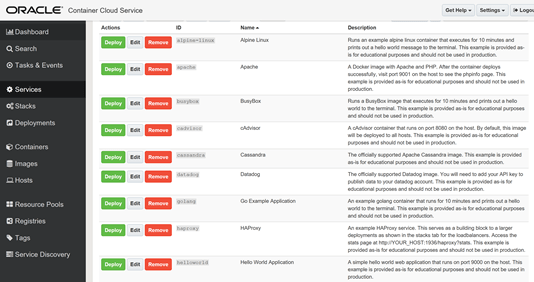
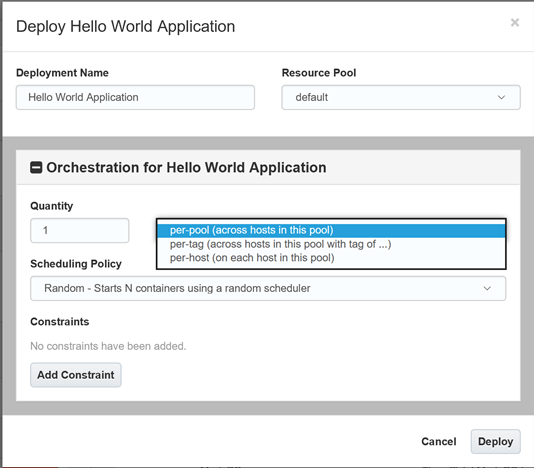
As I recall the HelloWorld Service happens to use the Nginx Web Server. I decided to use the HelloWorld Service and clicked the Deploy button. I was presented with the following dialog window where I had to specify a few things such as the Deployment Name, the target Resource Pool of worker nodes and any specific properties required for the build and run of the image eg Container Port and Host Port. I can also specify the quantity of instances of the application I want either in the pool, or on each host.
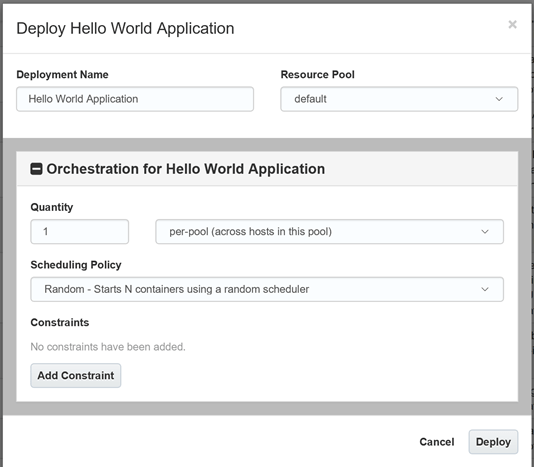
You will notice that I could choose to deploy a quantity of 1 or more services per pool or per host within a pool. I can also add a constraint such as Host and identify the specific host I want to target. The Container Console also allows me to define tags which can also be used as a constraint essentially only allowing deployment onto hosts with a particular tag eg Large Configuration, Small Config etc
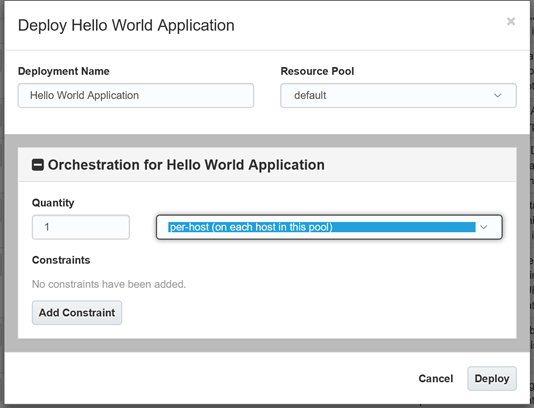
I decided to deploy a quantity of 1 HelloWorld Service per host in the ‘default’ resource pool.
With two worker nodes my hope is that I will see two HelloWorld services, one on worker node 1, the other on worker node 2.
Once I am happy with the configuration I click the Deploy button. At this point the magic starts to happen. I see the orchestration occur to deploy and start the containers with the HelloWorld image onto the worker node hosts. The Dockerfile is used to build the image. The instance of the image is called a container and it is possible to have multiple running containers of that image.
The deployment happened very quick which is the benefit of using Docker, however depending on where the required base images are copied from there may be some time spent downloading files required before the image build can be completed and run.
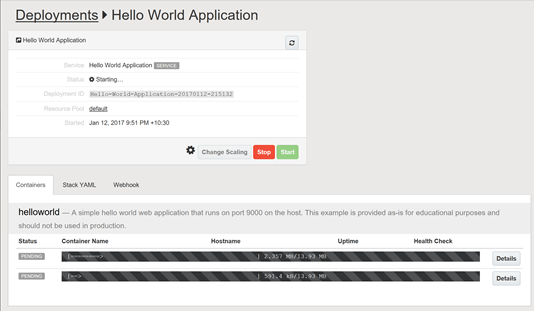
During the deployment, you may see the console flash green, then orange and then green again. The colours reflect the state overall of the deployment orchestration. Once completed the console was a green colour. So I am now ready to start testing. 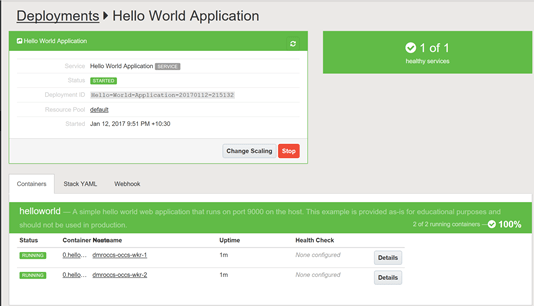
Where it makes sense your deployment can contain the smarts to do an auto health check to highlight any issues, for example, when a basic connectivity test fails. The Health Checks if defined are visible in the Console.
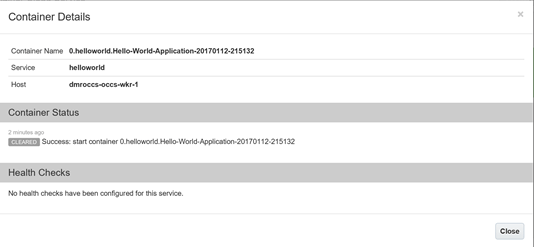
Assuming my deployment all worked I now need to know the Public IP addresses for the two containers running the helloWorld Service. To get the IP address I simply click on host1.
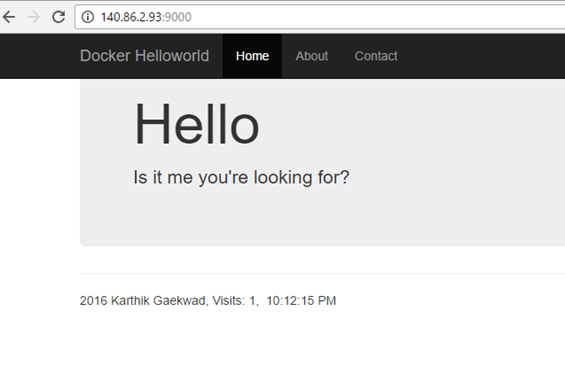
Note as per the description in the Docker Hub registry, the HelloWorld Service is a simple hello world web application that runs on port 9000 on the host. This example is provided as-is for educational purposes and should not be used in production. So I now pointed my favourite browser to http://140.86.2.93:9000 and I got the following displayed.
To prove that the helloWorld app was also running in the container on the second worker node I then pointed my browser to the Public IP address for the second worker node / host ( http://140.86.2.94:9000 ) and no surprise – it worked as expected.
In my next OCCS blog I want to progress from a single service deployment to deal with a stack deployment on the OCCS.

3 thoughts on “First experience Using the Oracle Container Cloud Service”