We wanted to demonstrate interaction with our Integration Platform using Email with an implementation based on the following

In order to support this requirement we chose to use the Oracle UMS adapter. This adapter would allow us to look for emails in a specified folder based – for example, consume incoming emails for emails with a particular subject line such as “Sphero Commands”. Of course before we configure the UMS adapter (covered in a separate blog), we first needed to install and configure an email server into our Virtual Machine. We chose to install, configure and run the Apache James email server – refer http://james.apache.org . Please note that our configuration was not secure or best practice but was adequate for our demonstration purposes. Also thanks to Andrew Dorman for helping me remember the steps involved.
The steps required to Install, Configure and Run the James Server were as follows;
- Download the Apache James binaries
- Install Apache James
- Configure Apache James RemoteManager
- Start Apache James Server
-
Create Users
-
Download the Apache James Server and verify the file
Point your browser to http://james.apache.org/download.cgi#Apache_James_Server
Note: We downloaded and installed a recent but stable version of Apache James 2.3.2.1
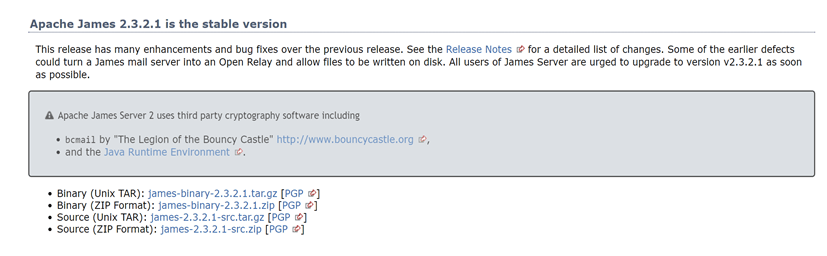
In your browser select and download the file eg james-binary-2.3.2.1.tar.gz

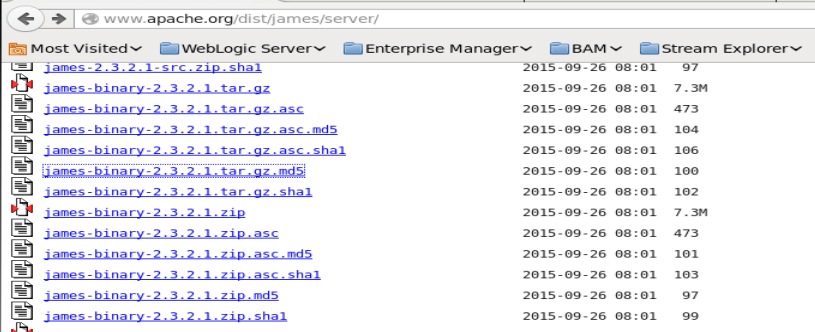
Once your download is complete, on the download site navigate to and click the james-binary-2.3.2.1.tar.gz.md5 link to reveal the MD5 checksum
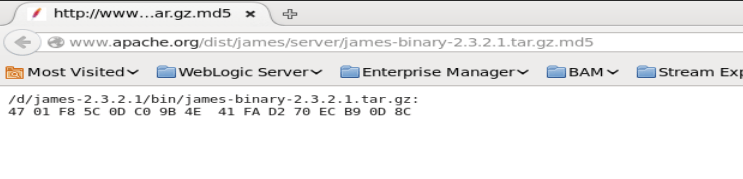
In a terminal window run the md5sum command to check the integrity of the file download – it should mirror the above.

- Install
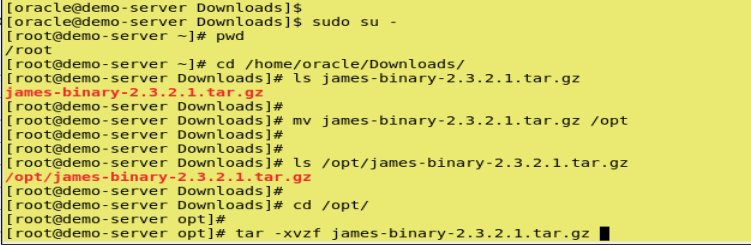
In your terminal window switch to your root user.
sudo su –
Then as the root user move your downloaded gz file to your desired location eg /opt
mv james-binary-2.3.2.1.tar.gz /opt
Now change directory to desired location to install james eg /opt
cd /opt
Next untar/ unzip using the following command
tar -xvzf james-binary-2.3.2.1.tar.gz
You should see the extract process writing to the terminal window as the file is expanded
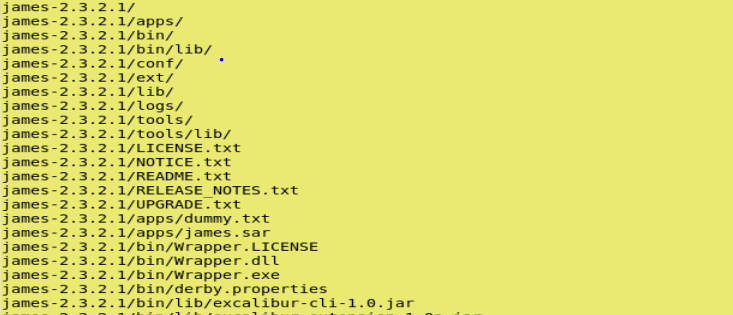
When the unzip completes you should now have a number of directories created under /opt/james-2.3.2.1 directory as per the screenshot below

-
Configure Apache James RemoteManager
There are a number of configuration parameters that can be set for the James Server however we required a very basic configuration so our changes were minimal.
Note: When installed the default setting for the RemoteManager assumes root with a password of root .
Therefore the only configuration change we did for our environment was to change the password value for the root user in the file
/opt/james-2.3.2.1/apps/james/SAR-INF/config.xml to match our environment.
Use your favourite editor (gedit) to edit the config.xml file.
Note: You will find the administration account info (root) under the RemoteManager section in the config.xml document.
4555
<!–
–>
<!–
true
–>
myMailServer
<!– Change the default login/password. –>
root” password=”root“/>
60000
<!–
james>
–>
-
-
Start Apache James
Save your config.xml file and then open a terminal window and start the James server
sudo -E /opt/james-2.3.2.1/bin/run.sh
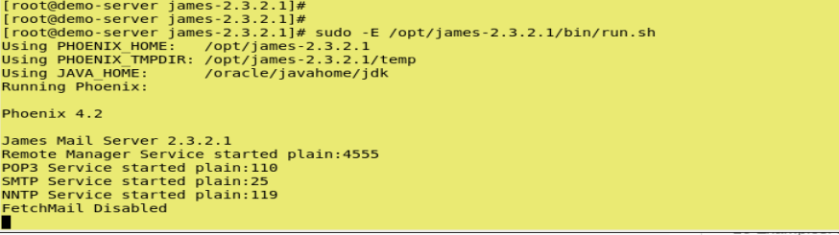
Note the RemoteManager Service is started on port 4555.
- Create UsersWith the RemoteManager configured and the James server started you should now be able to telnet to your server on port 4555 which will allow you to add users.
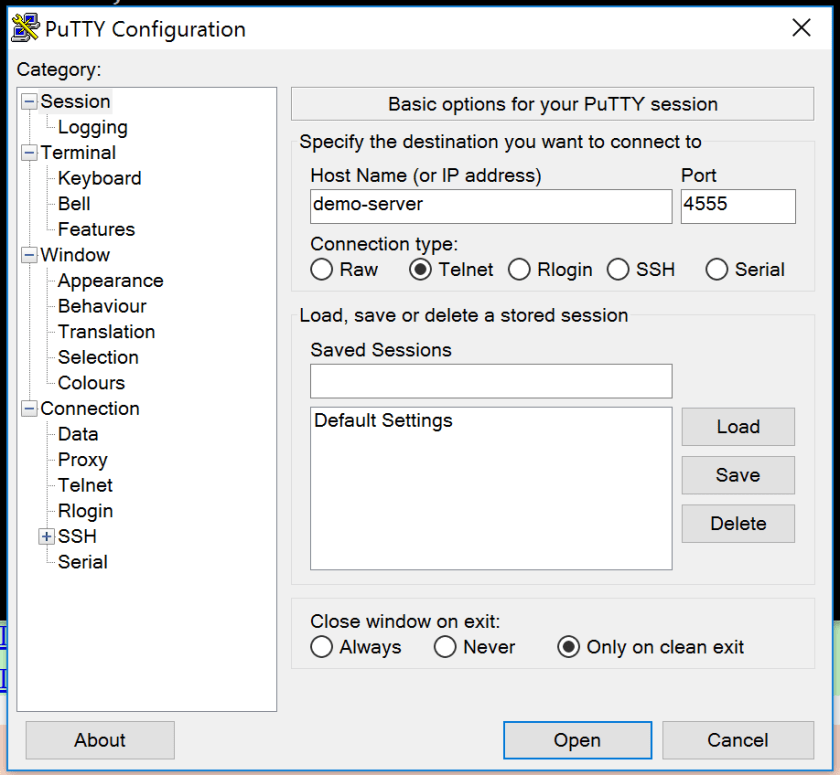
In the terminal window enter your admin user credentials as per the values specified in the config.xml file under the RemoteManager section.
In my case I used root and oracle for the password.
- There are a heaps of command but we just wanted to create a couple of users. Enter the command adduser followed by the username and password.
In my example below I am creating a user called user4 with a password of welcome1 .
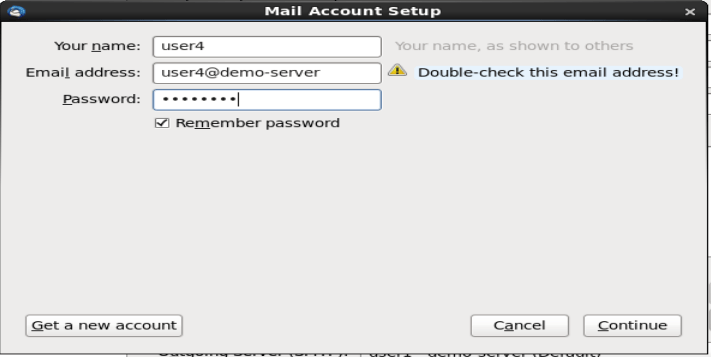
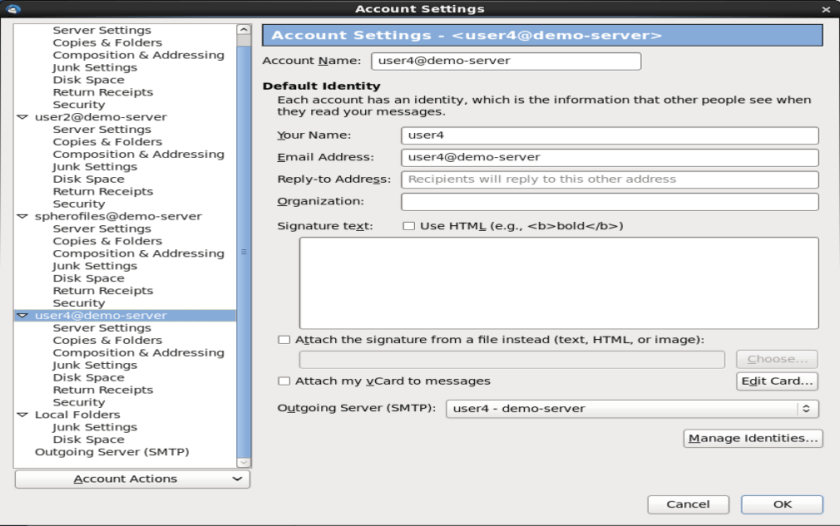
Now prove connectivity to your mail server using a suitable client eg Thunderbird
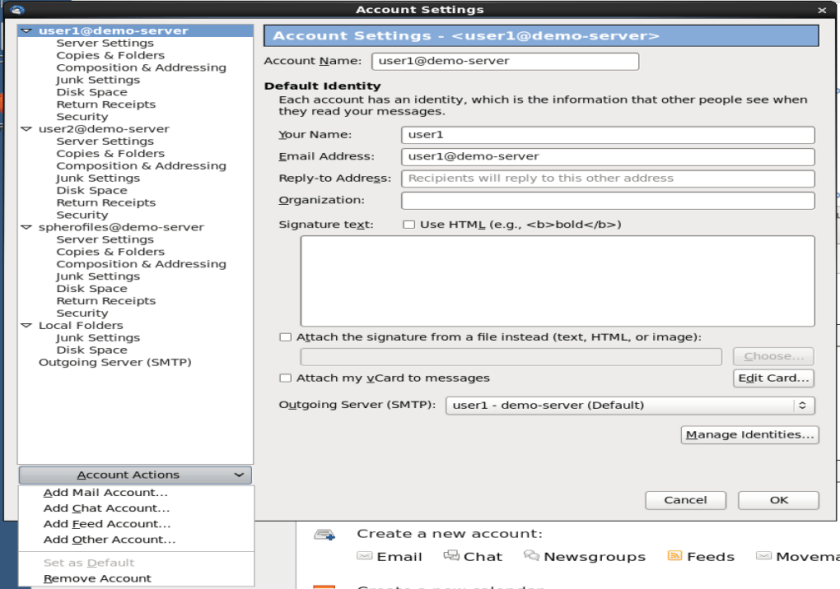
Choose Add Mail Account

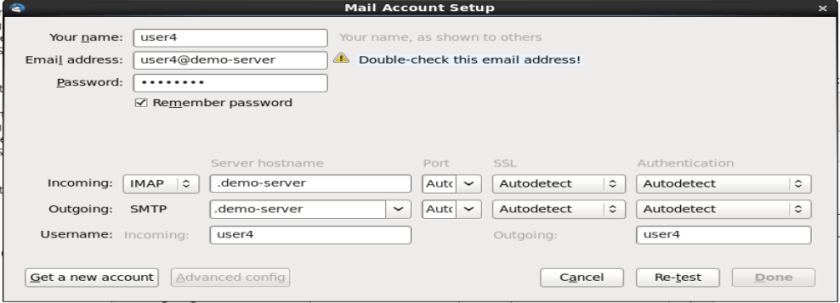
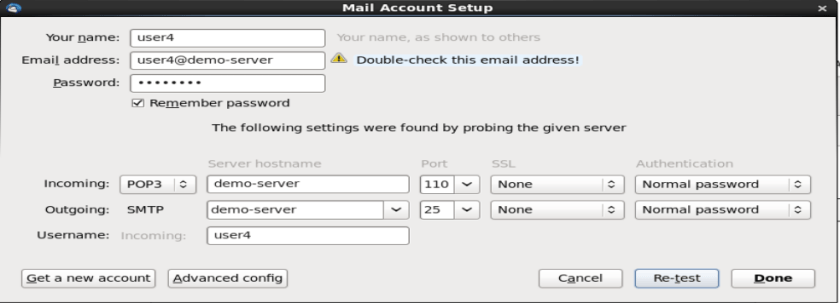
Change values to the following;
Incoming : from IMAP to POP3
Incoming Server hostname from .demo-server to demo-server
Incoming Port from Auto to 110
Incoming Authentication from Autodetect to Normal Password
Outgoing server hostname from .demo-server to demo-server
Outgoing port from Auto to 25
Outgoing Authentication from Autodetect to Normal Password
We know our implementation isn’t secure but it’s nice to be reminded ….

Taking the old C programmers motto – ignore all warnings, tick the checkbox.

Click Done.
You should now see your new user in the Thunderbird mail client.
Note : An alternative way to create users for James 2.x is to use the telnet admin: http://james.apache.org/server/2/adding_users.html , however
James 3 has added a cli client: https://james.apache.org/server/3/manage-users.html
Issues observed
-
We observed that occasionally the James server wouldn’t start after a shutdown of the VM. The console log / error message was as follows;
James Mail Server 2.3.2.1
Remote Manager Service started plain:4555
POP3 Service started plain:110
org.apache.avalon.phoenix.containerkit.lifecycle.LifecycleException:
Component named “smtpserver” failed to pass through the Starting stage.
(Reason: java.net.BindException: Address already in use).
The following steps helped resolve the above issue;
Open a terminal window and execute the following command as root.
/etc/init.d/postfix stop

sudo: /james-2.3.2.1/bin/run.sh: command not found
I am getting this error. I don’t know what to do. Could you please help me?
LikeLike
I assume this is at Step 6 where you are attempting to start James? Where is your James installed? In my blog my installation was under /opt hence in my environment the command I used to start James was as follows
sudo -E /opt/james-2.3.2.1/bin/run.sh
LikeLike