
This section provides an overview of how to configure the Salesforce adapter as part of an on-premise installation/configuration. Notice that Oracle provides an out-of-the box Integration Cloud Service in the Oracle Public cloud where these steps are not required anymore, as these adapters are provisioned and configured by default. For more information on how to integrate into Salesforce using Oracle Integration Cloud Service, refer to this other blog: https://solutionsanz.wordpress.com/2016/11/22/teaching-how-to-integrate-salesforce-with-ics/
If you need to configure the Salesforce adapter as part of an on-premise OSB/SOA installation, you need to generate and import the Salesforce.com certificate for your organization into your client/server. The Oracle Cloud Adapter for Salesforce.com uses the certificate generated by Salesforce.com to establish a two-way SSL authentication. This enhances the security as the target of SOAP calls made by the Oracle Cloud Adapter for Salesforce.com receives the certificate and can use it to authenticate the request against its keystore.
Importing Salesforce.com Server Certificate
Note: Here, Firefox is used for demonstration. Experience may differ if you will be using another browser or other version of internet explorer. But idea here is to click on security lock to fetch the certificate information.
-
Export Salesforce.com server certificate. The easiest way to do it is from the browser when attempting to login
- In a browser go to: https://login.salesforce.com/?lt=de
- Click on the salesforce.com certificate and then Export the certificate

Or in Firefox, it may look like this:

- Then navigate to More Information > Security > View Certificate > Details tab

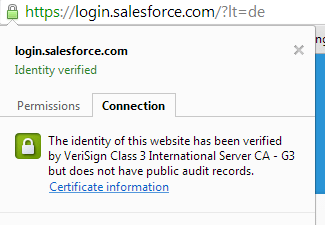
In Chrome, this may be a little different. click on the lock to the left of the URL, then click on the “Connection” tab and finally on the “Certificate information”
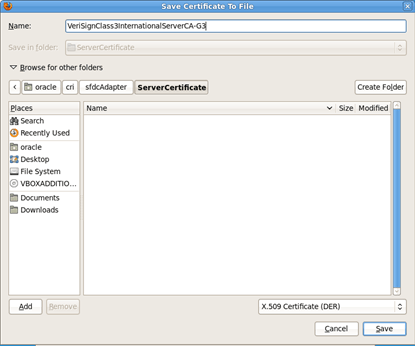
- Select each of the Certificate levels and click Export. Provide a suitable location on your system to save the certificate authority. Notice that a fresh installation will require the “full Certification Path”. I.e.

| Note: You need to make sure that key trust (DemoTrust.jks or KSS) contains all the certificates that match the full certification path. You can do this by running a “keytool –list” on the trust key store in SOA 11g or via the KSS in Fusion Middleware Control in 12c. In case there are missing certificates, then those certificates will have to be exported and then imported one by one. |
- Save the certificates as the X.509 Certificate (DER)
-
If you are using KSS instead of DemoTrust.jks, select each certificate in the path and for each select the option X.509 Certificate with Chain (PEM).
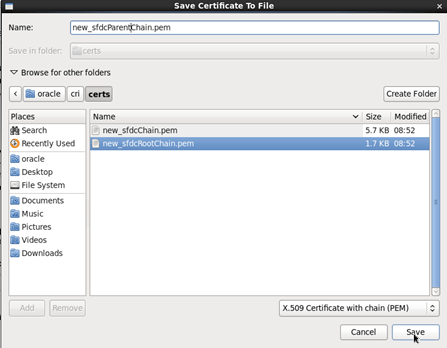
- Save it on a suitable location on your machine. In this case I am storing this certificate to the default Weblogic server’s trust key trust location (in this case $Middleware_Home/wlserver/server/lib)
Importing certificates using Keytool – Demo Trust Keystore Path
- Make sure that KSS for demo is disabled. To do this, go to the WebLogic console
- Click on Domain > Security > Advanced page and unselect the “Use KSS for Demo”. Then click Save.

- Restart the server
- To know the WebLogic server’s trust keystore location, login to admin console (http://url:port/console/).
- On the home page, proceed to Servers under Environment subsection.
- Select the Admin server out of the list of servers displayed.
- Proceed to the Keystores tab

- Under this tab, select the Demo Trust Keystore path. This is the path where our keystore SFDC resides.

- It would be of the form {Middleware_Home}/wlserver/server/lib/DemoTrust.jks. Next, you need to import this certificate from the authority into WebLogic server’s Demo Trust.
- Open a console window and move to that path
-
At this path run the following keytool commands:
keytool -import -trustcacerts -alias [yourAlias] -file [yourSavedFile] -keystore DemoTrust.jks -storepass DemoTrustKeyStorePassPhrase
Notice that DemoTrust.jks passphrase is DemoTrustKeyStorePassPhrase, while the Demo Identity Trust passphrase is DemoIdentityKeyStorePassPhrase – In this occasion you need to make sure you point to the Demo Trust, not the Demo Identity. By using the right password you can make sure you get this right.
| Note: if you get an error saying that “keytool” does not exist, point to the JRE, e.g. Alias keytool=”/oracle/javahome/jdk/jre/bin/keytool” Or simply, point to the full path: /oracle/javahome/jdk/jre/bin/keytool -import -trustcacerts -alias SalesForceRootCA -file [yourSavedFile] -keystore DemoTrust.jks -storepass DemoIdentityKeyStorePassPhrase |
- Make sure that you get the message “Certificate was added to keystore“. If it says that the “Certificate already exists” with a different alias name, then skip that one and continue with the next one.
-
You can verify the same by enlisting all the certificates using the following command:
keytool -list -keystore DemoTrust.jks -storepass DemoTrustKeyStorePassPhrase
- Now repeat the same Import steps for the next certificates down in the chain, i.e.

That is:
cp /home/oracle/cri/certs/*.der /u01/fmw/soacd/wlserver/server/lib/
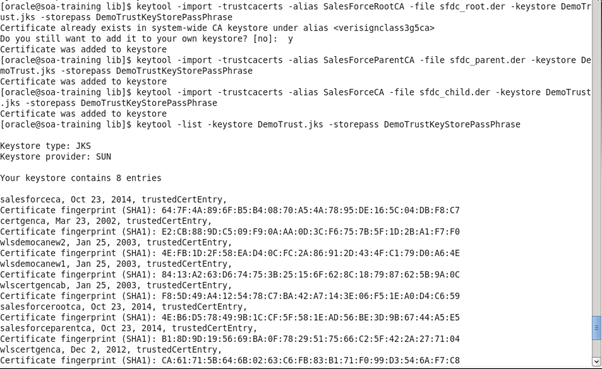
keytool -import -trustcacerts -alias SalesForceRootCA -file sfdc_root.der -keystore DemoTrust.jks -storepass DemoTrustKeyStorePassPhrase
Note: If you get a note saying that this certificate might already exist, still type “y” to override it.
keytool -import -trustcacerts -alias SalesForceParentCA -file sfdc_parent.der -keystore DemoTrust.jks -storepass DemoTrustKeyStorePassPhrase
keytool -import -trustcacerts -alias SalesForceCA -file sfdc_child.der -keystore DemoTrust.jks -storepass DemoTrustKeyStorePassPhrase
keytool -list -keystore DemoTrust.jks -storepass DemoTrustKeyStorePassPhrase
Note: At the moment of writing this document it was not clear as whether each certificate in the chain had to be imported. However this seemed to solve a problem to do with missing certificates in path, so as a temporary workaround this instruction will remain, but it is probable that in future releases only by importing the PEM with chain will be sufficient.
| Note: Another important command that you might need to use in case that you import the wrong certificate and you need to remove it: keytool -delete -alias SalesForceCA -keystore DemoTrust.jks -storepass DemoTrustKeyStorePassPhrase |
- Validate the just imported certificates with:
keytool -list -keystore DemoTrust.jks -storepass DemoTrustKeyStorePassPhrase
Make sure that the imported certificates appears as part of existing certificates in the keystore
| As long as the WebLogic Server is pointing to the right Keystore, this is not needed. However if you had to hardcode the keystore in the startup script (not recommended), you can add the following line into your startWebLogic.sh script file:
JAVA_OPTIONS=”${JAVA_OPTIONS} -Dweblogic.security.SSL.trustedCAKeyStore=/u01/fmw/soacd/user_projects/domains/compact_domain/security/DemoTrust.jks” |
- Restart WebLogic
Using the SFDC Cloud Adapter
Once you have imported the required certificates, the following steps are to be followed for configuring CSF key on the server side which would be used by Salesforce adapter during runtime for retrieving the Salesforce credentials.
- Configure the CSF Key by opening Enterprise Manager Console.
- Right click WebLogic Domain -> Domain Name and select Security -> Credentials

- Create a Map Name with the name “SOA” and Click OK

- In the Map created in the previous step, create a Key providing your Salesforce credentials. The password should be a combination of Salesforce Password and Salesforce Key. For example in this case, SFDC_CRI as shown in the screenshot below:
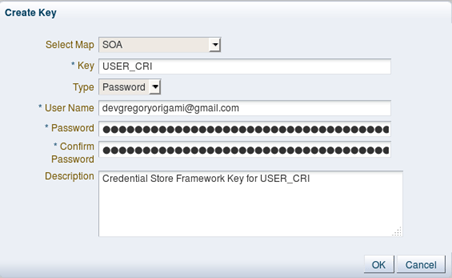
- The newly created CSF key should be available in the list of keys under ‘SOA’ map

Using the Oracle Cloud Adapter for Salesforce in JDeveloper
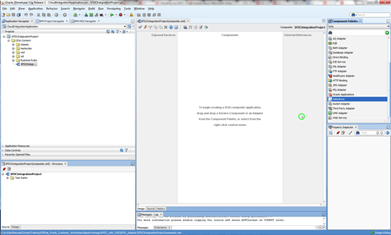
- Create a new Generic Application and a SOA Project. In this case I called them: CloudIntegrtationApplication and SFDCIntegrationproject respectively. Choose an empty composite.

- From the Component palette, drag the Salesforce adapter and drop it into the “External References”
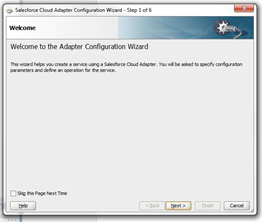
- On the Welcome step, click Next
- Type “CustomersContactInfo” as the Service Name and click Next

- Select the SFDC Enterprise WSDL that comes with this exercise (refer to “Integration with Salesforce with OSB” section for more information on how to get the WSDL from Salesforce.com).

- Add a new Credential, by clicking on the green plus icon. Make sure to use the same CSF Key that you used configured in WebLogic within the “SOA” Map. For more information read “Configuring CSF Key on Enterprise Manager Console” section in this document:

- Test the connection and make sure to get a successful message. Then click Next

If you experience any problem, refer to Oracle Cloud Adapter User Guide for Oracle Cloud Adapter for Salesforce.com, 11g Release 1 (11.1.1.7.0) or contact the owner of this document.
-
As part of the Cloud Operation Configuration, you have various Operation Categories, such as CORE, CRUD, MISC and SOSL/SOQL.

|
Supported Category |
Supported Operations |
| CORE | convertLead, getDeleted, getUpdated, merge, undelete, upsert |
| CRUD | create , retrieve, update, delete |
| MISC | getUserInfo, process |
| SOSL / SOQL | query,queryAll, search, queryMore |
For more information, refer to the Oracle Cloud Adapter User Guide for Oracle Cloud Adapter for Salesforce.com, 11g Release 1 (11.1.1.7.0) or 12.x documentation.
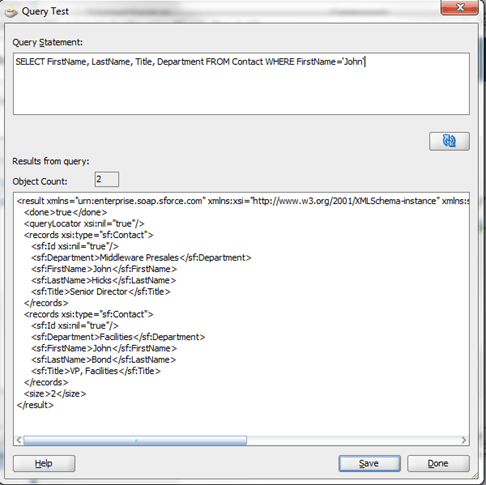
For the purpose of this example and in order to align with the first Salesforce integration with OSB in this document, choose SOSL/SOQL and enter the same query that was used in the previous example.

- Click on the Run icon to test your query. Make sure that you get the same result as in the OSB example.
- Leave the default headers and Properties and click Next
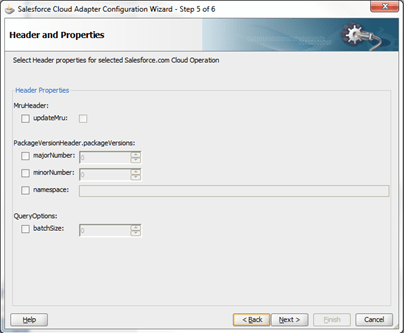
- Finally, click Finish

Wiring the Adapter in the SOA Composite
- Once you have the adapter in place, drag and drop a new synchronous BPEL and expose it as a SOAP endpoint. For simplicity of this exercise, select the default String Input/Output types.

- Wire the BPEL to the SFDC Adapter

- Open the BPEL service and create an “Invoke” operation pointing to the SFDC Adapter. Also select default variables.
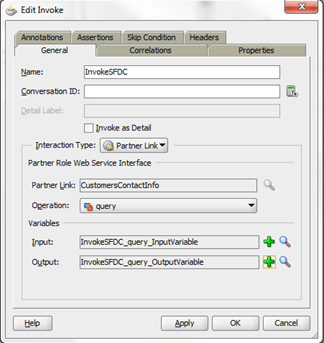
-
Assign the request variable. You can override the default query that you selected in the adapter. For example:
SELECT FirstName, LastName, Title, Department FROM Contact WHERE FirstName=’John’
- Save all and deploy

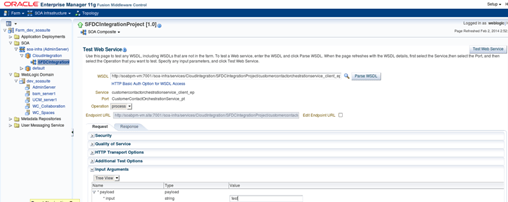
- Once it is deployed, test the service via the “Fusion Middleware Control Enterprise Manager Console”. Notice that since at this point you are not mapping neither the inputs nor the outputs, you can leave the fields blanks. The purpose of this testing is to verify the seamless integration to Salesforce.com via the Oracle Cloud Adapter.
Congratulations, you have successfully configured and used the Oracle Salesforce adapter as part of an on-premise OSB/SOA installation. For more information on how to integrate to Salesforce using the Integration Cloud Service, refer to this other blog: https://solutionsanz.wordpress.com/2016/11/22/teaching-how-to-integrate-salesforce-with-ics/

Carlos, there is also a great post by Lucas Jellema that covers steps to import certificates into SOA Cloud Service so that SOACS could invoke an ICS end point. Refer https://technology.amis.nl/2017/03/15/oracle-public-cloud-invoking-ics-endpoints-from-soa-cs-configure-ssl-certificate-and-basic-authentication/
LikeLike