
Oracle Cloud Infrastructure makes it easy to allow secured ways to let your compute instances in the Oracle Public Cloud to reach the internet, as well as being reachable from the Internet when needed. There are 2 main types of Networking Gateways that makes this easy to implement:
- Internet Gateway: This type of gateway is directly attached to your Virtual Cloud Network (VCN) and lets your compute instances, that reside in a public subnet, to reach the Internet and being reachable from the Internet. A classic example of this is a bastion host that needs to be accessed via SSH from outside your VCN and that also needs connectivity to the Internet.

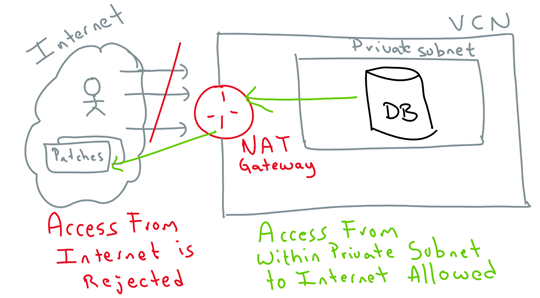
- NAT Gateway: NAT gateways are like Internet gateways, in the sense that it lets your compute instances to be able to reach out the Internet, but they forcibly disallow the ability to reach these instances from the Internet, in other words, they are private instances. A classic example of this is a DB system running on a private subnet on your VCN, that needs to reach out Internet to download patches, but you don’t want anybody outside your VNC to be able to reach your DB.
Given this is the first of many more blogs around Oracle Cloud Infrastructure, I am going to assume not previous knowledge and start from scratch and build each of the networks primitives one at a time. Obviously, Oracle allows us to fast track and simply select defaults and create all network resources automatically, when spinning up a VM, but I believe that knowing where everything fits, will give us the ability to change the defaults if needed in the future.
Let’s first create your VCN, Subnets and other Networking primitives
Perhaps the first thing that you have to think of is the Network framework that will govern a particular purpose. In this case, we will need 2 subnets; a public subnet used to test the Internet Gateway and a Private subnet used to test your NAT Gateway. Also, since subnets are logical constructs governed by a Virtual Cloud Network (VCN), I recommend always to think about creating your VCN first and think of the CIDR ranges that will reflect your required network topology.
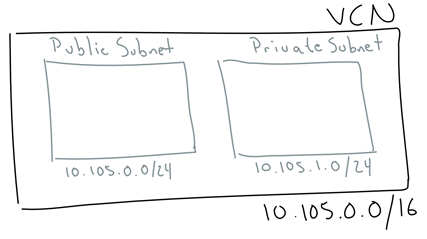
In this case, let’s keep thing simple, the only real rule that I want to highlight is, always design your networks making sure that you don’t overlap CIDR blocks:
- VCN CIDR block: 10.105.0.0/16
- Public subnet: 10.105.0.0/24
- Private subnet: 10.105.1.0/24
Let’s create first the VCN, for this:
- Login into your OCI console (get a new trial by going to https://cloud.oracle.com/tryit)
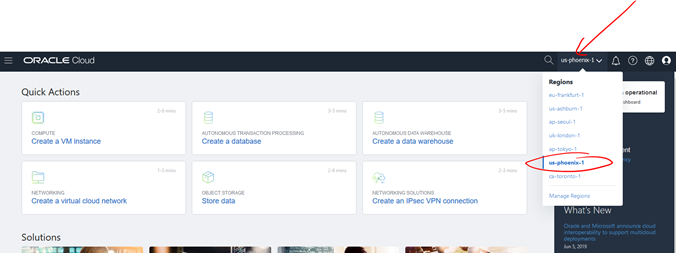
- Select a region that you want to work on. In my case, I am choosing the us-phoenix-1 region.
- Go to the top left burger menu > Networking > Virtual Cloud Network and click on Create Virtual Cloud Network.

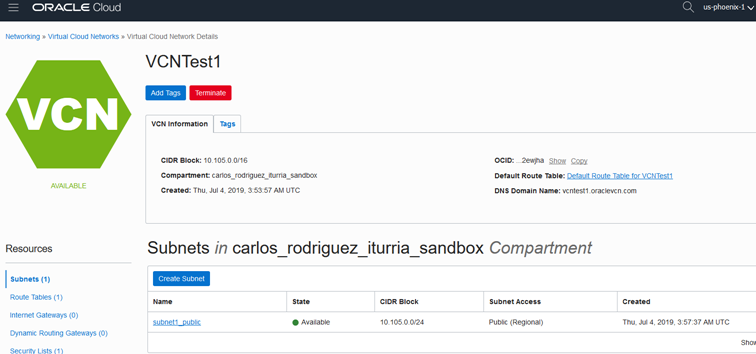
- Enter a name, choose a compartment where you want to install it, enter the VCN CIDR block (in this case, 10.105.0.0/16) and any tags if required. Also leave the default option “Create Virtual Cloud Network Only”. We will create the rest of the networking primitives afterwards.
- Then click Create Virtual Cloud Network. Your VCN will be created instantaneously.
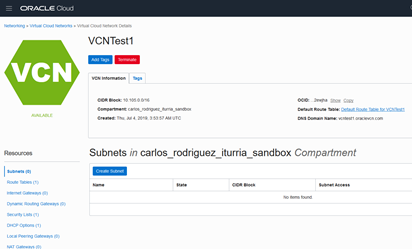
- Now, click on the Create Subnet blue button to create the first Public subnet.
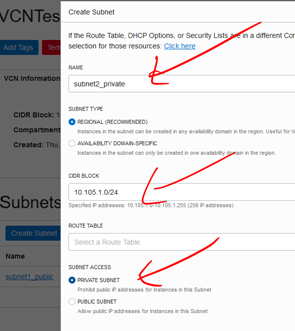
- Give it a name, leave it as regional, enter the CIDR block for the public subnet (10.105.0.0/24), choose public subnet and finally click Create Subnet at the bottom.
- Your public subnet will be shown.
- Now, repeat the steps to create another subnet, but this time it will be a private subnet with CIDR block 10.102.1.0/24.
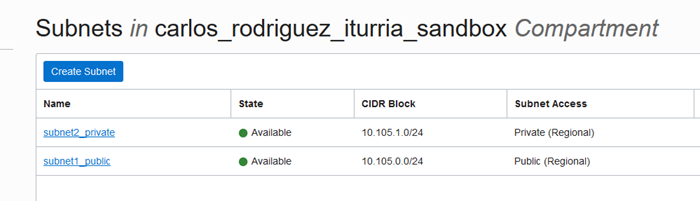
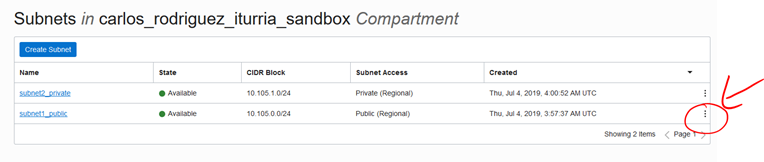
- Your 2 subnets will be displayed now.
When you create a VCN, by default a routing table, DHCP and security list are created and attached to it. However, it is always a good practice to leave these default configurations and create your own, specific for your needs. That way you can apply different rules per subnet.
Also, by default the default security list already establishes an ingress stateful rule to open incoming traffic on port 22. This means that, in theory for this exercise, we don’t need to create any new security list. Having said that, since we are learning best practices, let me show you how you would normally create separate route tables and security lists for each of your subnets, so that you can, if needed, in the future tighten different security requirements per subnet.
So, for this demo, we are going to create a pair of routing table and security lists each for one of our subnets:
- On the left menu under Resources, click on Route Tables and click on Create Route Table.

- This is going to be used for our public subnet, so give it a sensible name and add it within the same compartment that you chose before for your subnets.

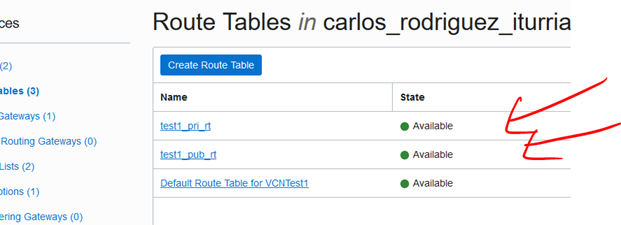
- Then click on Create Route Table. Your new route table will be displayed:

- Repeat these steps to create another route table, but this time, give it a name associated with the private subnet, so that you can identify them later. Once you complete this, your 2 new security lists should be displayed:
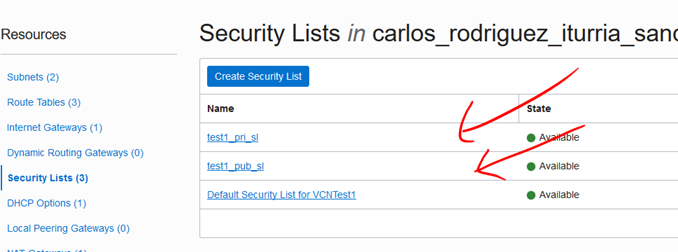
- Similarly, click on Security Lists under Resources and create 2 new security lists. Don’t add any rules to it yet, just leave the defaults, we will come back to that later. Just make sure that, you give then sensible names, one associated to the public subnet and one for the private subnet. This is just so that you can recognise them later, when assigning them into the subnets.
Now, let’s create the 2 type of gateways that we want to play with:
- Under Resources, click on Internet Gateway and click Create Internet Gateway.

- Give it a name and once again, choose the same compartment that you have been using so far. Then, click Create Internet Gateway.

- Repeat the same steps, but this time do it for NAT Gateways.

Finally, we need to:
-
Associate to the subnets, their corresponding route tables:
- Under Resources, click on Subnets
- Hove over the 3 vertical dots at the far right of the public subnet and click on Edit.
- Select the right Route Table and click Save Changes.

-
Repeat the steps to associate to the Private subnet, its corresponding route table.
-
Associate to each subnet the right security list (you can associate up to 5 security lists per subnet).
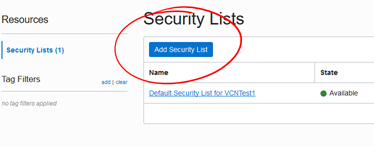
- Click on the public Subnet link
- Click Add Security List
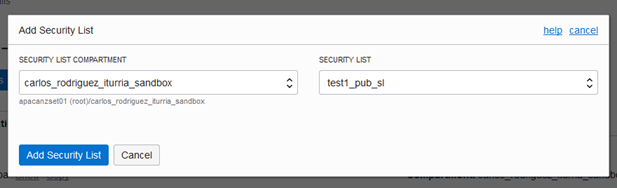
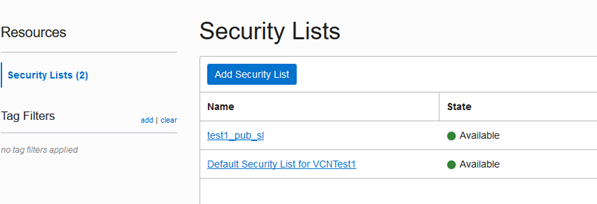
- Search for the security list that corresponds to the public subnet. Then, click Add Security List.
- Your default and new security lists will be shown:
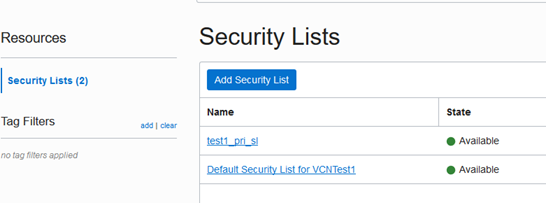
- Go back to Subnets and select the Private Subnet. Then repeat the previous steps to associate the security list that applies to the Private subnet.
Finally, we need to associate a default destination route on each of the Route Tables to the corresponding type of Gateway. That is:
- Within Resources > Route Tables, click on the route table associated with your public subnet.
- Click on Add Route Rules.
-
Given this is for the public subnet, I am adding:
- Target Type: Internet Gateway
- Destination CIDR block: 0.0.0.0/0 (This means all the Internet; we can obviously just add specific networks/hosts with tighter CIDR blocks)
- Compartment: Same compartment I’ve been using so far.
- Target Internet Gateway: Simply select from the drop-down menu the Internet Gateway that we created previously.

- When ready, click on Add Route Rules.
- Now, let’s repeat these steps, but this time to add the NAT Gateway into the routing rule associated with the Private subnet.
- Normally for NAT Gateways, we don’t open the destination CIDR block to the whole Internet, but just the ranges where we would be getting the patches from, for example. For the sake of this exercise, you can simply add the whole Internet.
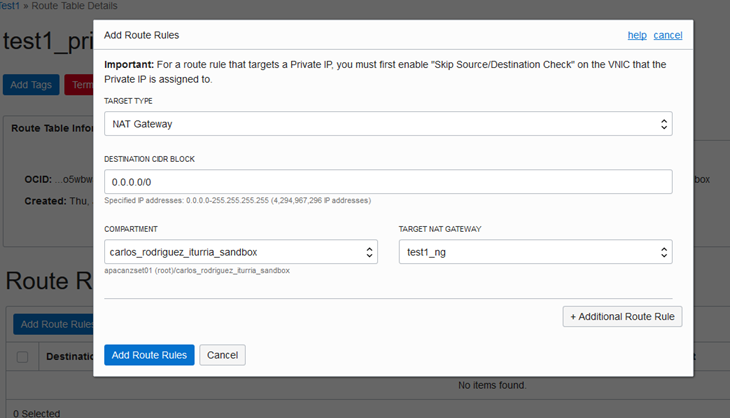
- When ready, click on Add Route Rules.

We are ready to spin up VMs on each of these subnets.
Now, let’s spin up VMs into the Subnets
We are ready to spin up VM compute nodes into each of our subnets, for this, let’s simply add Ubuntu machines (I love Ubuntu).
- Click on the top left burger menu and go to Compute > Instances.
- Click on Create Instances.

-
In the compute creation, let’s first create the bastion host, that is, the VM that will be in the public subnet:
- Enter a sensible name: bastionhost1_vm
- Select the Availability Domain (you normally have 3 Availability Domains per Region)
- Change Image Source to Ubuntu 16.04
- Instance Type: VM
- Shape: Leave the default VM.Standard2.1
- Add your RSA public key, so that you can ssh later, using its corresponding private key.
- VCN Compartment: Select the compartment that you have been using so far.
- VCN: Select the VCN that you created previously
- Subnet Compartment: Select the corresponding compartment.
- Subnet: Since this is the bastion host, select the public subnet that you created previously.
- Verify and when ready click on Create.
- Within a minute, the Instance will be ready:
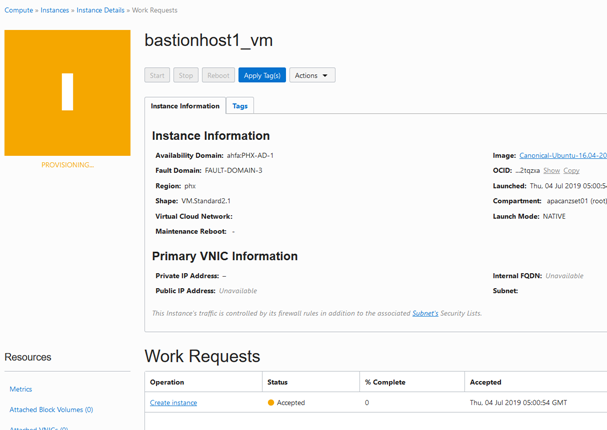
- You know it is ready when it comes all green:
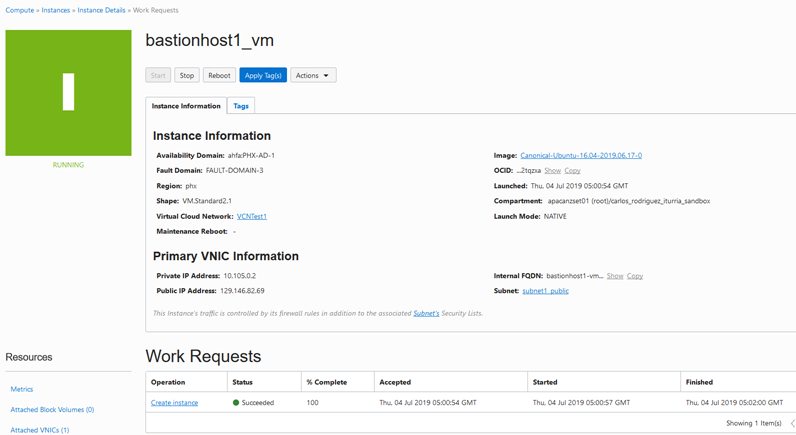
-
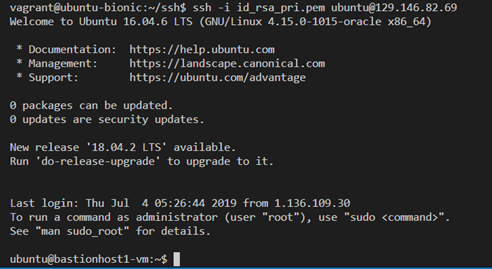
Notice that the VM is associated with a Public IP Address, use your private key to ssh into this new VM. The default user for Ubuntu VMs is “ubuntu”.
For example, for me:
- Great, now repeat the same steps, but this time to create a new Ubuntu VM in the private subnet.
- Notice that since this second VM is associated with a private subnet, it will not have a public IP Address. In other words, we cannot reach it from the Internet, which is exactly what we wanted.

- However, since we associated a NAT Gateway with the private subnet route table, we should be able to reach the Internet from any compute instance under the private subnet. Let’s test it.
- For this, let’s use our bastion host to ssh our private VM (using its private IP Address, e.g. 10.105.1.2 in this case).
- For this case, once you SSH into the bastion Host, let’s simply create a new file and store the private key (there are better ways to do it using dynamic groups, but that would be another blog).

- Now, simply ssh from the bastion host into the private VM:
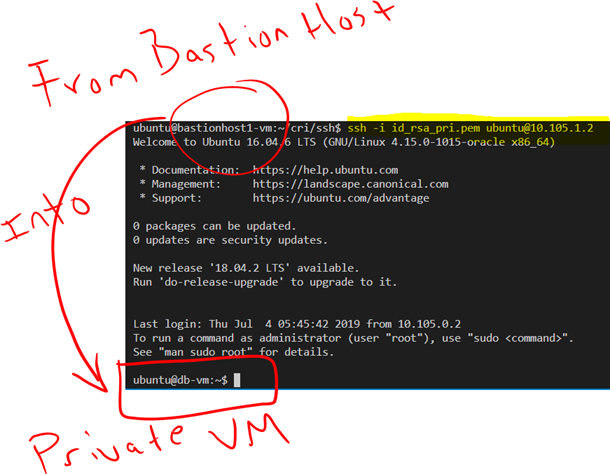
- Great, we have connectivity, now let’s prove that we can reach the Internet from within this private VM.
-
A simple curl command would do and a great time for a daddy joke:

Ok, not a great joke, but at least we know that we can hit the Internet from an instance running on the private subnet.
I hope you found this blog useful. If you have any question or comment, feel free to contact me directly at https://www.linkedin.com/in/citurria/
Thanks for your time.

I always appreciate a dad joke Carlos !
LikeLike
I am not able to access internet from a compute instance in a public subnet that was created in a private network. How do I grant access to this
LikeLike
Much has changed since writing this blog. Oracle Resource Manager (a managed Terraform environment) helps with this architecture. There are reference architectures (built-in or open-sourced) that can help. Check out some of the sample build-in. here – https://docs.cloud.oracle.com/en-us/iaas/Content/ResourceManager/Reference/solutions.htm. AND there is a architecture centre that helps with the best practice method of designing your cloud infrastructure – there are solution architecture and reference blueprints as well. Check out these here – https://docs.oracle.com/en/solutions/index.html.
LikeLike