
Most organisations have to the deal with several kinds of digital artefacts that need publishing on various channels like Web, Mobile, TV, Social, Kiosks, Print, etc. And it is no brainer that organisations need a “Digital Artifacts” repository that can help them to store these digital assets in a centralised repository. Also, it helps them to distribute very quickly on those channels as mentioned earlier to maintain brand consistency and ensure the rights asset displays on the right channel at the right time. However, most often the digital artefacts are produced in partnership with several teams internally and externally (Primarily design agencies). So the Digital Artifact repository is not only a storage container, but also needs to behave like a collaboration platform to engage with all the stakeholders internal and external to the same platform in real-time. To make it bit more complicated imagine the teams producing the digital assets (aka contributors) need to get all the necessary approvals before the artefacts are published or even consumed by different individuals. Given the nature of the organisations, business approvals can come in various shapes. For example, a Digital Artifact that needs to go out on TV for advertising needs a Product Team, a Branding Team, and Legal Team. The product team is responsible for the design of the digital artefact. The branding team ensures the assets produced are consistent with organisations marketing themes. The legal team task is to ensure the teams have done their due diligence and advise the product teams of the Risk level associated with the activities. So a single digital artefact has got its life-cycle, and there are various touch points before it lands on different social or mobile channels. Your Digital Artifact repository that needs to behave like a collaboration platform should also ensure it provides the capability for digital lifecycle management and manages approvals. Fortunately, the Oracle Content and Experience, and Process Cloud platform addresses the exact above needs in a simple, configurable manner. I don’t need to mention the beauty of having such a platform in the cloud as it allows us to just focus on the problem we have at hand than worrying about installation, what kind O/S server/containers, technology skills, scalability, upgrades, etc. You can read more about Content & Experience and Process Cloud platform that fulfils the requirements for Digital Artifact repository, collaboration, and workflow automation. Now that we have the context let’s focus on one of the problems at hand, how do we make the Digital Artifact go through an approval process using these platforms?
Let’s design the approval process first: The design of the workflow process follows the principle of No Code/Low code aimed at Business Analysts/citizen developer kind of personas.
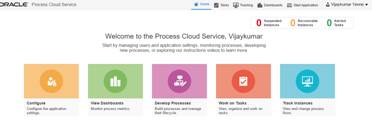
- Login to the Process Cloud Platform and Navigate to Develop Processes:
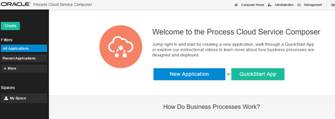
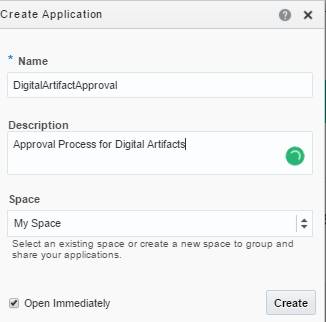
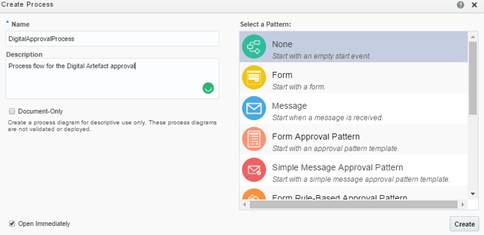
- Compose the Process by creating a New Application
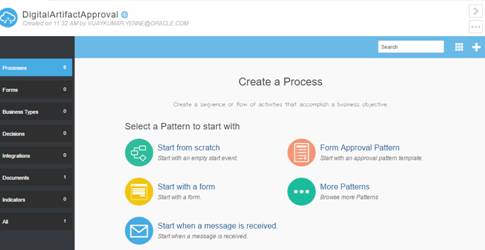
- There are several patterns from which we can base the process on. For this process let’s start from scratch
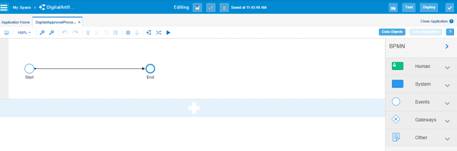
- On the canvas,we should see a plain empty process start and end events with a catalogue on the left.
- We want the process to initiate as soon as the contributor or the person producing the digital asset uploads the asset. For this purpose let’s use the “Document Start” event. Drag and Drop this event from the catalog on the right onto the canvas.

The default “Start” event is redundant given our requirement is to base the process initiation on Document upload. Delete the “Start” event and rename the “Start Event.” Connect the “Document Upload” event to the end event for the process flow to be complete.
- As soon as the Digital Asset is submitted for approval, we can route the document to the appropriate team for “Review.” In our case let’s say we would like the Digital Asset to be reviewed by “Branding” Team and Legal Team. We can use two swim lanes on the canvas to represent these groups.

- Drag and Drop the “Approve” human tasks into each of the lanes.

Our requirement for the workflow is sequential, so you can re-wire the canvas as shown below. The platform does allow for other permutations and combinations of process design. (we can discuss this in another post).

When the Approvers review the Task, we would like display some information about the Digital Asset sent for consideration. Further, we would like to provide some option to facilitate some commentary around the approval. There is a “forms” service capability within the process that helps us capture all relevant metadata that is required for approvals. Also, we would like to provide some basic information about the Task itself.
Bring up the properties option on the “Branding Approver” task that navigates you to complete information where you can provide the Task Title, Summary, due date, etc. in addition to creating the form.


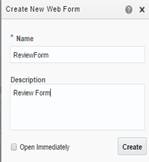
Create a “New Web Form” that opens the Forms Editor that enables to capture all the relevant metadata fields.
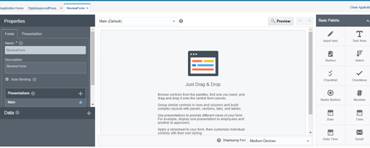
Drag and drop the components from the palette to create a complete form. We shall discuss styling, rules, and others in a future topic. For now, let’s create the below form.

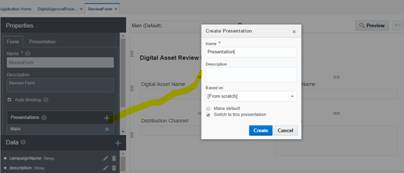
For the “Legal Review” Task, I would like to re-use the same form. However, I would like to capture a couple of additional attributes for the review/audit process which is visible only to the legal teams. I don’t need to write any complicated logic for that. Instead, we can create a new “Presentation” for Legal Task based on the same form created earlier.


For the Legal Review form, I disabled other fields and added two additional attributes and made them required.
Let’s go back to the Legal Task in the Process Composer and make sure we select the above presentation when the job is sent for approval.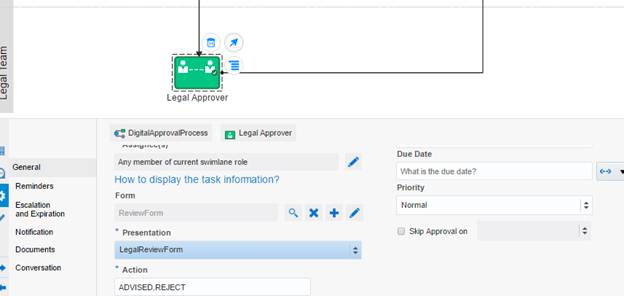
- Notifications service is inbuilt into the platform, so we don’t need to scratch our heads on how to integrate email notifications into the process. Let’s personalize the email notification message that goes out every time the approvals are kicked in. Navigate to the properties that display the options around notifications, reminders, escalations, etc. I will come back to this topic in future, for now, let’s continue with getting the primary approval process accomplished.
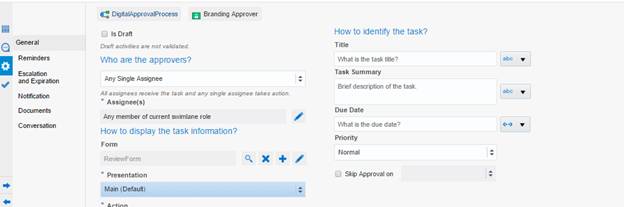
Provide a Title and Task Summary so that the Brand Reviewer can see this information in the email notification.

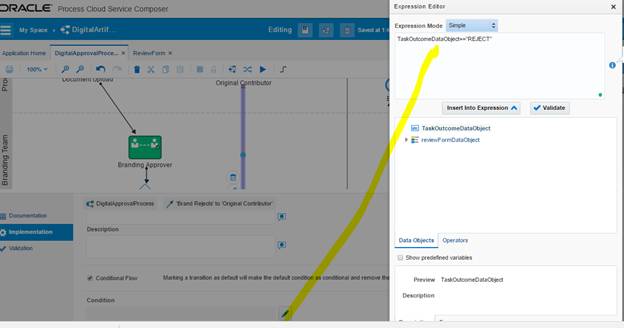
- During the flow if the task is rejected we need to escalate it back to the original contributor who is uploading the digital artefact for review so that contributor can provide additional comments. Drag and Drop the “Submit” Human Activity into the first lane. When a decision is made to reject the task need to be escalated to the contributor, this can be achieved by using an Exclusive “Gateway.” Drag and Drop the “exclusive gateway” activity into the canvas for Branding and Legal Task “Rejection” tasks. The happy path (default activity) is going the next task, only on “Reject,” we navigate the task back to the contributor.
- One last design activity to be accomplished before we deploy this process is to map the Incoming Digital Asset/Document Metadata information to the Form created earlier. This mapping will ensure any information captured through the invocation is carried along as part of the payload which can re-purposed for downstream process activities. On the document start event, bring up the “Data Association” and map the attributes.

We can see the Document Properties on the Left, and the Form attributes on the Right, drag and drop these attributes for them to be mapped automatically. Make sure the outgoing sequence of the Original Contributor task is pointing to Branding for Review.

The final process design should like below:

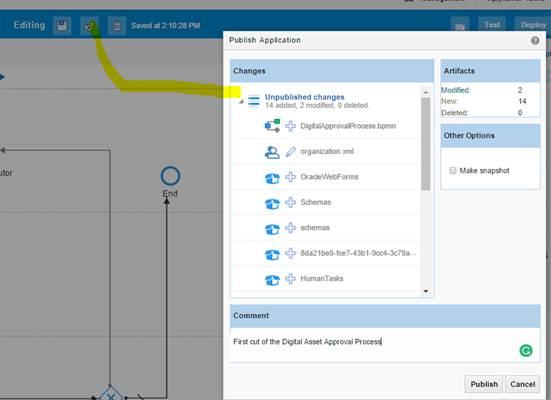
We just completed creating a simple Digital Asset approval process. Let’s deploy and configure before we test out the process. Before we deploy the process, we need to publish the changes. The platform provides the capability to create a snapshot of our changes so that we can rollback at any point in future.
Once the changes are published, we are ready to deploy the process. Hit Deploy on the Page that navigates to the Deployment option. Click on “Deploy New Version” that takes your through the wizard to complete the deployment process.


The next step is to add members to the Branding and Legal Team so that they can receive and act on the approval of the tasks. Members can be added or removed at any time based on the number of people required for approval which is a configuration setting that we saw in the Task Summary above.
Adding or removing members is an Admin activity.
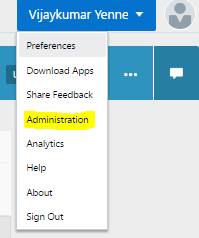
Navigate to the Process Workspace and click on Administration that brings up the Roles interface to add/remove members. Choose the role, click to add the members and search for the member and hit ok and Save.


The administrator has to configure communication between Process Platform and the Content Experience platform. You can verify this from the Services menu option.

Log in to the Content & Experience platform, the Digital Asset Repository or content hub which is a centralised store for all digital artefacts. Create a few containers/folders to organise the digital assets as below.

Let’s trigger the workflow process for every asset that is dropped into the Draft folder. To achieve this, we need let the system know which process to invoke Select the draft folder and click on Properties to launch the window. Enable the switch to initiate a process that lists the processes available for selection.

If you don’t see the Process being listed, your Administrator hasn’t configured the Content & Experience and Process cloud connectivity.
Navigate to Administration option on the Content & Experience platform, Applications section.
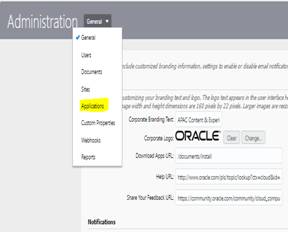
Make sure the Process Cloud Service Integration is enabled. If disabled, enable it and provide the Process platform access details with the REST end point highlighted below.

Let’s test the flow.
Upload a sample digital asset into the “Drafts” folders. The act of uploading triggers the workflow.
An email notification is immediately sent to the Branding Team as shown below:

Click on View Online and login as the Branding Team member, should take you the metadata details screen to provide additional information:
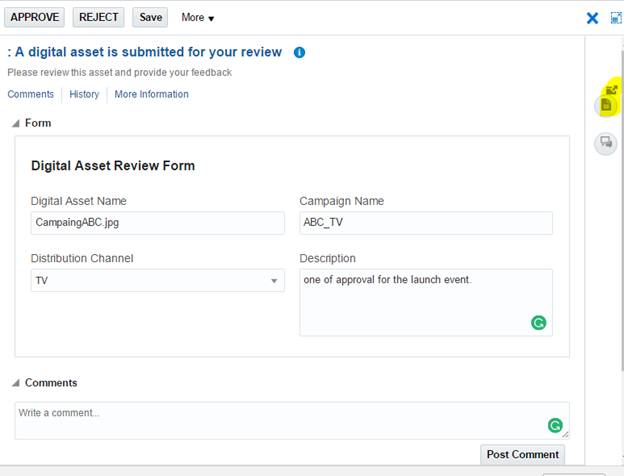
Clicking on the Document Icon should open a viewer window where the digital asset uploaded by the contributor is rendered. As a member of the branding team, I can provide the relevant information and push it for downstream approval or Reject to obtain more information from the contributor.
When Legal team reviews the Task, we can see that the validation rules in Action. Also, we can see Approve Action button is different from the previous Task. We achieved all this without writing any piece of code.

Let’s drill into more advanced details like Business Rule, API’s, Complex forms in future posts. In the meantime, you can download the sample approval application from here.
