
When creating your Development environment it is recommended that you move to a Linux platform. This is so that you can make use of the Docker containers, as well as avoiding multiple issues that exist when running some Modules of Node JS, such as socket.io
There are multiple ways you can get access to a Linux environment, even while working on a Windows platform. The recommended way in this guide is by using Oracle VirtualBox.
- Go to VirtualBox website (https://www.virtualbox.org/) and download the latest version. At the moment of writing this document, the latest version is 5.0.16 for Windows x86/amd64

Notice that if using OS X, you can still download a VirtualBox distribution. The main reason why you would still want to do it is because that way you can standardise a single platform among a team members, as well as having the ability to recreate your development environments over and over again, without affecting your host OS (Windows/OSX). For the case of this example, we are going to standardise using Xubuntu.
- Once you download VirtualBox, install it using a traditional approach.
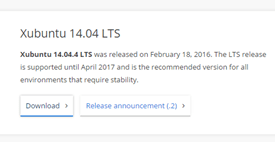
- Next, download the Linux distribution that we are going to use, in this case Xubuntu. Go to www.xubuntu.org and download the latest LTS (Long Term Support) distribution – At the moment of writing this guide the latest LTS version is 14.x
- Once the “iso” distribution of Xubuntu is downloaded, let’s create our Virtual Machine. For tis, open VirtualBox if not already opened.
- Click the New button

- Select the expert mode in order to get access to a fine tunning mode

- Name your VM, for example criDevEnv
- Set the Type to Lux and the Version to Ubuntu 64-bit
- Select the amount of memory that you want to assign, in my case I choose 4096MB
- Select to Create a virtual hard disk now

- Click Create
-
For the Create Virtual Hard Disk select the following settings:
- File Location: Choose a folder where you want to save your image
- File size: Choose the size for your VM, in this case 20GB
- Hard Disk file type: VDI (VirtualBox Disk Image)
- Storage on physical hard disk: Fixed size

Then click on Create
Wait until your Dev VM gets created

-
Once it completes, select the new VM in VirtualBox and click on “Settings” to fine tune the following further options:
-
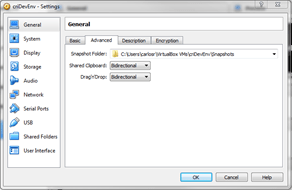
On the General section:
-
Click on “Advanced” tab and set:
- The location for the Snapshot folder
- Shared Clipboard: Bidirectional
- Drag and Drop: Bidirectional
- Click on Description tab and enter a meaningful description
-
-
On the System section:
-
Go to Processor tab and select at least 2 processors

-
-
On the Network section:
- Select the Enable Network Adapter, Attached to: Bridged Adapter
- Name: Choose the most common medium for connecting to the network. In my case I always connect via Wireless cards, so I choose that one.
-
Expand Advanced: Click on the MAC Address blue double-arrow icon a few times to ensure you get random MAC Addresses, in case these settings are ever configured as part of a class with multiple attendees sharing the network.

-
On the Shared Folders section:
-
Add a new shared folder, in my case I choose to point to C:\temp\shared and Auto-mount – In your case select the settings and location that work for best for you


-
-
- Click on OK to save the settings
-
Select the VM if not already selected and click on the green “Start” button

- Click on the yellow folder and select the Xubuntu iso file that you downloaded previously.
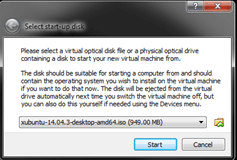
- Click on Start to proceed installing Xubuntu as part of your VM
-
Click on “Install Xubuntu”

- Ensure you get green ticks as the prerequisites. Then select Download updates while installing Xubuntu and click Continue

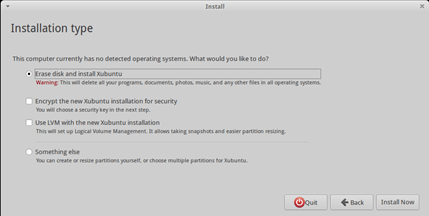
- Select Erase disk and install Xubuntu – This will erase the virtual image assigned to this VM, it will not have any effect on the host OS. Then click on “Install Now”
- Click on Continue to confirm the partition disks changes.

- It will detect your location in the world, in this case I live in Melbourne, Australia – Click Continue

- Leave defaults selected for the Keyboard layout and click on Continue

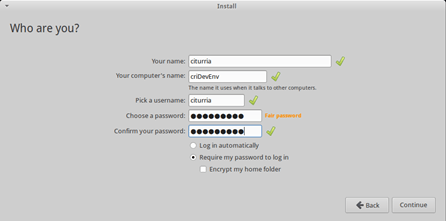
- Enter your name, computer’s name, username and root password. Then click Continue
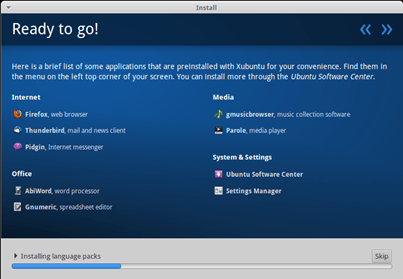
- Wait while it finishes installing Xubuntu as part of your VM
- Once it finishes installing it will ask you to restart the computer (Guest) – Click on Restart Now

- Wait while the VM restarts. It might ask you to press enter to continue restarting.
- Enter the password that you chose when prompted

- It will let you get in into your Xubuntu VM

- Notice on the top left that there is a “Software updater” message – Click on it and Install Now all updates. It will as you for the root password, which is the same that you configure for your username. This should take just a couple of minutes depending on your network speed.

Once it completes, it will ask you to restart your VM.
- Once it restarts log in using your default user and open a Terminal window. We are going to add your user into the vboxsf group, so that you can get access to the shared folders configured by VirtualBox
-
Type sudo -a -G vboxsf [your user], for example:
sudo usermod -a -G vboxsf citurria

It will ask you to enter the root’s password
-
Then log out and log in again – You can do this by going to the Xubuntu start menu and click on the Power off icon on the bottom and then select Log Out

That’s it, you should be able to use your own user to get access to the shared folders, without requiring root permissions.
Configuring Xubuntu Guest Addition Modules
- Now let’s configure the guest modules that come with Xubuntu ISO disk, so that we can run our Dev VM in seamless view mode and so we can use it easily/seamlessly within our Host Windows OS.
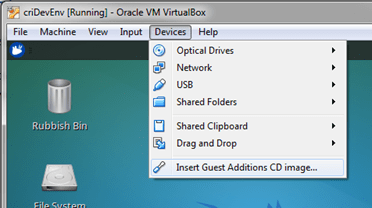
- Once logged in, go to Devices -> Insert Guest Additions CD Image
- Right click on the blank area and click on Open Terminal here

-
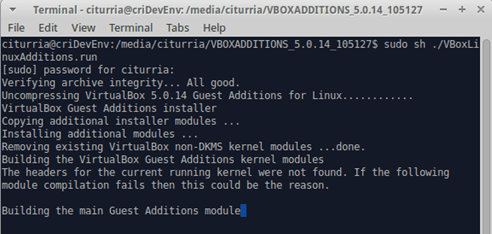
Type: sudo sh ./VBoxLinuxAdditions.run – Then type the root password
Wait until it completes installing all Guest additions modules:
- Close all windows in the Guest VM and Restart the VM
- Once it comes back up, log in and go to the View Menu and select “Seamless Mode” or type “Ctrl L”

-
Before hitting “Switch”, have a look at what it is telling you:
- If you need to go back to windowed mode at any time, type the Right “Ctrl + L”
- If you need to go to the main menu bar at any time, type the Right “Ctrl + Home”

- That’s it, now at the top of your screen in Windows (Host) you will see the Xubuntu start icon to open the main menu and open Xubuntu applications in Windows

-
Not only that, you can now copy and paste text between Windows and Xubuntu windows.

Pretty cool huh? Now you have a friendly Linux based brand new environment running on Windows.
During this exercise I installed Ubuntu 14.x – However, soon after Ubuntu 16.0.4 came out. If you want to upgrade, I found the very good tutorial: https://www.digitalocean.com/community/tutorials/how-to-upgrade-to-ubuntu-16-04-lts
Optionally, you may want to create an appliance out of your virtual disk and vbox descriptors, so that it simplifies portability across other computers where you might want to also run your dev environment or perhaps to share it among a team of people. For this, you can use VirtualBox to export an appliance:
-
Open VirtualBox and select File + Export Appliance

-
Select your VM and follow the wizard until you can click “Export” – During this process you can add extra descriptions to your OVA.
This will take a few minutes to complete. At the end you will get a portable VirtualBox appliance (.ova) that you can share with other people or servers.

Also I recommend that you create multiple snapshots out of your VM, as you see fit. This is so that you can roll back to a stable version should you need it, which given these are Dev environments, it is likely that sooner or later you will completely break it and you will need to roll back in time.

Tip: Xubuntu by default comes with an auto-start screen locker – This running as a guest Dev VM can be quite annoying. To disable it:
-
To kill this process imply run: sudo killall light-locker
Or
- Permanently you can disable it if you go within Settings>Session and Startup > Application Assistant (tab) and disable the Screen locker option.
Upgrade Ubuntu 14.04 to 16.04
Check this site for more information.
First check your current version:
lsb_release -a
-
Update and upgrade components:
sudo apt-get update
sudo apt-get upgrade
sudo apt-get dist-upgrade
-
First, make sure you have the update-manager-core package installed:
sudo apt-get install update-manager-core
-
Do release upgrade:
sudo do-release-upgrade
