In a previous series of blog posts titled Exploring Github DockerHub and OCCS
I walked through how to setup your development environment, install Docker, create a git project, link Docker Hub and GitHub accounts, trigger a build of a docker image on Docker Hub and then deploy and run the docker image using the Oracle Container Cloud Service.
In this blog I wanted to do something similar but this time focus on a more simplified process so that a less technical user could follow the steps without the need for a development environment. The way I have structured this post mans that you can follow every step using a web browser. I have attempted to focus more on consuming the dockerised application that a developer has already built. For the purpose of this exercise I am using the example Medical Records application that some of you may be familiar with from some of my previous blog posts. For those not familiar with the application, it consists of a Node.js web application that interacts with a MongoDB database. The web application surfaces a number of REST APIs (eg Get / POST Patient , GET / POST Physician, GET/POST Observations etc), and uses Swagger UI so that the REST APIs can be quickly interacted with by the end user.
If you want to follow the steps in this blog post you will need a login for GitHub and Docker Hub and also a subscription or trial account for the Oracle Cloud in order to use the Oracle Container Service Classic (OCCS).
For those unfamiliar with what Oracle currently offers in the container space, Oracle have brought two offerings to market:
Container Service Classic provides an easy and quick way to create an enterprise-grade container infrastructure. It delivers comprehensive tooling to compose, deploy, orchestrate, and manage Docker container-based applications on Oracle Cloud Infrastructure for Dev, Dev/Test, DevOps, and Cloud Native use cases. The second container offering is Oracle’s Container Native Platform is designed for DevOps teams to build, deploy, and operate container-based microservices and serverless applications using open source tools. It is an end-to-end container lifecycle management suite, including a managed Kubernetes service for creating and managing clusters, a private registry for storing and sharing container images, and a fully integrated CI/CD service to automate and manage deployments, all powered by enterprise-grade cloud Infrastructure.
For my walk through below the focus is on consumption of the Docker Image using the first generation OCCS offering and I hope to blog around a similar exercise using the Oracle Container Native Platform.
It is assumed that an OCCS service instance has already been provisioned. Previous blog posts document the steps required to Provision an OCCS Service Instance and also Using the Oracle Container Cloud Service . Of course, always check the product documentation to validate that the steps recorded are still current.
The flow of the ten steps in the diagram below cover the approach I took. Please note that most of the steps are a one-off activity and the productivity.

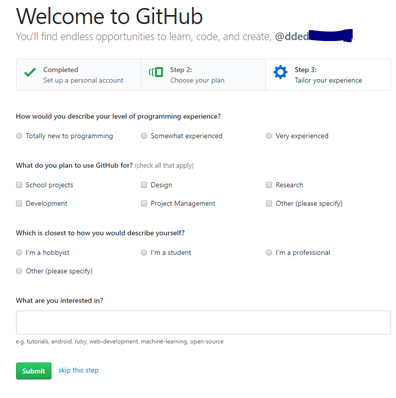
Create GitHub account.
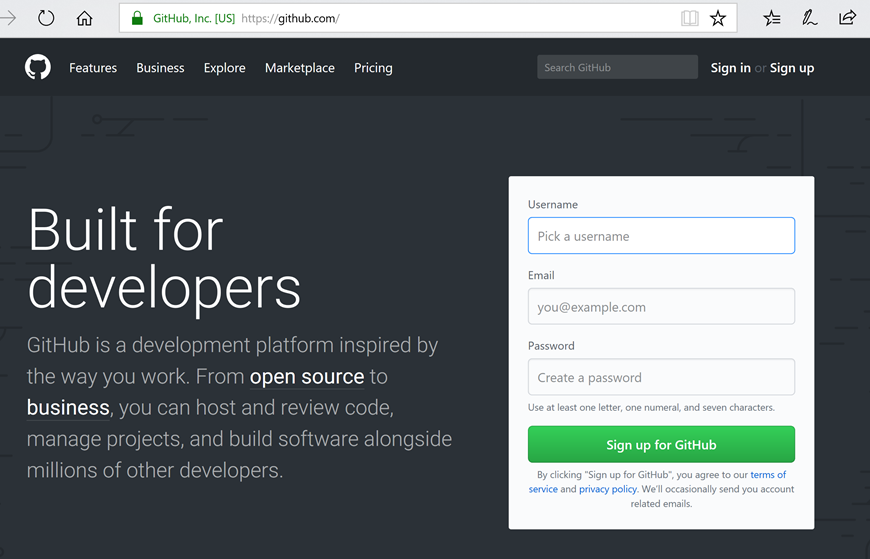
GitHub is a very popular hosted software source control service. As there is an existing git project for the ankimedrec-apis application you will take a copy of this existing project and add into your project library. If you don’t already have a GitHub account then sign up. Navigate in your browser to https://github.com .
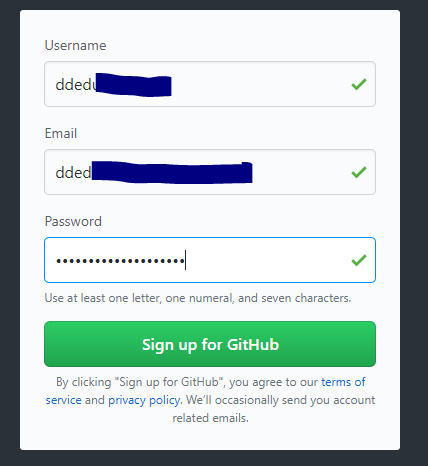
Simply fill in the required mandatory details and press Sign Up for GitHub.
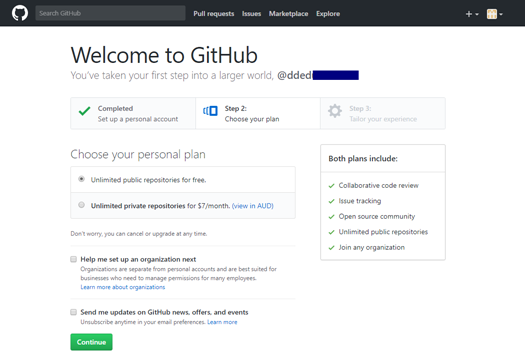
I chose the “Unlimited public repositories for free” option and pressed the Continue button.
You can then press the Submit button to submit your request for a GitHub account.
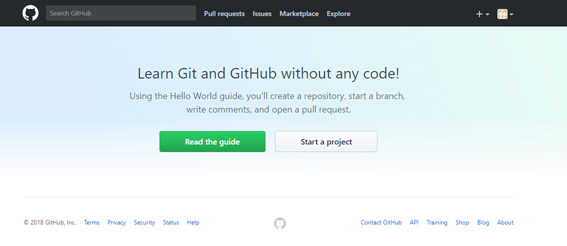
Click the “Start a project” button.
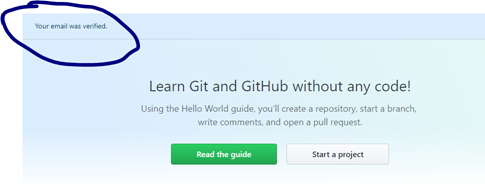
Before you can continue you should see that a further step is required in which you will need to validate the email address associated with your GitHub Account Sign Up.
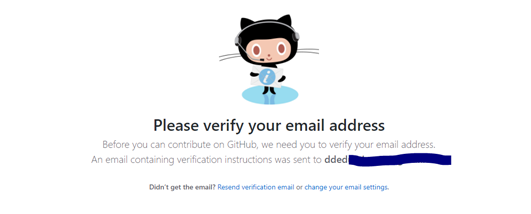
Login to your email account and click the verify link in the email you received from GitHub.
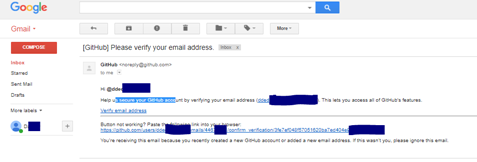
In your browser session for GitHub account creation, you should see that “Your email was verified”.
With your GitHub account setup and your email verified, you will now create a new repository. Enter a name for your first Git repository eg myfirstproject , enter an optional description. Choose Public, and check the box to initialize the repository with a README file.
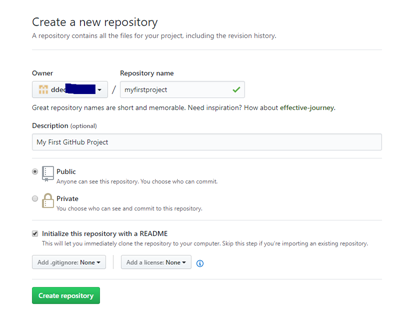
Click the green Create Repository button.
Soon afterwards you will see that a Git repository will be created under your login (eg jsmith001/myfirstproject).
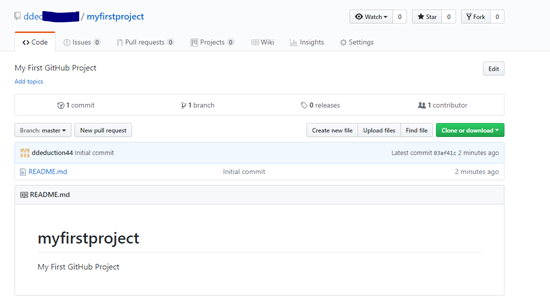
Note that your repository has only a single README.md file. Files will extension of ‘.md’ are MarkDown files. According to Wikipedia , Markdown is a lightweight markup language with plain text formatting syntax. It is designed so that it can be converted to HTML and many other formats using a tool by the same name. Markdown is often used to format readme files, for writing messages in online discussion forums, and to create rich text using a plain text editor.
Obviously you can now upload other files to your first Git repository but for the remaining steps in this ‘How-To’ document you will focus on creating a fork of the ankimedrec-apis repository that contains the MedRec application project files. According to a GitHub Help article – A fork is a copy of a repository. Forking a repository allows you to freely experiment with changes without affecting the original project. Most commonly, forks are used to either propose changes to someone else’s project or to use someone else’s project as a starting point for your own idea.
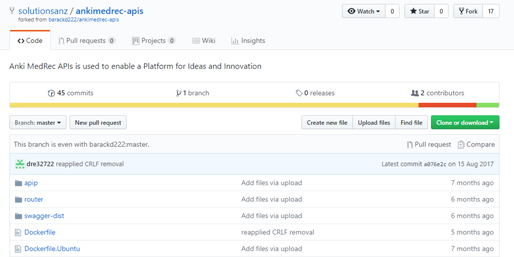
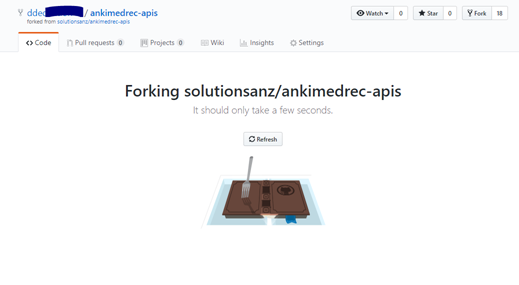
Fork the solutionsnanz/ankimedrec-apis repository
To create a fork of the ankimedrec-apis repository owned by the user solutionsanz you will need to do the following.
While you are still logged into github.com, point your browser to https://github.com/solutionsanz . You should now be able to see all the public Git repositories owned by the user solutionsanz .


Next, click on the link ankimedrec-apis .
Click the fork button in the top right of the screen. This will start the copy of the repository from solutionsanz to your Github account which will take less than a minute.
After about a minute you should now see that a forked copy of the ankimedrec-apis project has been created in your GitHub account.
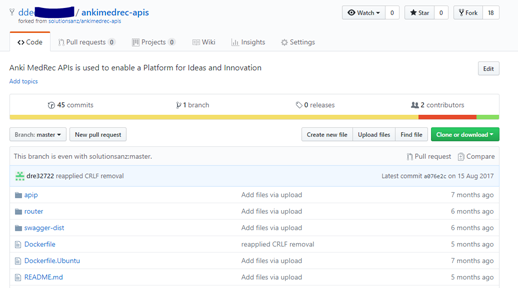
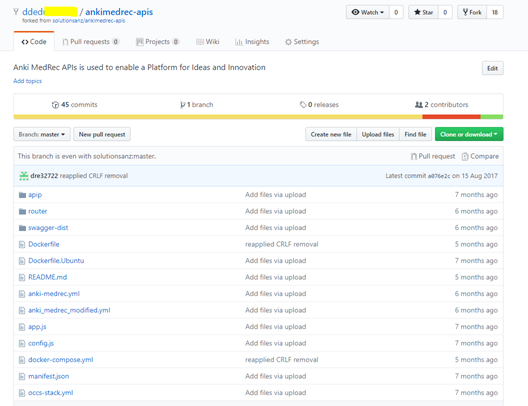
Ok so far so good, you should now have a GitHub account, and have forked the ankimedrec-apis project into your GitHub account. You can see that there are a number of files in the project.
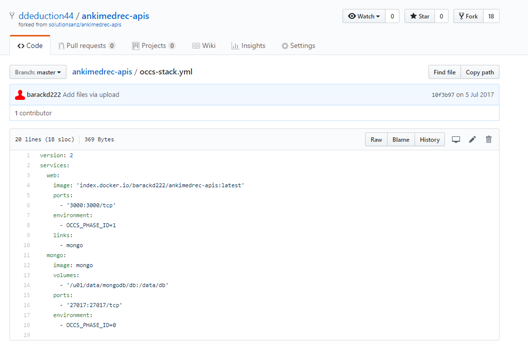
Click the Dockerfile to view the steps that a very kind developer has defined in order to containerize the Node.js application. Also note the occs-stack.yml file which contains the docker compose / stack definition of the web application and the mongoDB which you will use later in this tutorial to define a stack within OCCS.
Create Docker Hub Account
While GitHub provides a place to store and manage source code for your projects, Docker Hub is a place used to build, store and retrieve docker images.
To create a docker hub account for your user, simply point your browser to docker hub … https://hub.docker.com/ , fill in the details under ‘New To Docker?’ , verify that you are not a robot and click the Sign Up option.

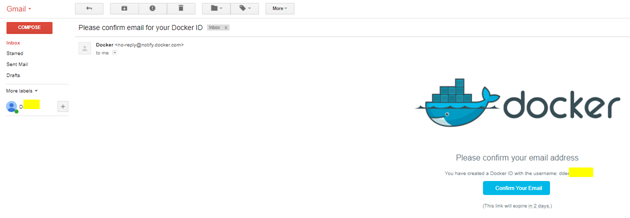
You should get a message directing you to your email account for verification.

Login to the email account associated with your Docker Hub signup and confirm your email address.
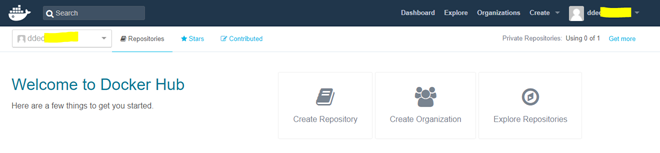
Once you have confirmed your email address, you should be ready to login to Docker Hub.
Simply use the Sign-in option on the Docker Hub site, and enter your credentials.
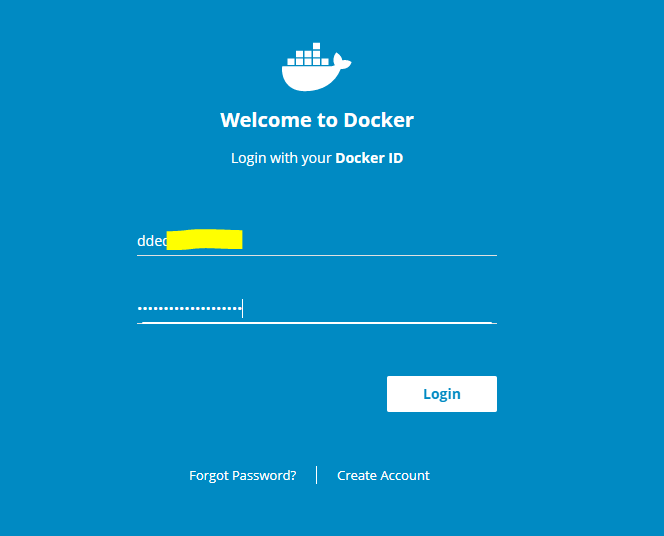
Enter your username and password and click Login .
Assuming you have successfully signed in to Docker Hub, you have a little more setup to do.
Link GitHub to your Docker Hub Account
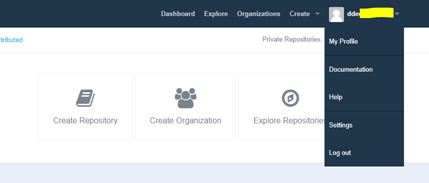
Click on the drop down arrow next to your username.
The dropdown should reveal a sub menu of options, click Settings.
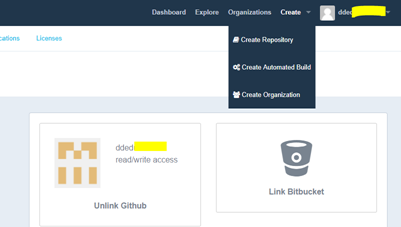
Click on the third tab across the top of the page … Linked Accounts and Services . You will link the Git and Docker Hub accounts such that certain activity in your GitHub account will trigger an automated build of a Docker image (containing the MedRec project) and then store the built docker image in Docker Hub where it can be pulled from into your OCCS environment.
Note that you can link to both GitHub and BitBucket. BitBucket provides a web based software version control system similar to GitHub.
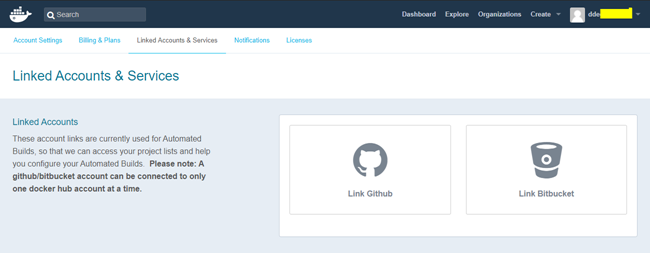
Click the Link GitHub icon.
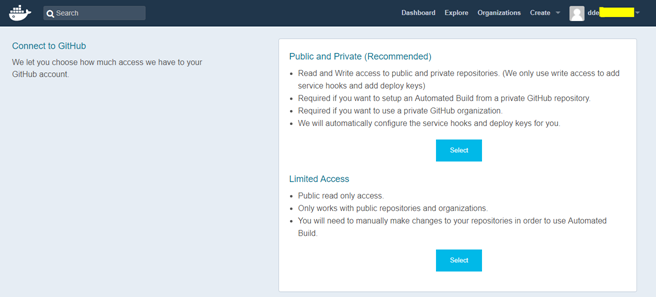
Select the Public and Private (Recommended) option.
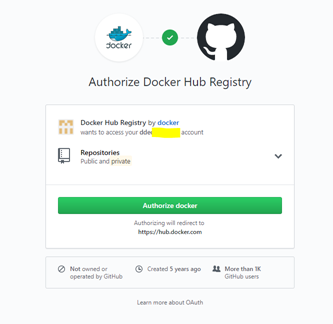
Click the Authorize docker button
to setup the authorisation trust relationship (OAuth) between GitHub and Docker Hub.
Note: If you weren’t already signed into GitHub you would be prompted to do so.
As I was already authenticated to GitHub I could simply Authorise Docker Hub to be part of the OAuth trust.
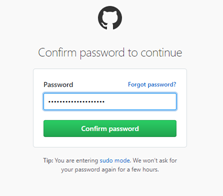
GitHub will request your password confirmation before completing the OAuth setup.
Enter your GitHub password and press Confirm Password.
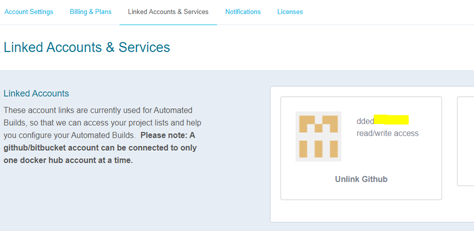
You should see the above image highlighting that your Docker Hub account is now linked to your GitHub account.
Create Automated Build Job to build Docker image
Creating an automated job is a very simple task and the official Docker documentation provides a good explanation;
You can build your images automatically from a build context stored in a repository.
A build context is a Dockerfile and any files at a specific location.
For an automated build, the build context is a repository containing a Dockerfile.
Automated Builds have several advantages:
- Images built in this way are built exactly as specified.
- The Dockerfile is available to anyone with access to your Docker Hub repository.
- Your repository is kept up-to-date with code changes automatically.
Automated Builds are supported for both public and private repositories on both GitHub and Bitbucket.
As I want an automatic build of my docker image triggered by GitHub events I need to define my Automated Build.
I already have a Dockerfile in my ankimedrec-apis, so once I configure the automated build I should be good to go.
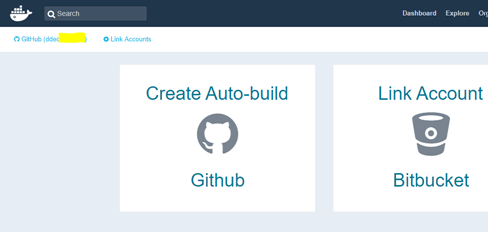
In Docker Hub, under the Create sub menu I chose Create Automated Build. This is where I specify the project git repository that I want Docker Hub to subscribe to for events.
I clicked the Create Auto-build GitHub icon.
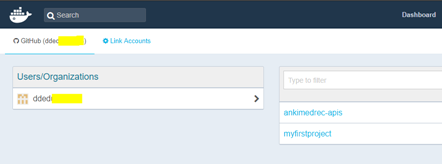
From the list of repositories associated with your git hub account, choose the git repository you forked previously – ankimedrec-apis.
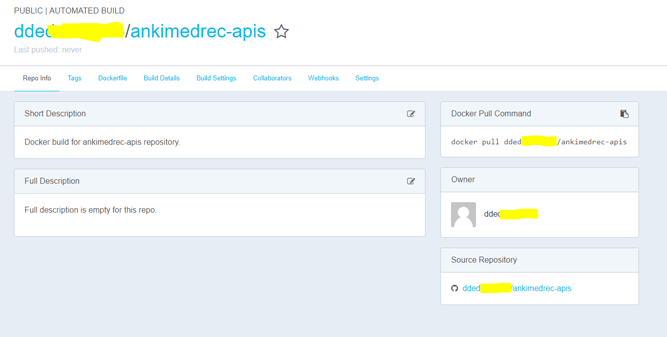
In the Create Automated Build page you can specify a repository name for docker image but I suggest that you accept the default repository name so that it matches the Github repository name. You can enter a description such as … “Docker build for ankimedrec-apis repository.”
Note: The description field has a 100 character limit.
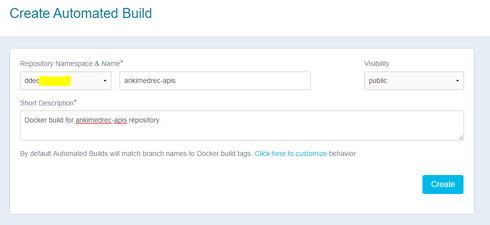
Click the Create button.
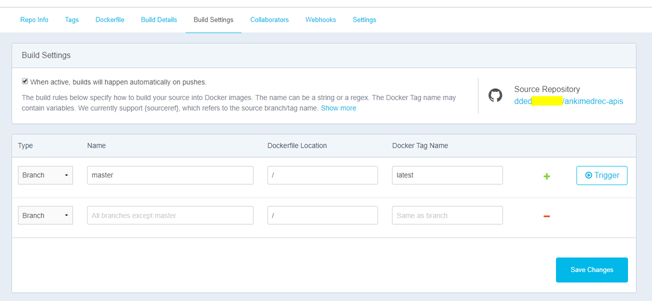
Next configure Docker Hub to do an automated build based on changes to the Master Branch of the git repository
The steps required are very well documented on the Docker Hub site but I have recorded them here so that this blog post is pretty much self-contained. Click the Build Details tab.
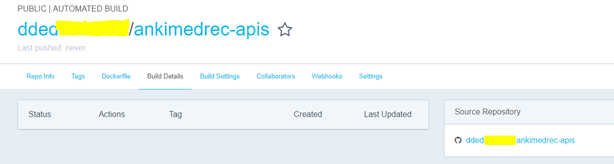
Note that no build of a docker image has been actioned yet.
Click on the Build Settings Tab.
Builds of a docker image can be triggered automatically (based on a commit/push of the git repository that is linked to the docker hub automated build.
Builds can also be triggered manually by pressing the trigger button on the Build Settings tab..
Click the Trigger button
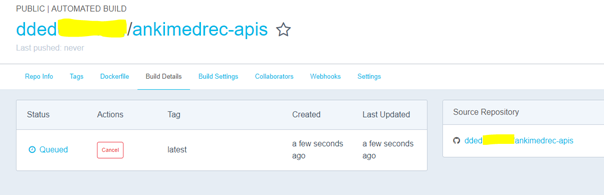
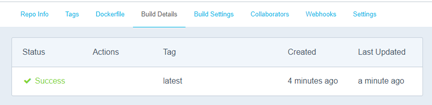
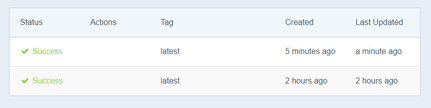
Once a build has been triggered (either manually or automatically) the status of the build job is made available in the Build Details tab.
Within a few minutes, you should see a newly built image appear on the Docker Hub image Dashboard.
Periodically refresh the browser page to see status updates.
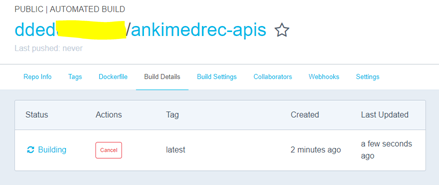
Initially the status will be Queued, then Building as per below screenshots.
A few bullet points gleaned from the official documentation covering how all this magic works.
- During the build process, Docker copies the contents of your Dockerfile (from your Git repo) to Docker Hub.
The Docker community (for public repositories) or approved team members/orgs (for private repositories) can then view the Dockerfile on your repository page.
- The build process looks for a README.md in the same directory as your Dockerfile.
If you have a README.md file in your repository, it is used in the repository as the full description.
If you change the full description after a build, it’s overwritten the next time the Automated Build runs.
To make changes, modify the README.md in your Git repository.
- You can only trigger one build at a time and no more than one every five minutes.
If you already have a build pending, or if you recently submitted a build request, Docker ignores new requests.
- The Build Settings page allows you to manage your existing automated build configurations and add new ones.
By default, when new code is merged into your source repository, it triggers a build of your DockerHub image.
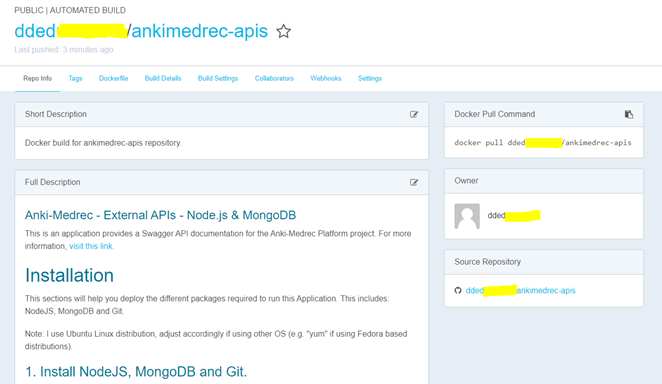
If you click on the Repo Info tab within Docker Hub after the initial Docker build has successfully completed, you will see that the README information is now displayed under the Full Description section.
Update a forked ankimedrec-api project file to trigger an automated build job
Next you will update one of the files (occs-stack.yml) in your ankimedrec-apis GitHub repository. The reason for this update two fold;
- The above file currently references an incorrect docker image (currently shows it is owned by barackd222).
- The update and subsequent commit/push will trigger a fresh build of the docker image
In your browser navigate to your GitHub repository
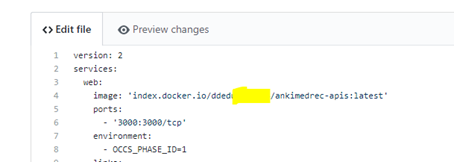
Click on the link to the occs-stack.yml file.
modify the line containing ‘index.docker.io/barackd222/ankimedrec-apis:latest’ to reflect your Docker Hub user (eg jsmith001 ) instead of barackd222 .
Note: you will need to copy the contents of this file later. When you do click the RAW button so the copy doesn’t include the line numbers.
Scroll down the page and enter the following information in the short and long descriptions within the Commit Changes area.
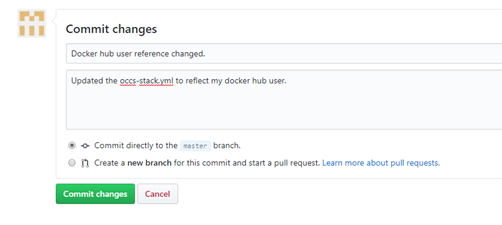
Press the Commit changes button. This will update the Master branch of your GitHub repository. Once this happens you should see soon after that a new Build of the docker image that will contain the ankimedrec-apis application will show on Docker Hub.
Note: Best practice would dictate that we should have development branches and not work directly on the Master branch, but in an attempt to keep this blog post as simple as possible I have cut corners.

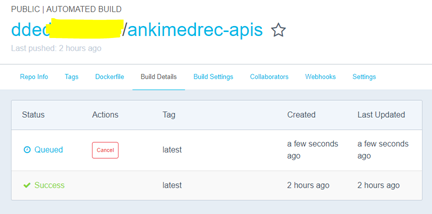
In Docker Hub check the build status of your image under the Build Details tab.
Once you get a successfully built image you are now ready to create a Stack definition within the Oracle Container Cloud Service to pull down and run the docker image you just created.
With your Docker image built, login to your Oracle Cloud Account and access the MyServices Dashboard.
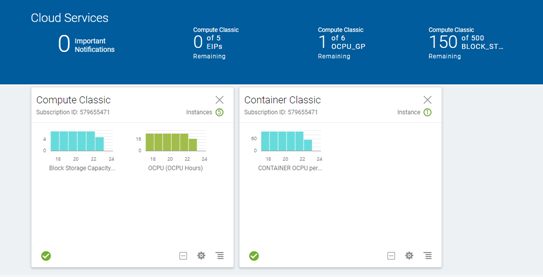
Click the hamburger icon on the bottom right of the Container Classic box.
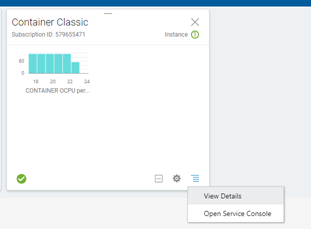
Click Open Service Console, and then click the hamburger icon on the right of the Oracle Container Cloud Service Instance and choose Container Console.
In my example my Service was named dmrOCCS.
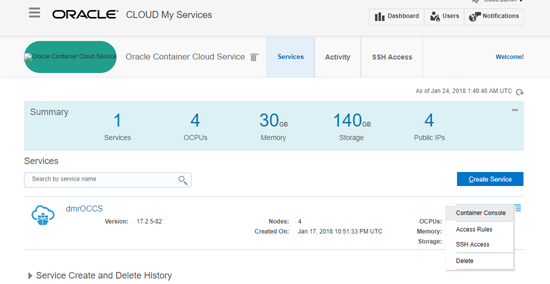
Login to the OCCS Container Console using the specified username / password provided by your Cloud Service Administrator.
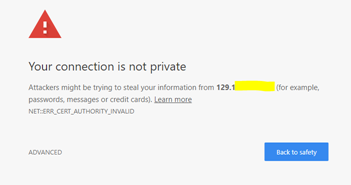
Note: you will get a Security Exception as at this stage we don’t have a valid certificate recognised by the browser for our OCCS instance.
In Chrome browser the Security Exception will appear as follows.
Click Advanced to bring up the process to IP Address (unsafe) link…
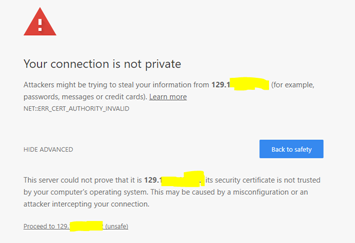
Click the Proceed link
Enter your username (eg admin ) / password for the OCCS Container Console and press the Login button.

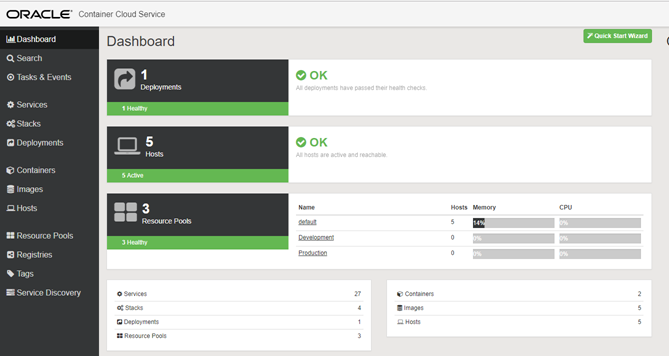
The Container Console should be displayed as per below. The console allows the user to create/edit/browse Services and Stacks, and deploy the Service and Stacks of interest to the Container Service runtime.
To clarify some of the terminology used within the console I have included the following definitions from the official Docker documentation ;
“- An image is a lightweight, stand-alone, executable package that includes everything needed to run a piece of software, including the code, a runtime, libraries, environment variables, and config files.
– A container is a runtime instance of an image—what the image becomes in memory when actually executed. It runs completely isolated from the host environment by default, only accessing host files and ports if configured to do so.
– Services – In a distributed application, different pieces of the app are called “services.” For example, if you imagine a video sharing site, it probably includes a service for storing application data in a database, a service for video transcoding in the background after a user uploads something, a service for the front-end, and so on. Services are really just “containers in production.” A service only runs one image, but it codifies the way that image runs—what ports it should use, how many replicas of the container should run so the service has the capacity it needs, and so on. Scaling a service changes the number of container instances running that piece of software, assigning more computing resources to the service in the process.
– A stack is a group of interrelated services that share dependencies, and can be orchestrated and scaled together. A single stack is capable of defining and coordinating the functionality of an entire application (though very complex applications may want to use multiple stacks).”
The occs-stack.yml file was included in the ankimedrec-apis repository as it defines the stack (web application service and mongodb database service) that will need to be deployed to OCCS. Services and Stacks need to pulled from a Registry in order for you to be able to deploy the image. An example registry definition for Docker Hub registry is included in the OCCS instance when it is created, but you will create a registry definition to Docker Hub using your Docker Hub credentials.
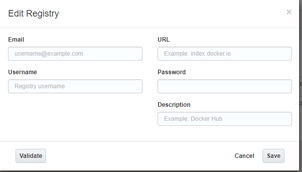
Define a Registry in OCCS
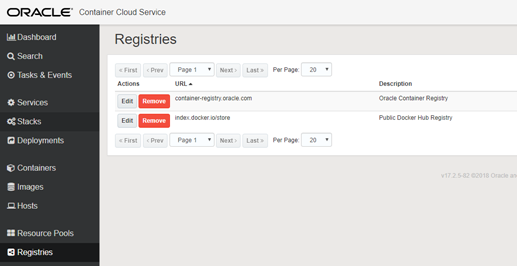
Click Registries in the left menu.
You should see a link to the docker hub image registry as part of the OOTB experience within OCCS.
You will essentially create a modified copy of this Registry Definition in order for you to target your image that was created previously and stored in Docker Hub.
As I have used this environment, my credentials were already added and the details validated, so we are good to go.
Ener your credentials as per below.
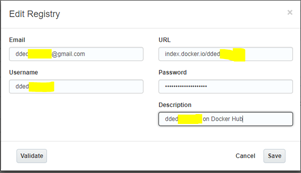
Press the Validate button

Press Save to save the registry configuration.
If the validation step worked successfully, then we are in good shape to pull the built docker image that was created previously from docker hub when we deploy our Stack.
A Stack is a composition of services and in our case the sample application (ankimedrec-apis) consists of a Node.js application service and a MongoDB database service.
After you have successfully deployed the stack within OCCS, you will have end up with two docker containers, one for the web application tier and one for the database tier.
The Stack configuration will deal with the networking between the two containers.
Click on Stacks in the left hand menu.

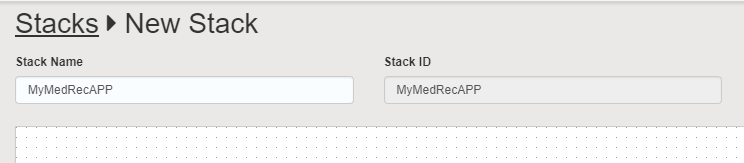
Click the New Stack button on the right of screen.
Enter a name for your Stack eg MyMedRecAPP then click the Advanced Editor link.

Next copy the contents of the occs-stack.yml you edited and committed previously.
Note: Use RAW format when copying from GitHub repository.
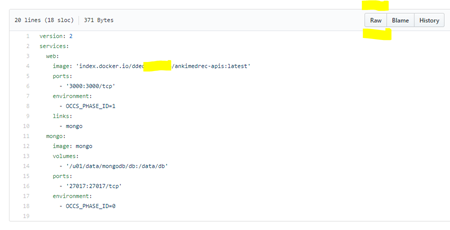
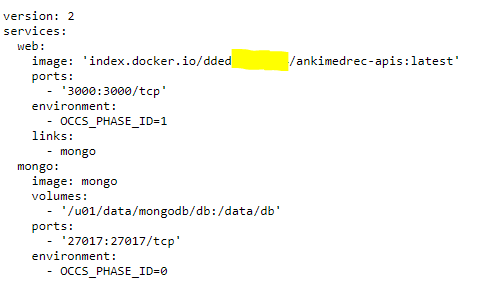
Copy the RAW content and then Paste it into the Advanced (YAML) Stack Editor as per below.

Click Done.
Note: we are only pulling one image from Docker Hub and from the screenshot above you will see that it is the web application tier.
Out of the box, the mongo image is defined as a service within OCCS and the image is available locally.
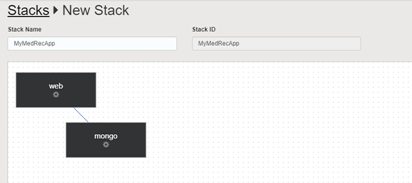
Click Save button.
Your newly created stack definition should appear as per screenshot below;
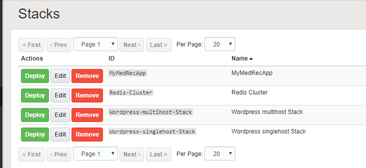
Now that you have created a Stack, your next step is to deploy the Stack to the Container Service.
Click the green Deploy button adjacent to your Stack definition.
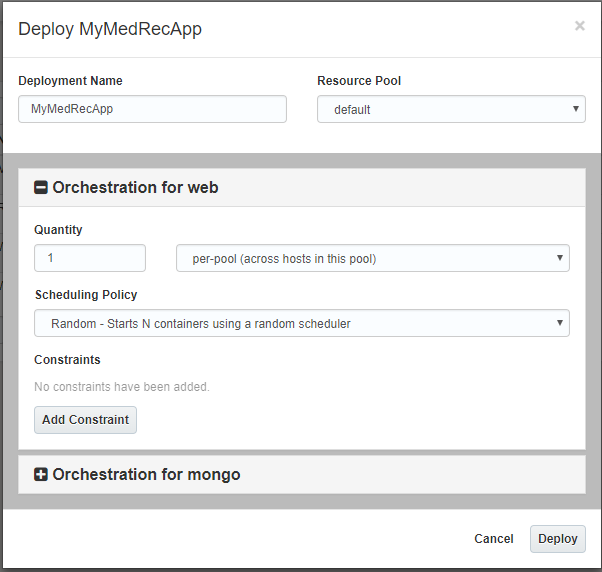
Note that the Oracle Container Cloud Service Classic offers orchestration for the database and application tiers of the MedRec application.
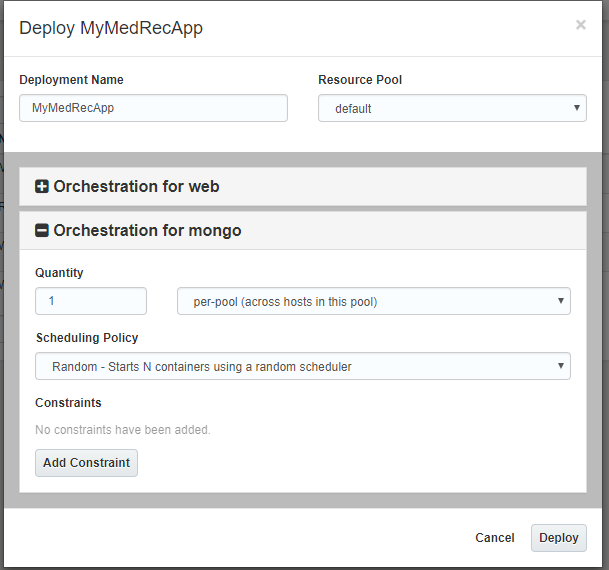
Accept the default values of 1 per-pool (across hosts in this pool) for both the (Node.js) Web Application and (mongoDB) Database Tiers.
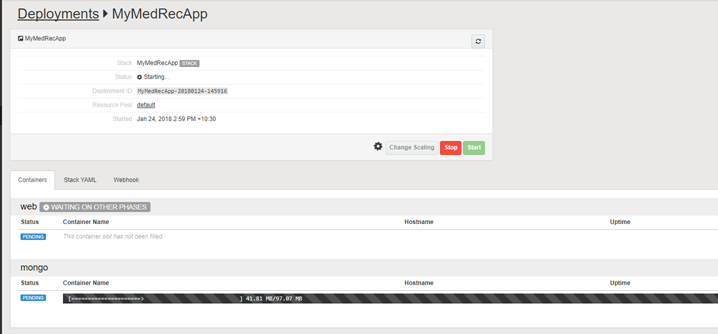
You will see that the required docker images are now being pulled from the local (OCCS) repository (eg mongo image) and / or the Docker Hub repository (ankimedrec-apis image).
You might see the screen change colour from green to orange and eventually to green as per screenshot below.
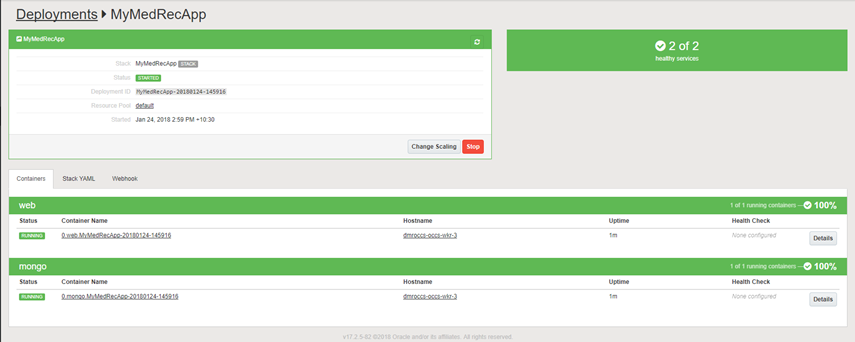
Once the containers have successfully started for both mongo and the web application tier then you will see a green RUNNING indicator on the screen.
With the application successfully deployed and running, the next thing for you to do is to interact with the deployed application.
In the sceenshot above you will see the Hostnames for the web application tier (dmroccs-occs-wkr-3).
Click on the hostname for the web tier in order to get additional information about the host, including public IP address and any other containers already deployed on the host.
In the example below you will see that the web app con and mongodb containers are both deployed and running on worker node 3.
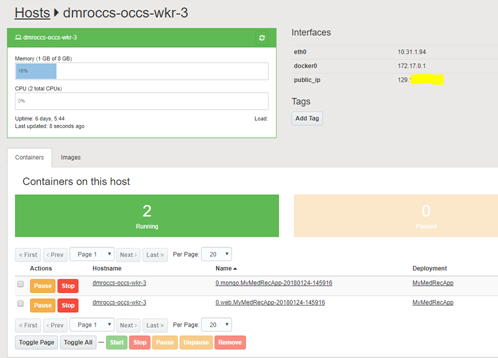
Copy the Public IP address.
In a browser tab enter the following – http://xxx.xxx.xxx.xxx:3000 – where xxx is the IP address of the host you just copied.
You should now see the Anki-MedRec Application running.
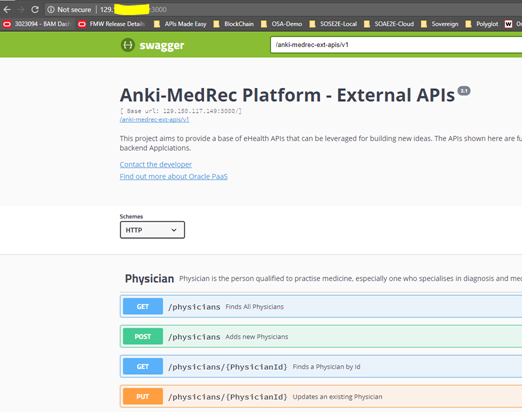
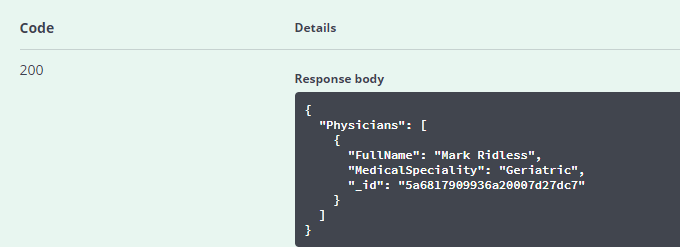
Click the Blue GET button adjacent to /physicians, we will execute this to return any Physicians that have been created and stored within MongoDB.
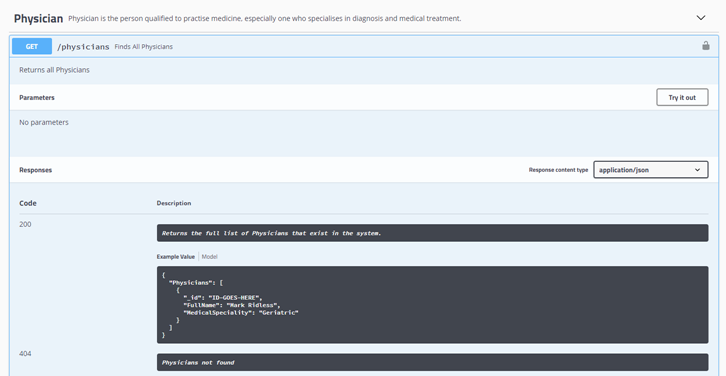
Click the Try It Out button.

Click the Blue Execute button.

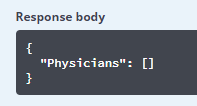
Note that the Response Body is an Empty Array.
Click the Green POST adjacent /physicians which will allow use

Click Try It Out button
You can now edit the sample Physician data or leave it as is ..
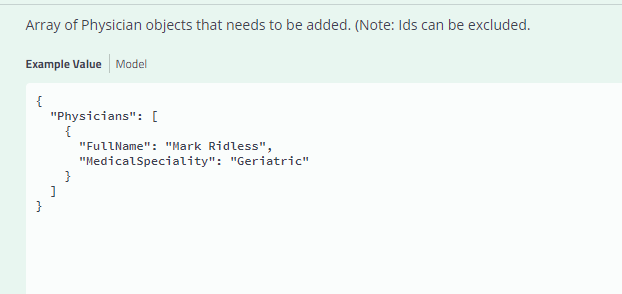
Click the Execute button
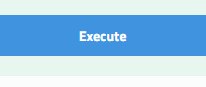
You should see that an HTTP-200 (Success) has been returned.
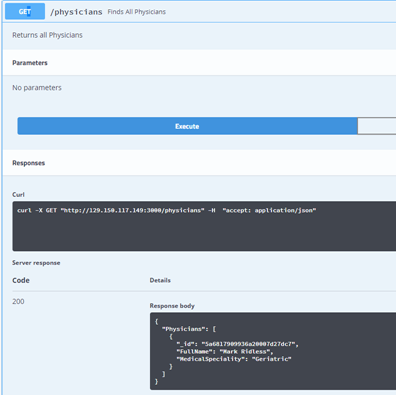
Now repeat the steps for the GET /physician to see if the data is retrieved.
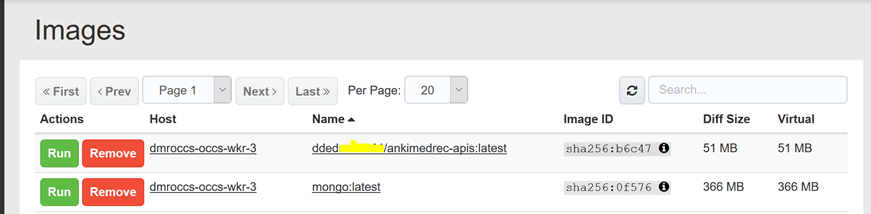
Finally, within the Container Console, click on Images to see the image that was pulled from Docker Hub.
As a logical next step and in order to understand the steps required to cover the design of the secured API layer using Apiary.io and to secure the REST APIs that are part of the AnkiMedrec application using the Oracle API Platform check out this blog.
I hope you found this useful.