The Oracle Cloud Application Performance Monitoring (APM) service collects end user trace sessions for Real User Monitoring (RUM). By default the client IP is not captured for the end user session. For some customers, default Geolocation info (eg. Country, Region, City) may be sufficient for end user monitoring. However, for those who want to collect Client IP information as well, to enable this setting please see the following example.
Enable Client IP Collection for End User Session
For every End User Session, we want to capture the Client IP address location.
1. To do this, in the OCI Console, navigate to the OCI APM Service
OCI gives you flexibility to create custom metrics when no out of box metrics are available. There are two options on how this can be achieved. Depending on your use case let’s take a look at which choice works for you.
Requirements
OCI Monitoring Service
OCI Stack MonitoringService
View Metrics in Monitoring Service
Yes
Yes
Create Alarms
Yes
Yes – Automatically, emitted to Monitoring Service once Metric Extension is enabled for target resource
Metric Dimensions
Yes
Yes
Frequency Collection
Control by client API execution, cron job, scheduler or agent
Yes – can be configured when creating the metric extension.
Collection can be directly executed by OS command, Script(eg. Shell, Python), SQL, JMX or HTTP (REST API)
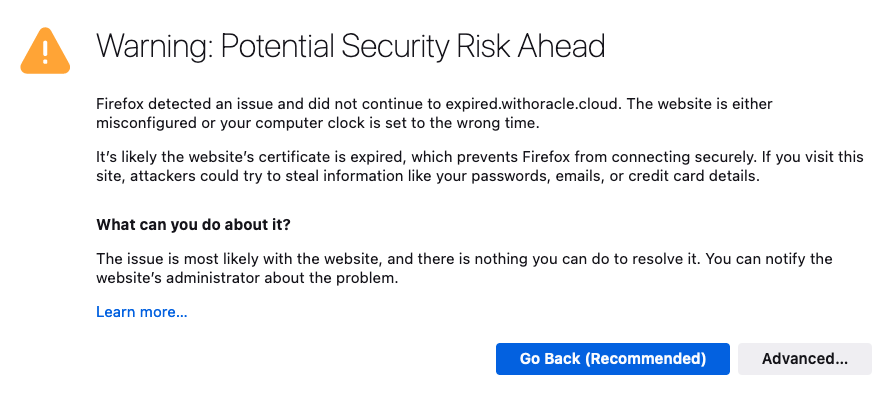
I’m sure we’ve all experienced it, either as a user, or as a system administrator. You know, that important SSL certificate everyone forgot about so didn’t renew, and now has expired?
When an SSL/TLS certificate expires it can create a number of problems, including:
Users’ web browsers will display warning messages, indicating that the website’s connection is not secure. This can lead to a loss of trust and deter user engagement.
API clients will often refuse to establish a connection if an SSL certificate is not valid potentially disrupting crucial data exchanges and integrations.
Search engines may flag the site as unsafe, leading to a drop in rankings and reduced organic traffic.
Also regularly encountering certificate warnings conditions users to accept future certificate errors, which makes them more likely to accept an SSL certificate warning should they be targeted in a Man In The Middle Attack.
To avoid these issues, it’s important to have enough advance warning that a certificate is going to expire so you can obtain a new one, install, and test it thoroughly.
If you’re already using Domain Validated (DV) certificates, such as those issued by Let’s Encrypt you might want to consider my automated Let’s Encryption Solution. This solution automatically handles the entire certificate lifecycle using serverless functions inside OCI. For those who prefer to bring their own certificates, these can be imported into OCI’s certificate service.
As at June 2023, certificate expiry monitoring in OCI is primarily focused on certificates associated with Load Balancers. To improve monitoring, I’ve developed a serverless solution that examines all certificates expiration dates. The solution emits logs and sends email notifications, also allowing for customisable lead time to align with your organisation’s certificate procurement process. Logs can also be forwarded to your SIEM solution if required.
If you are running Oracle E-Business Suite (EBS) application today you will now be able to perform an auto discovery of all related resources in OCI Stack Monitoring. It will collect metrics specific for your EBS resources as well as ability to perform correlation across the EBS application and infrastructure stack as well as enable proactive alerting.
Components that will be auto discovered includes:
Concurrent Processing Node
Workflow Manager
WebLogic
Forms
Today, Stack Monitoring service supports EBS version 12.1 and 12.2 deployments hosted on OCI, On-Premise or Third Party Cloud (eg. AWS, Azure).
In the example, I will show you how you can configure Stack Monitoring for EBS version 12.2.
Update: There is now an even better way to do this, with first-class support from the OCI Resource Scheduler – just set it to ‘Start’ your Function, and it will be invoked based upon the configured schedule.
Functions in Oracle Cloud Infrastructure are great. As a serverless execution environment with pre-built logging, metrics, etc. it allows developers to simply focus on their code and not worry about all of the supporting infrastructure, while still providing a lot of flexibility through the use of container primitives. As great as Functions are, they are reactive, they can only be invoked and can’t natively be configured to be executed in a spontaneous or scheduled manner. Often this won’t matter, as Functions will be invoked directly or indirectly by users, or in response to events, but sometimes you simply need a bit of code to run periodically.
There are various ways you can bring telemetry and operational data into OCI Observability & Management (O&M) to proactively monitor and gain operational insights into your IT fleet.
Example of ways you can do this are:
Service Connector Hub – Route and move data from one OCI service to Another OCI Service (eg. OCI Logging to Logging Analytics)
API Call – Collect data from files stored on Object Storage or Upload Log data on demand
Agent Based – Deployment of Agent on Host
If you have targets you want to monitor on-premise or in the cloud (OCI, AWS, Azure etc…) and you have access to the VM or Compute instance (ie. you can SSH or Remote Desktop to the host), then an Agent based method will allow you to collect and bring that data into unified platform in O&M.
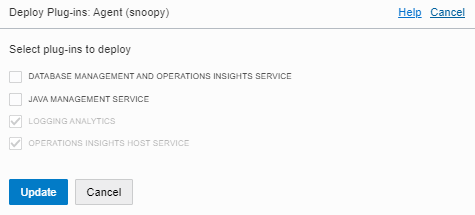
In this example we will show how you can deploy Agent based method (on Linux OS) so you can leverage the O&M services including:
Logging Analytics
DB Management
Operations Insights
Java Management Service
1 – NETWORK COMMUNICATION (For External Targets to OCI)
We recommend using OCI FastConnect or IPSEC VPN
Communication Destination to OCI Tenancy – HTTPS (443)
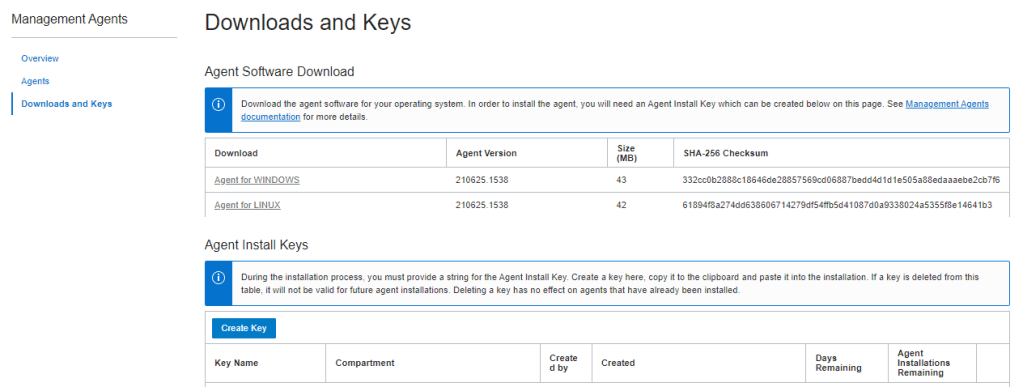
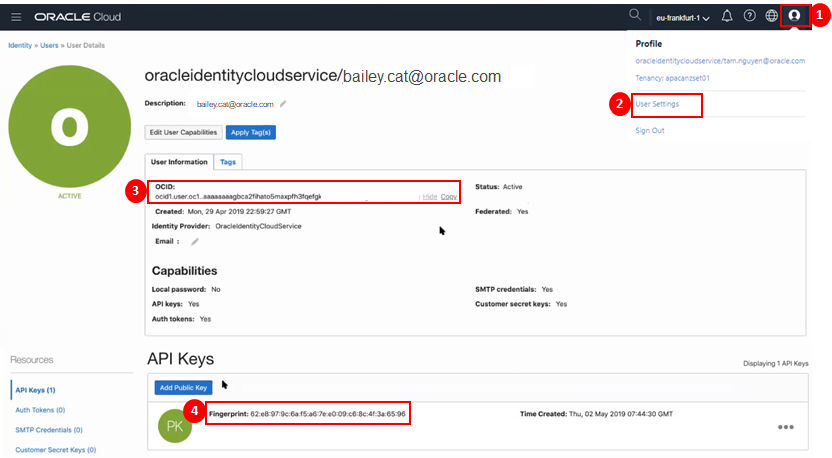
3. Review Key and Download Key to File (eg. oci-reg-key.txt)
NOTE: Your Key File will be in the format of <Key Name>.txt. Copy it to your target host.
4. Download Agent by clicking on the Agent for your OS (eg. Agent for LINUX) and copy to your target host
4 – INSTALL AGENT
1. Login to the host and locate the downloaded agent file oracle.mgmt_agent.rpm
$ sudo rpm -ivh oracle.mgmt_agent.<version>.Linux-x86_64.rpm
Preparing... ################################# [100%]
Checking pre-requisites
Checking if any previous agent service exists
Checking if OS has systemd or initd
Checking available disk space for agent install
Checking if /opt/oracle/mgmt_agent directory exists
Checking if 'mgmt_agent' user exists
Checking Java version
JAVA_HOME is not set or not readable to root
Trying default path /usr/bin/java
Java version: 1.8.0_271 found at /usr/bin/java
Updating / installing...
1:oracle.mgmt_agent-201113.1621-1 ################################# [100%]
Executing install
Unpacking software zip
Copying files to destination dir (/opt/oracle/mgmt_agent)
Initializing software from template
Creating 'mgmt_agent' daemon
Agent Install Logs: /opt/oracle/mgmt_agent/installer-logs/installer.log.0
Setup agent using input response file (run as any user with 'sudo' privileges)
Usage:
sudo /opt/oracle/mgmt_agent/agent_inst/bin/setup.sh opts=[FULL_PATH_TO_INPUT.RSP]
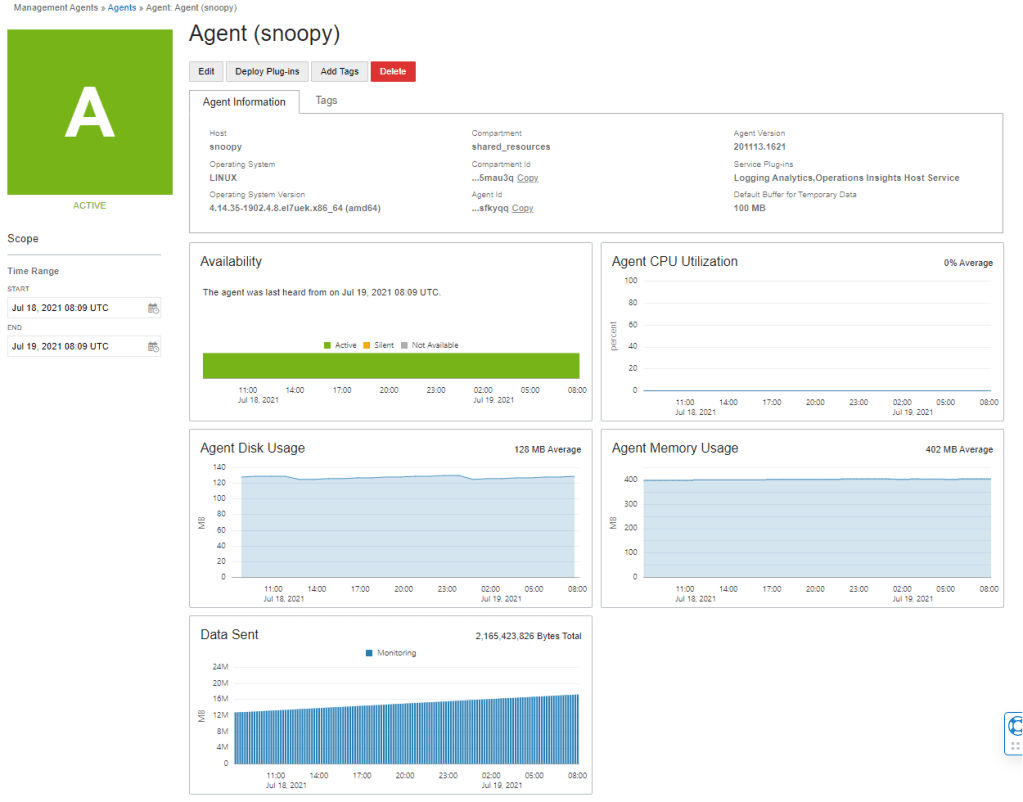
Agent install successful
You probably heard that Oracle Autonomous Database (ADB) leverages machine learning to automate with traditional infrastructure related database administration tasks such as security, backups and patching.
No matter how well designed your database infrastructure is, performance and issues relating application or external components which make up the application ecosystem can still have an impact on end user response time or availability. Continue reading “Why Would you Monitor an Autonomous Database?”