
In this post I will show you how you can setup Autonomous DB monitoring in Oracle Management Cloud (OMC) in under 5 minutes.
NOTE: Make sure you have the appropriate policies setup before you start.
STEP 1
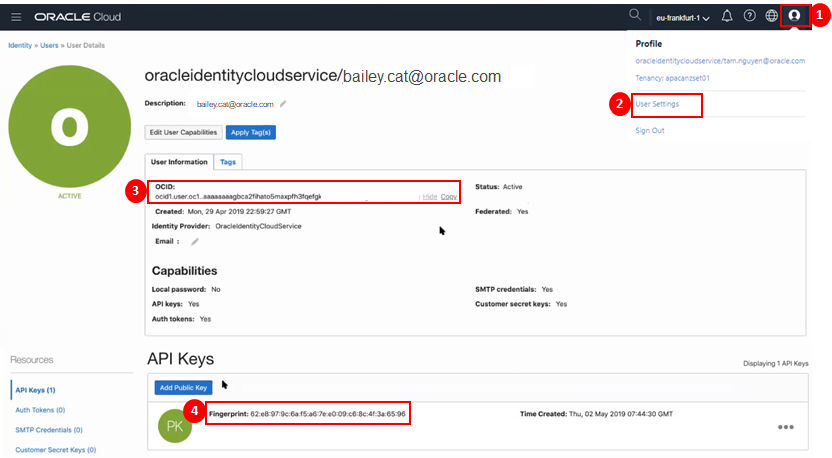
You will need to obtain your OCI User Information associated with your Autonomous Database (ADB) instances from the OCI Console.
- Click on the user icon in top right hand corner of OCI console.
- Select User Settings
- On the User Details page, make a copy of the User OCID
- In addition to this, make a copy of the API Key Fingerprint.
STEP 2
You will need to obtain your OCI Tenant Information associated with your Autonomous Database instances from the OCI Console.
- Navigate to Administration > Tenancy Details
- On the Tenancy Information page, make a Copy of the Tenancy OCID.
HINT: If OCID is hidden, you can click on Show to display entire value if you wish.

STEP 3
In another browser session, launch the OMC Console.
HINT: If the side menu does not appear, click on menu icon
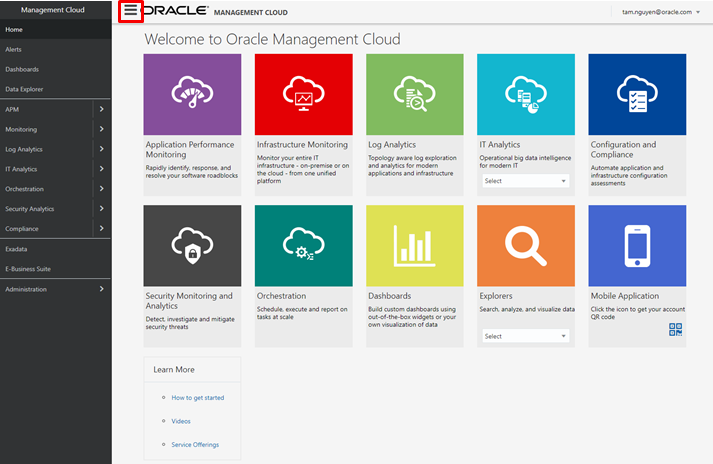
STEP 4
From the side menu, navigate to:
- Select Administration
- Select Discovery
- Select Cloud Discovery Profile

STEP 5
On the Cloud Discovery Profiles Page:
Click on + Add Profile
The Add Discovery Profile Page will appear.
- Specify a Profile Name (eg. ADWPROFILE1)
- Choose Cloud Service Provider Oracle Cloud Infrastructure
- Click + Add
- Select Region (eg. Frankfurt)
- Select Services (eg. Autonomous Data Warehouse)
- Enter Credential Name (eg. ADWCRED)
- Enter User OCID (eg. ocid1.user.oc1.xxxxx)
- Enter Tenancy OCID (eg. ocid1.tenancy.oc1.xxxxx)
- Enter the associated Private key with user API Key
- Enter the Fingerprint (eg. nn:nn:nn:nn:nn:nn:nn)
- Click on Start Discovery

STEP 6
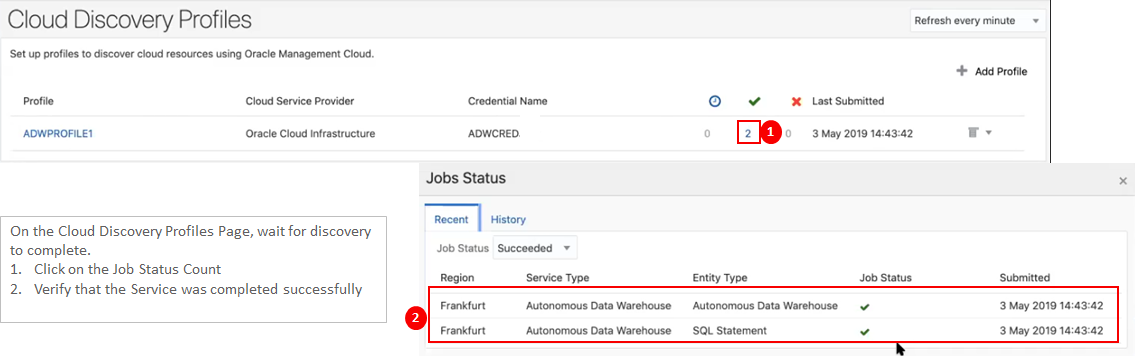
On the Cloud Discovery Profiles Page, wait for discovery to complete.
- Click on the Job Status Count
- Verify that the Service was completed successfully
This completes the setup. Now you are ready to start monitoring and managing your Autonomous Database in OMC. Click here here for more.
