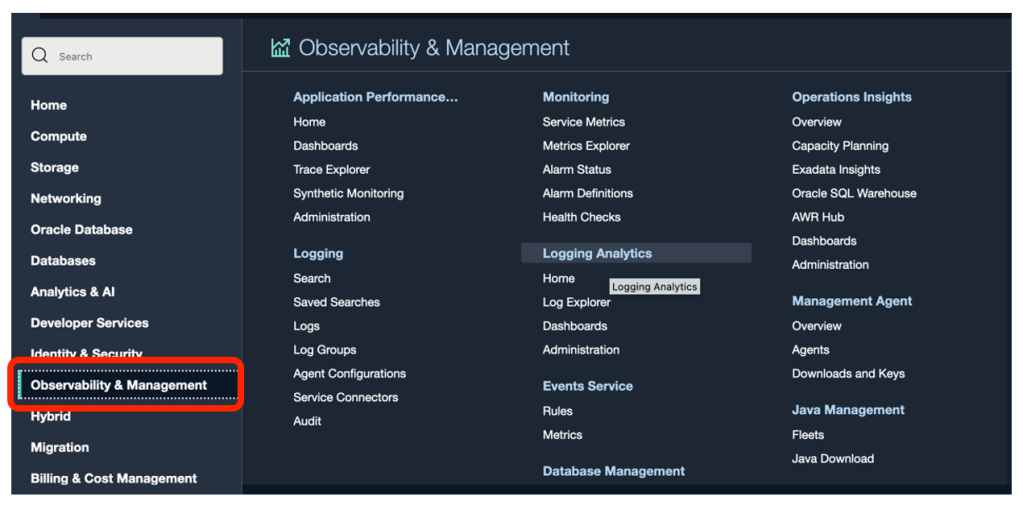
This blog title seems quite easy and simple but there are bit of steps to manage SOA Market Place Image (SOA MP) Database password reset configuration within application tier which I will discuss in this blog.
There could be multiple situations when user needs to change SOA MP Database password e.g. SOA MP DB password might got expired, or about to expire hence that’s must need to reset to new password which should get further updated all relevant places inside SOA application tier.
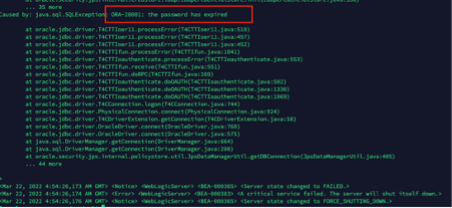
In my case it was for SOA dev/test environment eventually SOA MP DB password has default expiry set for 6-month time and it got expired, due to which SOA application was not coming up and constantly keep throwing below error-
Caused by: java.sql.SQLException: ORA-28001: the password has expired
Note:
In my case below software version were used.
SOA Suite 12.2.1.4
Oracle Autonomous Database 19c
Instruction given here may not work exactly for another SOA and DB version.
To fix above problem. We need to perform below steps –
- Need to find out how many places within SOA Application tier DB password been used?
- Are the SOA MP DB users locked? or Password expired? or both
- Reset & unlock the SOA MP DB user’s password
- Create encrypted value of new password for WebLogic Data source & update all Data source files with this new encrypted password and restart all WLS Admin/SOA servers.
Note: If step 4 doesn’t work (In my case, it hasn’t worked but as per Oracle documentation it should work. I may be doing some mistake which hard to troubleshoot so I took alternate path as workaround)5
5. (Optional) force WebLogic to start in Development mode instead of Production mode as clear text password not accepted in Production mode inside JDBC configuration files.
6. (Optional) Use new password as clear string inside JDBC configuration file, bring up WebLogic server and again update new password from WebLogic console for all Data sources, this will encrypt database password inside data source files.
7. Create new DB profile with UNLIMITED limit and assigning to each SOA DB users to avoid password expiry in future.
Need to find out how many places within SOA Application tier DB password been used? –
SOA interact with Database using WebLogic Data source which act as bridge between application tier to Database tier. So, we need to know how many WebLogic Data sources using the SOA Database. There are two ways you can validate this –
- If WebLogic Admin server up and running then go to console>>data sources >> and make a note of all Data source except your Custom one which you might have created for some other purpose. E.g.

b) If WebLogic server not up and running (which most likely the case) then ssh to server where SOA binaries and domain reside and find out ‘jdbc’ folder, which will list out all Data sources which exists within WebLogic.
E.g.
/u01/data/domains/mgusoa_domain/config/jdbc/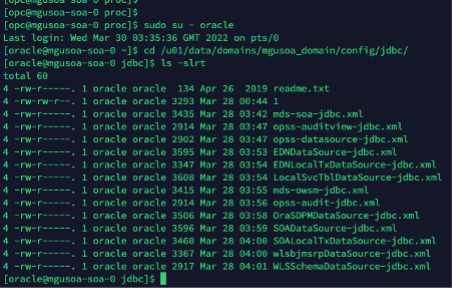
So, now first challenge is sorted out, now we know what are all Data sources which are using SOA MP database, so if we change SOA MP database password all these Data source files needs to be updated with new password.
Are the SOA MP DB users locked? or Password expired? or both
Now, let’s move to next step and check whether SOA MP Database DB users are locked, or password expired or both.
In order to do that, first you need to know DB users name used for SOA. One quick and easy way to open one of Data source files and find out DB prefix e.g. “SP1603934449”
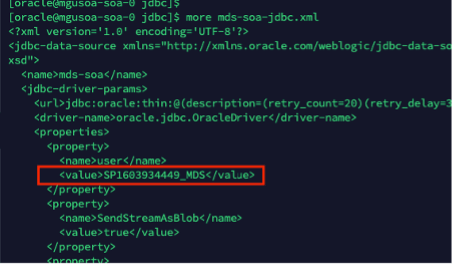
Once you know DB prefix, run below query in SOA Database to know all SOA DB users.
select username from dba_users where username like 'SP1603934449%';
So, now you know all the SOA DB users within SOA Database which are used by SOA application tier. Next step to check each of them whether they are locked, or password expired.
Run below sql query to know their status –
select username, account_status from dba_users where username like 'SP1603934449%';You should be able to see “account_status” column value either “LOCKED” or “EXPIRED & LOCKED”
In my case most of them with status “EXPIRED & LOCKED”
Reset & unlock the SOA MP DB user’s password
ALTER USER SP1603934449_IUA identified by Lxxx#1xxxxx;ALTER USER SP1603934449_SOAINFRA ACCOUNT UNLOCK;commit;

Once password reset and unlocked, run the below SQL query again and account status should be “OPEN” now
select username, account_status from dba_users where username like 'SP1603934449%';
Create encrypted value of new password for Weblogic Datasource & update all datasource files with this new encrypted password and restart all WLS Admin/SOA servers.
WebLogic data source files doesn’t except password in clear text if, WebLogic running in “Production” mode. If WebLogic running in “Development” mode, then it can accept clear text password. In my case, although it was dev/test environment but unfortunately it was set for “Production” mode, so I have to generated encrypted value of new password.
Refer the oracle documentation for detailed steps;
Run the WebLogic Encryption Utility and enter the password you set for the database schemas:

/u01/jdk/bin/java weblogic.security.Encryptpassword: new_password
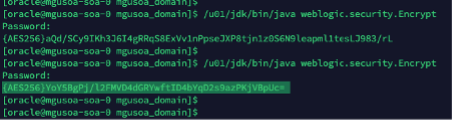
Once you run “/u01/jdk/bin/java weblogic.security.Encrypt” command it will ask to type new password, type the new password. It will further generate encrypted password value as highlighted in above screen shot.
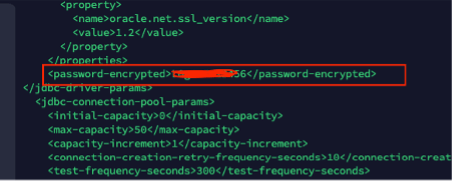
Once you know the new encrypted value for new password, update all the JDBC data sources files one by one with this new encrypted password and restart the WLS admin/SOA Servers

Your WebLogic server should be up and running after this change.
Note: If step 4 doesn’t work (In my case, it hasn’t worked but as per Oracle documentation it should work. I may be doing some mistake which hard to troubleshoot so I took alternate path as workaround)
(Optional) force WebLogic to start in Development mode instead of Production mode as clear text password not accepted in Production mode inside JDBC configuration files.
You must update multiple configuration file to force WebLogic to start in “Development” mode.
I have updated below 4 configuration files. The full path is just for reference, you must use your environment path to find out these files. Make Production value either “false” or “” depending up on file existing value.
/u01/data/domains/mgusoa_domain/config/Config.xml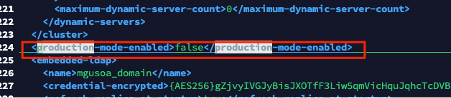
/u01/data/domains/mgusoa_domain/bin/setDomainEnv.sh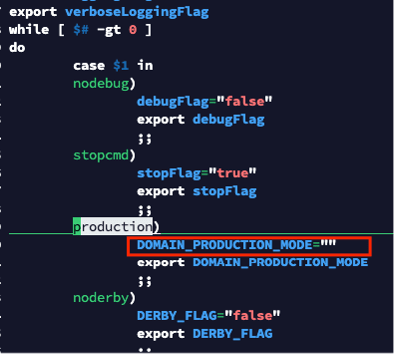

/u01/data/domains/mgusoa_domain/init-info/startscript.xml/u01/data/domains/mgusoa_domain/init-info/startscript-unsub.xml
Once above configuration is done, now you can update all JDBC data source files with clear text password
Once all JDBC data source xml files got updated with new password in clear text format.
Restart the WLS admin and SOA server using out of box script available in SOA Market Place Image
/opt/scripts/restart/restart_12c_servers.sh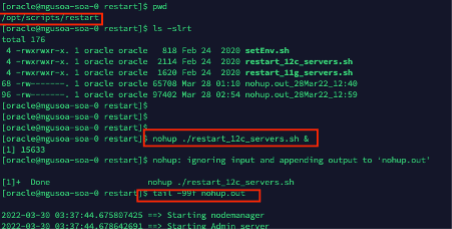
Admin server should go in running mode

Now you can access WebLogic Admin console and start remaining servers if needed.
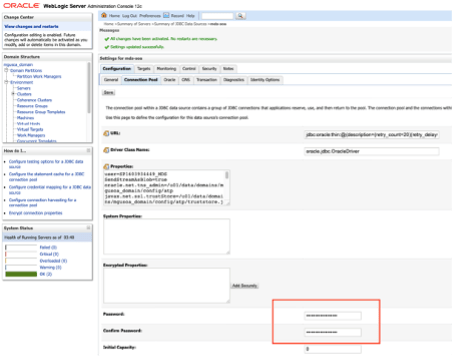
Last steps to update all data source from Weblogic console again, this will update all JDBC data source files in backend with encrypted password instead of clear text password. Use the same clear text password from WebLogic console for all Data source files and click save button, this will replace clear text password in backend to encrypted password.
Create new DB profile with UNLIMITED limit and assigning to each SOA DB users to avoid password expiry in future.
create profile unlimited_pwd_pol_soa limit password_life_time unlimited;Above command should create a database profile with password expiry set to unlimited and can be verified by running below command
select * from dba_profiles where resource_name = 'PASSWORD_LIFE_TIME';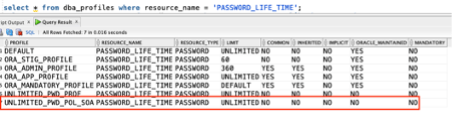
Now, set all SOA DB Users to use that profile.
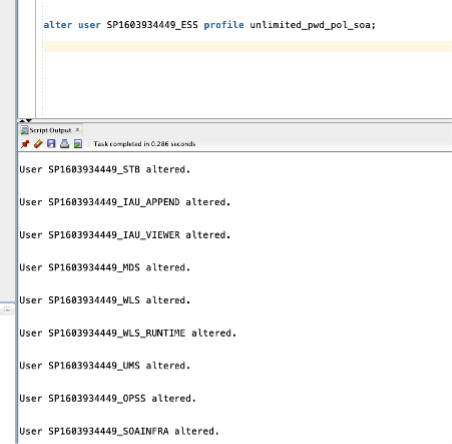
Run below command to check whether profile for each SOA Database user been changed or not?
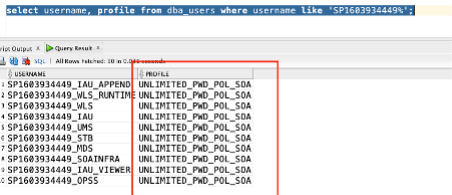
Above step hopefully will force SOA DB users password not to expire in future and will help to avoid all above steps. However, that’s not recommend for Production environment.
Happy blogging 🙂