
I have been Integrating applications for the last 15+ years and normally every integration is a new challenge. It really doesn’t matter what technology or standards you use or have used in the past, the reality is that integrations come a new set of challenges. In the past few years the pre-built adapters have simplified in a way these challenges, but with hybrid architectures a new set of challenges comes to the picture, for example; connectivity, security, simplicity, message reliability, etc.
I was very excited when I learned the way Oracle Cloud is using to solve this problem. It is with something called Oracle ICS (Integration Cloud Service) Connectivity Agents, that basically get installed close to the Application being integrated, for example on-premise or in IaaS. Then using ICS in a browser, you can introspect into the backend application as if it was close to ICS, in fact with this solution ICS is completely oblivious of the location of the actual backend application. The Connectivity Agent will in this case connect internally with the back-end applications and communicate to ICS by pushing out messages via Messaging Cloud Service.
This agent is installed and runs in an on-premises environment on the same network as internal systems such as Oracle E-Business Suite, Oracle Siebel, Oracle Database, and others. You download the on-premises agent installer from the Agents page in Oracle Integration Cloud Service to your on-premises environment for installation. Multiple agents can run on a single host. There can be multiple host systems, each running one or more agents, in a cloud/on premises topology.
The best part of this solution is that there is no firewall-hole configuration, as there is nothing calling in the Agent from the Public Cloud. All the communication happens from the agent out to the public cloud via HTTPS (443), which does not represent a security vulnerability. Also, since multiple Connectivity Agents can be used simultaneously, it is easy to achieve lineal scalability and more importantly high availability.
If however, it is required to maintain all integration traffic completely and absolutely inside the Application firewall, without leaving a customer’s data-centre. It is possible to use a second flavour of ICS Agent called “Execution Agent”, which allows on-premise to on-premise integrations, while still allowing a seamless zero-code integration in ICS browser console.
The following diagram illustrates the 3 most common patterns being used by Oracle ICS integrating SaaS to SaaS, SaaS to On-Premise and On-Premise to On-Premise.

In this blog we are going to illustrate how to use the Oracle ICS Connectivity Agent. For more information refer to the following sites:
- About Agents
- Installation guide
- Managing Agent Groups and the On-Premise Agent
- Demo video: https://youtu.be/nsbvR027GXY
- A-Team chronicles: http://www.ateam-oracle.com/integration-cloud-service-ics-on-premise-agent-installation/
Pre-requisites
For the purpose of this blog and to illustrate the concept of the “ICS Connectivity Agent” we are going to integrate into an on-premise Database table and expose it as a GET and POST REST APIs externally via ICS Console.
The idea is that when you hit that REST API externally via POSTMAN or SOAPUI, you can either fetch the records from the table or insert new records into the table. In future blogs we are going to teach how to properly secure this API, for now it will be using simple authentication over HTTPS.
The diagram below describes what we are aiming to achieve in this blog:

- Let’s create the database configurations that we are going to play with. In my case I used Oracle DB, but you could use other flavours.
|
If using the pre-built virtual image, you can use the underlying Oracle DB for the following exercises. The details are as follows: – Sysdba: sys/welcome1 – Port: 1521 – SID: soadb Otherwise modify the connection settings accordingly to point to any other database. |
- Feel free to use your favourite SQL Client. If you decide to run sqlplus within the Linux VM, you need do the following:
| As oracle OS user:
export ORACLE_HOME=/u01/app/oracle/product/12.1.0/dbhome_1 export ORACLE_SID=soadb Move to the bin directory of the Db installation: cd /u01/app/oracle/product/12.1.0/dbhome_1/bin Login as sysdba ./sqlplus / as sysdba |
- Create the evaluator user
| create user evaluator identified by welcome1; grant dba to evaluator with admin option; commit; |
- Create schemas (Download here)
| As EVALUATOR, run the following schemas, so that we can play with them as part of this product evaluation:
DROP TABLE “EVALUATOR”.”USERS”; CREATE TABLE “EVALUATOR”.”USERS”( “USERID” NUMBER(6,0) NOT NULL ENABLE, “NAME” VARCHAR2(64 BYTE) NOT NULL ENABLE, “STATE” VARCHAR2(5 BYTE) NOT NULL ENABLE, “MOBILE” VARCHAR2(20 BYTE) NOT NULL ENABLE, “EMAIL” VARCHAR2(84 BYTE) NOT NULL ENABLE, “TYPE” VARCHAR2(3 BYTE) NOT NULL ENABLE); ALTER TABLE “EVALUATOR”.”USERS” ADD ( CONSTRAINT USERS_PK PRIMARY KEY (USERID)); DROP SEQUENCE “EVALUATOR”.”USERS_SEQ”; CREATE SEQUENCE “EVALUATOR”.”USERS_SEQ” START WITH 1000 INCREMENT BY 1 NOCACHE NOCYCLE; DROP TRIGGER “EVALUATOR”.”USERS_TRG”; CREATE OR REPLACE TRIGGER “EVALUATOR”.”USERS_TRG” BEFORE INSERT ON “EVALUATOR”.”USERS” FOR EACH ROW BEGIN SELECT USERS_SEQ.NEXTVAL INTO :NEW.USERID FROM DUAL; END; / ALTER TRIGGER “EVALUATOR”.”USERS_TRG” ENABLE; COMMIT; |
- In order to confirm you table creation, simply run as Evaluator:
| SELECT TABLE_NAME FROM USER_TABLES; That should bring: SQL> select table_name from user_tables; TABLE_NAME ——————————————————————————– USERS |
- Now, let’s insert a few rows for testing purposes:
| INSERT INTO USERS (NAME, STATE, MOBILE, EMAIL, TYPE) values (‘Carlos’, ‘VIC’, ‘+615550505’, ‘eljefe@oracle.com’, ‘sc’); INSERT INTO USERS (NAME, STATE, MOBILE, EMAIL, TYPE) values (‘David’, ‘SA’, ‘+616660606’, ‘elguapo@oracle.com’, ‘sc’); commit; |
Installing the ICS Connectivity Agent
ICS Agent is available to download from within your ICS Console. Follow the next instructions to download it and install it.
- Login to ICS Console using your credentials
- Find at the bottom right of the ICS Home page the section called “Create Agents”. Click on the big purple cog icon.

-
In the Download menu at the top, you can either download the Connectivity or Execution Agent. In a different blog I show how to setup the Execution agent too, for this blog download the “Connectivity Agent”.
Notice that depending on your network connection it might take some time to download.

- The ICS Connectivity and Execution agents run on Oracle Linux 6+ – If you don’t have such environment, you can download this Pre-built Oracle Linux 7 VM from OTN. For the purpose of this blog I used Oracle Linux Server 6.7
- Install the latest JDK on your Linux OS if not already there. This is my java version:

- While it downloads the Agent, you can create the “Agent Group” in ICS. This will be required to run the Agent on premise. For this, go back to your ICS Console within “Agents” if not already there.
- At the top, click on “New Agent Group”

- Enter the Agent Group Name and Description.

- Your new Connectivity Agent group will show up. Also notice that at this point there are 0 Agents associated to this group.

- Once you finished downloading your ICS Agent, unzip it.
- Change the permissions to make it executable in Linux: chmod 755 cloud-connectivity-agent-installer.bsx
-
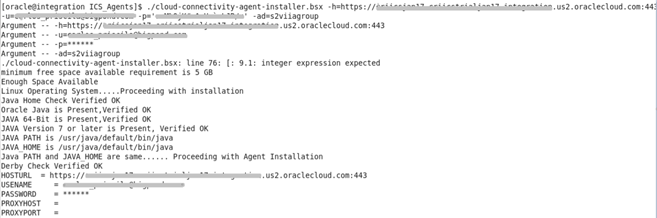
Run your ICS Agent. Usage as follows:
./cloud-connectivity-agent-installer.bsx -h=https://: -u= -p= -ad= [ -ph= ] [ -pp= ] [ -au= ] [ -ap= ] [ -aport= ] [ -nphosts= ]
Where:
-
-h=https://: – This field is required. It specifies the Oracle Integration Cloud Service hostname and port. As an example, when installing from your Oracle Integration Cloud Service POD, the host and port you specify are typically the Oracle Integration Cloud Service URL (for example, https://icsapps.integ.dc4.c1234.oraclecorp.com:443).
Note: Do not specify “/ics”. Do specify 443 as the port, if you leave it blank or 80 it won’t work.
-
-u= – This field is required. It specifies the Oracle Integration Cloud Service user name.
- -p= – This field is required. It specifies the Oracle Integration Cloud Service user password.
-
-ad= – This field is required. It specifies the agent group identifier that was generated in the Identifier field when you created the agent group in the New Agent Group – Information dialog in Creating an Agent Group. You must create the agent group before you can install the on-premises agent.
-
[ -ph= ] –
This field is optional. It specifies the hostname, or address, of the proxy server. A proxy server allows indirect connection to network services and is used mainly for security (to get through firewalls) and performance reasons (proxies often provide caching mechanisms). The -ph and -pp properties are only required if your on-premises environment is set up with a proxy server mandating that all connections be routed through it. If your on-premises host includes a proxy server, you must specify this property. The agent can work with any proxy in the DMZ.
-
[ -pp= ] –
This field is optional. It specifies the port number of the proxy server. If your on-premises host includes a proxy server, you must specify this parameter.
-
[ -au= ] –
This field is optional. It specifies a new agent username. This is a new username used to initialize the local installation of the on-premises agent. If not specified, the default username of weblogic is used.
- [ -ap= ] –
This field is optional. It specifies a password for the new agent username. If not specified, the default password is used. You may need to contact Oracle Support Services to obtain the default password for the default user weblogic.
NOTE:
Make sure to override the default password or you will have to contact Oracle Support to get it…
-
[ -aport= ] –
This field is optional. It specifies the agent port (for example, 9002). This enables you to specify any available port outside of the default value of 7001. If not specified, it defaults to 7001. Any free port can be used.
-
- [ -nphosts= ] –
This field is optional. It specifies the hosts to be ignored by the proxy.
- [-profile] – This field is optional. It sets the number of worker threads to a value appropriate to your environment.
- PROD: When -profile PROD is specified, the agentWorkerThreads property value is set to 40 in the CpiAgent.properties file. This setting is optimal for high-load environments. When -profile -PROD is not specified, the agentWorkerThreads property value also defaults to 40.
- DEMO: When -profile DEMO is specified, the agentWorkerThreads property is set to 3.
For more information refer to the Oracle documentation.
-
Wait while the Agent configures itself, connects to your ICS account and does some black magic, such as:
- All on-premises adapters are registered.
- A Java database is installed.
- The JRF domain is created.
- The on-premises agent is deployed.
- At the end, make sure it completes with a successful message

- Now, come back to your ICS Console and within Agents, confirm that there is now 1 Agent added into your Agent Group

-
Note: As you could’ve seen during the ICS Connectivity Agent installation, it runs on WebLogic. However, do not use startWeblogic.sh nor stopWeblogic.sh to start and stop the on-premises agent. Instead, use startAgent.sh and stopAgent.sh… These files were created inside the folder where you installed the Agent.
For example, to stop the ICS Connectivity Agent:

- Make sure it completes with a successful message:

-
Now, in order to start it again, try this:
./startAgent.sh -u= -p=
Make sure to get a successful message at the end.

For more information refer to the Oracle documentation
- Congratulations your ICS Connectivity Agent is installed successfully. Now, it’s time to move on to the next section and start using and experiencing the magic of Integration Cloud Service…
Note: In order to deinstall the on-premise ICS Connectivity Agent:
-
Stop the on-premises agent:
./stopAgent.sh
- Delete the directory in which the on-premises agent is installed.
-
Remove it from ICS console:
- Go to Oracle Integration Cloud Service.
- On the Designer Portal, click Agents.
- Find the agent group.
- Click the number representing the agent count. The Agents in this Agent Group dialog is displayed.
- Find the agent to delete, and click X to delete the agent registration.
Building the Integration
Now it comes the easy part, because from an ICS design point of view, you don’t need to know about the existence of the ICS Connectivity Agent. That is, you can keep using your “Connectors” in the same way as always, the only special thing that you have to do is to attach your connector to the Agent Group. Once you do it, internally ICS will connect through the Agent to whatever resource you want to integrate to… It will let you introspect as if you were directly connected to the application, even if the Application is totally secured inside firewalls… Pretty cool, huh? Let’s do it.
As you should recall from the beginning of this blog, we want to integrate to a backend database to INSERT and SELECT records from a database table. Externally we can to expose such actions with simple POST and GET REST APIs.

Let’s create the Database Connector
- Go to the ICS console and click on Connections

- Click on New Connection and then select the “Oracle Database”

- Enter a sensible Connection Name and Description. Also set the Connection Role to only “Invoke” at this time. Then click on Create.

-
The Connection page will open. Click on “Configure Connectivity” and enter the DB connection details. Just enter either SID or Service Name (NOT BOTH). Then click on OK.
Notice that since the DB is local to the ICS Agent, I can use local addresses from within the public cloud. This in a different situation would never work!

- Then click on “Configure Security” and enter the user name that you used at the beginning of this blog to create the database tables. If you followed the instructions, it should be evaluator/welcome1

- Finally, click on “Configure Agents” and
select your
Agent group that you created previously. The click on Use.

- Then, click on Save and Test. Make sure to get a successful outcome. Then, click Save again and Exit the Connection.

Let’s create the REST Connector
- Ok, now we are going to create a simple REST Connector that is going to be used during the Integration to expose GET and POST capabilities into our DB.
- Click on New Connection and select REST this time.

- Enter some sensible name and description

- There is nothing else to do, simply test and save.

- Great, your 2 connectors are ready. Now it is time to move on and build the integration.

Let’s create the Integration
- Either in the left menu or in the Home page, select “Integrations“.

- Click on “New Integration” and select “Basic Map Data”

- Enter sensible integration name and description. Then click on Create.

- Drag the DB connector that you built from the right catalogue into the right side of the integration pane.

- Enter a sensible name and select “Run a SQL Statement” from the drop down menu. Then click on Next.

- Enter the following statement: select * from users Then click on the “Validate SQL Query” button. Make sure it brings a successful message and then click on Next.

- Review your query and click on Done to complete.

- Have of your integration is complete. Now let’s drag the REST connector from the right catalogue into the left side of the integration pane.

- This is the step where we configure the GET API, so try to enter values like my screenshot below. Then when done click on Next.

- For now, simply enter * at the Allowed Origins. Then click Next.

- At the Configure the Response Payload, select JSON Sample and click on the <> link to define the JSON payload that you want to return back to external users.

-
Based on the fields in the “Evaluator.USERS” table, choose those that you want to bring back. Then create a JSON payload with those fields.
Because you are going to receive potentially multiple rows from the Oracle DB table, you better create an array in JSON, otherwise the mapping will not be right. In my case, I wrote something like this:
{“users”: [ {“id”:”id”, “name”:”name”, “state”:”state”, “mobile”:”mobile”, “email”:”email”, “type”:”type”},
{“id”:”id”, “name”:”name”, “state”:”state”, “mobile”:”mobile”, “email”:”email”, “type”:”type”}
]
}
Notice the structure {“x” : [ , , , , ]} – That’s an array in JSON. ICS will be smart enough to know that you are expecting potentially multiple elements as you will see soon…
Once you are happy with your own JSON object, click Ok.

- Back in the Response page, click Next.
- In the last step, validate all the configuration and if everything looks right, click on Done to complete.

- Great, the integration is 90% complete, all we have to do next is to build the mapping between the two connectors.

- Click on the outbound Mapping and then click on the “plus” sign to create the mapping.

-
The outbound mapping will show up. Notice that based on the SQL statement, ICS generated the incoming fields from the backend table… More importantly, in the DB Connector we used “localhost” as the destination endpoint. How great is that!
Also notice that based on our defined JSON payload, ICS determine in a nice hierarchical view the elements to be mapped. You can see how ICS was smart enough to determine that “users” from your defined JSON payload, most be understood as a list of elements…
That’s a beauty!

-
Given we are expecting a potential list (more than 2) of elements coming from the Database table, we need to add a for-each construct.
In the Source panel, identify the repeatable source and target elements to which to map. Notice that a repeatable element is identified by a special icon with two bars to the left of the name. When you place your cursor over these elements, the words Repeating Element are displayed.

-
All we have to do is to map the corresponding field by connecting the dots, starting with the top lists, i.e. getUsersOutput -> users , then USERID to id, NAME to name and so on…
At the end, we will have something like this:

- Make sure to click on Save button at the top right corner before exiting the mapper.

- Great, our integration is almost complete.

- Now, repeat the same steps to create the inbound mapping. This time, since we are not passing any parameters, simply connect the two root nodes. Make sure to Save before exiting the Mapper editor.

- Click on Tracking at the top right corner and drag and drop the *execute option from the source into the first Tracking field. This is merely for tracking purposes. Then click Done.

- Save your Integration and make sure it is 100% complete! Then you can exit the Integration.

- Your new integration is complete, but it is still in draft mode. In order to activate it, you need to slide the action on the right.

- Tick “Enable tracing” and click on “Activate“.

- After a few seconds your integration will be Activated!

- In order to see the deployed metadata, click on the “information” icon next to the green bar and then click on the link.

- A new browser tab will open with the metadata of the REST API that we built as a front end to our integration.

- Congratulations your Integration is ready to be tested!
Let’s test your first integration
- For the purpose of this demonstration I am going to use Google Postman, but you can use any other REST client such as SOAPUI.
-
In order to build the full REST API URL, copy from the metadata link the whole link before “/metadata”, in my case it is something like:
-
Then append the definition of your GET API. If you followed my steps it is /evaluator/users, that is:
- Copy this into Postman. Then leave the method as GET.

- Click on Send and notice what happens…

- We get a 401 Authorization error. This is because the REST API is protected with Basic Authentication.
- Click on Authentication tab and select Basic-Auth as the security type. Then enter your ICS account and click Send again.

- This time it works! notice that each database table row will come as a separate JSON array element…

-
Congratulations, you have completed the first integration!!!
-
Now, we need to implement the second integration, so that we can POST new rows to be INSERTED into the backend database table, let’s do it, come with me to the next section!
Let’s build a second Integration to POST new rows to be INSERTED into our backend DB table.
This second integration will be almost identical to the first one. There is no need to create new connectors, we simply have to create a new Integration and by dragging and dropping our existing connectors, we are going to allow different configurations.
- Create a new “Basic mapa Data” Integration, as you did with the first one.
- Give it some sensible name and description. Then click on Create.

- Once again, drag and drop your DB connector from the menu on the right into the right side of the Integration pane.
- Give it a sensible name and select “Run a SWL Statement” again. Then click Next.

-
Type an INSERT SQL statement this time. In my case I wrote this:
INSERT INTO USERS (NAME, STATE, MOBILE, EMAIL, TYPE) VALUES (#NAME, #STATE, #MOBILE, #EMAIL, #TYPE)
Make sure to validate the SQL Query and to get a Successful outcome. Then click Next.

For more information on what you can and cannot do with SQL statements using the ICS Oracle DB Connector, refer to this document.
- Validate and click Done.

-
Now, drag and drop your REST connector into the left side of the Integration pane. Once you do it, this time configure it to allow POST.
Also, make sure to select “Configure a request payload for this endpoint” and CORS. Then click Next.

-
Similarly, as with the first integration, select JSON Sample and click on the <<>> link to define your own JSON payload. This time, you don’t need an array because we are just allowing the creation of one user at a time. So, a JSON like this would suffice. Then click Ok and then Next.
{“name”:”name”, “state”:”state”, “mobile”:”mobile”, “email”:”email”, “type”:”type”}
Notice that there is no need to give an id, as we configure it to be auto-increment from the beginning of this blog.

- Enter a * to allow all origins. Then click Next.
- Review and click Done to complete. Your integration will look like this one:

- Click on the Mapping in between and then the plus icon to create a new mapping.
- This mapping will be very easy, just connect each of the related items. Then click Save and Exit.

- Click on Tracking on the top right corner.
- This time drag the name from the left menu into the first Tracking Field. Then click Done.

- That’s it. Your integration is complete. Make sure to see a green 100% completion, then click Save and Exit.

- Activate your new Integration and once again enable tracing as you did with the first integration. Then wait while ICS deploys it. It should take just a few seconds.

- Once the bar comes green, click on the “information” icon next to the green bar and click on the metadata link.
- Your new REST API metadata should look like this:

- That’s it, let’s test it now.
-
Similarly, as you did for the first integration, copy and paste your REST API into Postman.
This time make sure to set the HTTP verb to POST. Don’t forget to set your Basic-Authentication as you did last time.

-
The only thing that is different this time is that now we have to send a JSON payload as part of the body of the REST API request. You can simply copy and paste the JSON sample from your metadata web page or type it from scratch, it’s pretty short. For example:
{“name”:”Barack Dorman”, “state”:”ALL”, “mobile”:”617770707″, “email”:”mrback@oracle.com”, “type”:”SC”}
- Add a new HTTP Header, set Content-Type to application/json
Then click Send.

- There was no response as we did not configure one, but you must’ve got a 202-Accepted response

- Now, simply run your first integration again and make sure you get now your new record.

Congratulations! I hope you found this blog useful.
If you have any question or comment, feel free to contact any of the authors of http://solutionsanz.blog – We are here to help you!
Thanks for watching…

Hi Carlos,
Thanks for writing this article, It has very detailed information how we can integrate between ICS and On Premise application suing connectivity agent. Much appreciate your effort to write such detailed article. I have replicated the same in my local DB and ICS environment and was able to do so. The only one major issue I have faced was download ICS Connectivity agent, as it’s binary size is very big 1.8 gb and download speed from Oracle is getting restricted to 100 to 200 kbps and download was getting interrupted again & again and partial download file was not getting resumed. But finally after 8 to 10 attempt, one of attempt was successful and was able to setup agent locally.
I am not sure whether you have already written any similar article for Execution agent or not? but if not then request to publish similar stuff for Execution agent.
Regards..
Manish
LikeLiked by 1 person
Manish, we have also experienced issues with incomplete downloads of the Agent. As you point out it isn’t small. Hopefully the Product Team will provide an approach to make this experience better in the near future. regards Dave
LikeLike
It’s a great reference to learn and teach others in Korea
LikeLiked by 2 people
Hi
I am trying to install agent on onPremise Vm, but when running installation command, I am getting following error .
command run :
./cloud-connectivity-agent-installer.bsx -h=https://integration-gse00012012.integration.us2.oraclecloud.com:443 -u=cloud.admin -p=****** -ad=OIM_AGENT -au=lroot1 -ap=lroot1 -ph=****** -pp=80
Following error :
Valid hostURL provided
integration-gse00012012.integration.us2.oraclecloud.com is alive
Some Other process is currently running on the port provided. Exiting Agent Installation Process.
Nothing is mentioned in doc about it, I am not sure which service is running on 443?
Could you please help?
LikeLiked by 1 person
Hi Vipul, I think the problem is that the agent is trying to start in the default port (7001) and you must be running another WebLogic server already in that same host… Try running a netstat -a | grep 7001 and see if there is anything running on that port already…. If this is correct, either change the port of the existing WL Server or the one of the agent. You can do this by applying the attribute “-aport=9001” (see it in the blog) for example, that way, your agent will start on port 9001 rather than 7001. I hope this helps. Let me know otherwise.
LikeLike
Hi Vipual
Why u are assigning port 80 for agent? port 80 is standard port reserved by OS and many other process. You should use some custom port e.g. 9001 or 7001 etc. for agent. The port 443 in your command is for your cloud ICS instance and had no relation with your agent port number. 443 is the right port which you need to use while connecting ICS instance. However, for agent port if you use any custom unused port then I hope your problem will be sorted out. Try this and let me know if stil not solved. Also share the error log which help to diagnose the issue. Regards.. Manish Kumar Gupta
LikeLiked by 1 person
Hi Manish, I think port 80 is the proxy port (-pp), which is likely to be port 80… But you are spot on, the agent’s port, if not specified otherwise, will be 7001, which is very likely that any other WL server running on the host, will be using. As said in my reply to Vipal, using the flag -aport=XX can be used to change the agent’s port to something else, like 9001 or 9002, etc. Thanks, Carlos
LikeLiked by 1 person
Hi Carlos,
This is very interesting for starters as i am.
Cloud you please share same practice for Connecting Oracle EBS 12.2 ?
Many Thanks
Asif
LikeLike
Hi Carlos,
The Article is amazing for begginers to start with ICS.Could you please post few more demo’s like on other adapter uses (FTP,JMS,etc) ,that will be helpful also.
Thanks in Advance.
Regards,
Rikta
LikeLike